
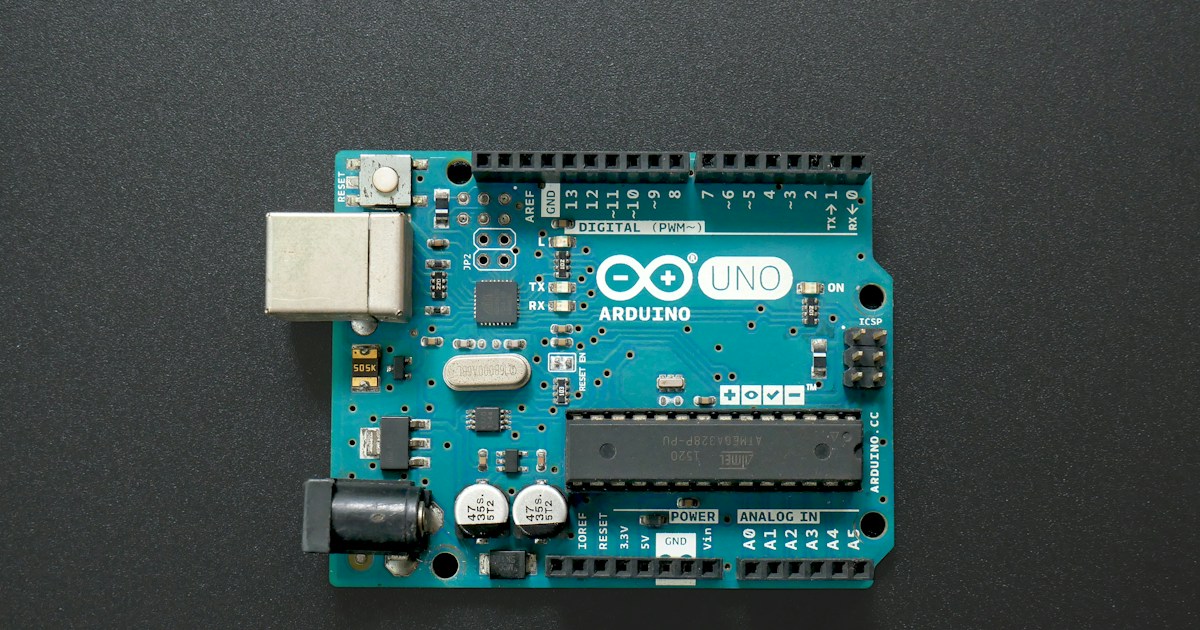
What are the best Arduino boards for beginners? For most people, the Arduino Uno Rev3 is the easiest first pick thanks to its familiar layout and huge library of tutorials. Prefer newer hardware? Choose the Uno R4 Minima; planning wireless projects? The Uno R4 WiFi or Nano ESP32 may be a better fit.
We’ve seen a first project stall for a surprisingly unglamorous reason: the tutorial showed a full-size Uno, while the learner’s tiny board had a different layout. The fix wasn’t faster code or fancier parts—it was choosing a board that matched the instructions. A little compatibility check can turn “Why won’t this blink?” into a working project.
This guide compares 10 beginner-friendly Arduino boards, explains their strengths and trade-offs, and helps you choose based on what you want to build. We’ll also cover starter kits, wiring basics, and common buying mistakes, so your first board feels like a launchpad—not a puzzle box.
Key Takeaways
- Best for most beginners: Arduino Uno Rev3, especially if you want to follow established tutorials.
- Best modern Uno-style pick: Uno R4 Minima; choose the Uno R4 WiFi if your projects need wireless connectivity.
- Best compact options: Nano Every for a small non-wireless build; Nano ESP32 for compact Wi-Fi and Bluetooth projects.
- Match the board to your project. More pins and features aren’t automatically better for learning.
- Check voltage and wiring requirements. Use a motor driver for motors; don’t power them directly from a board’s GPIO pin.
- A useful starter kit needs clear, board-specific instructions, not just a mountain of components.
- Compare the Arduino Uno Rev3 | Uno R4 Minima | Uno R4 WiFi | Nano ESP32 | official Arduino boards.
Table of Contents
- ⚡ Quick Tips and Facts: Choosing Your First Arduino Board
- 🧭 Arduino Boards Explained: A Beginner-Friendly Background
- 🔎 How We Chose the Best Arduino Boards for Beginners
- 🏆 10 Best Arduino Boards for Beginners
- 1. Arduino Uno R4 Minima: Best Overall Starter Board
- 2. Arduino Uno R4 WiFi: Best for Wireless Projects
- 3. Arduino Uno Rev3: Best for Classic Tutorials and Compatibility
- 4. Arduino Nano Every: Best Compact Beginner Board
- 5. Arduino Nano ESP32: Best for Wi-Fi and Bluetooth Projects
- 6. Arduino Nano 33 IoT: Best for Connected Sensor Projects
- 7. Arduino Leonardo: Best for USB Keyboard and Mouse Projects
- 8. Arduino Micro: Best for Small USB Input Devices
- 9. Arduino Mega 2560 Rev3: Best for Larger Projects
- 10. Arduino GIGA R1 WiFi: Best for Ambitious Beginners
- 📊 Arduino Board Comparison: Features, Connectivity, and Best Uses
- ⚖️ Arduino Uno R4 vs. Uno Rev3: Which Should You Buy?
- 🧰 Arduino Starter Kits: What Should Be in the Box?
- 🛒 Official Arduino Boards vs. Compatible Clones
- 🧩 Choosing an Arduino Board for Your First Project
- LEDs, Buttons, and Basic Electronics
- Robots, Motors, and Moving Parts
- Wi-Fi, Bluetooth, and Internet of Things Projects
- Wearables, USB Controllers, and Compact Builds
- 💻 Arduino IDE, Setup, and Your First Sketch
- 🔌 Arduino Pins, Voltage, Power, and USB Basics
- 🧪 Essential Beginner Components and Accessories
- 🛠️ Common Arduino Beginner Problems and How to Fix Them
- 🚫 Arduino Buying Mistakes to Avoid
- 🔭 When to Upgrade to a Different Arduino Board
- ✅ Conclusion
- 🔗 Recommended Links
- ❓ FAQ
- Is the Arduino Uno R4 better than the Uno Rev3 for beginners?
- Is an official Arduino board necessary for learning?
- Can I use Arduino tutorials with a different board?
- Which Arduino board is easiest to program?
- What is the best Arduino board for robotics?
- Do Arduino boards include Wi-Fi or Bluetooth?
- Can an Arduino board damage components if wired incorrectly?
- What should I buy with my first Arduino board?
- 📚 Reference Links
⚡ Quick Tips and Facts: Choosing Your First Arduino Board
If you’re deciding among beginner-friendly microcontroller boards, our Arduino guide is a useful companion. Here’s the short version from the Robotic Coding™ team: the Arduino Uno is the safest first pick for most beginners, while the Uno R4 WiFi and Nano ESP32 make sense when wireless projects are part of the plan.
| If you want to… | Start with… | Why |
|---|---|---|
| Follow the widest range of beginner tutorials | Arduino Uno Rev3 | Classic pin layout and a large library of tutorials, kits, and compatible parts |
| Learn with a modern, straightforward board | Arduino Uno R4 Minima | Familiar Uno form factor with more memory and processing capability than the Rev3 |
| Add Wi-Fi and Bluetooth without extra modules | Arduino Uno R4 WiFi | Uno layout, wireless connectivity, and an onboard LED matrix |
| Build something compact | Arduino Nano Every | Small footprint and Uno-style 5V logic |
| Make a Wi-Fi or Bluetooth project | Arduino Nano ESP32 | Compact board with ESP32 wireless capabilities |
A quick fact that saves beginner frustration: a board’s pins are not motor drivers. You generally need a motor driver or suitable driver board to control motors. Arduino’s Getting Started guide and official board documentation are reliable places to check setup and board-specific details.
Our practical rule: choose your first board based on the projects and tutorials you want to follow, not the biggest number in a specification table. A board with Wi-Fi can be exciting; it can also add setup steps before you’ve made your first LED blink. We’ll compare the trade-offs below.
🧭 Arduino Boards Explained: A Beginner-Friendly Background
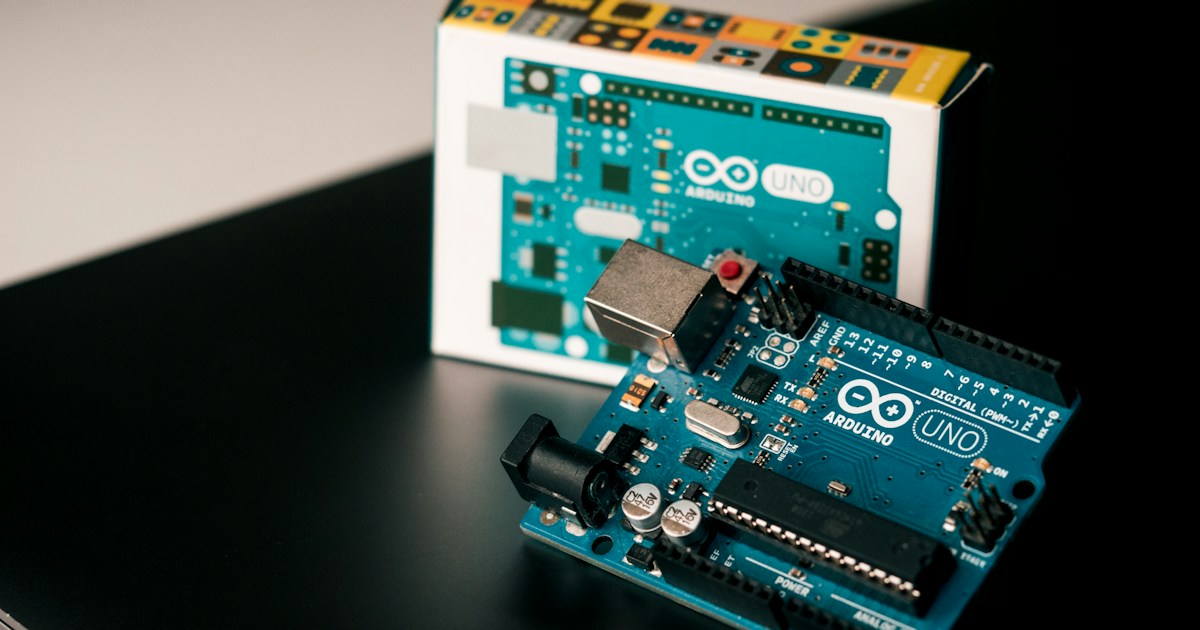
An Arduino board is a small microcontroller development board. You write a program, upload it, and the board reads inputs—such as buttons or sensors—then controls outputs such as LEDs, displays, buzzers, or motor-driver circuits. The Arduino language and programming documentation covers the fundamentals.
For beginners, the board itself is only one part of the experience. You’ll also need a computer, a compatible USB cable, the Arduino IDE or another supported editor, and project components. A starter kit can gather those bits in one box; a bare board often cannot.
What “Arduino-compatible” means
Arduino is both a brand and an ecosystem. Official Arduino boards are designed and documented by Arduino. Compatible boards from other manufacturers may work with the Arduino IDE and use similar pin layouts, but their USB chips, voltage levels, headers, or setup instructions may differ.
That difference is not automatically a problem. Many learners start with a compatible Uno-style board. But if you’re following a tutorial, verify the exact board model and USB setup before assuming every step will match.
Why the Uno keeps appearing in beginner tutorials
The Uno Rev3 has been a common reference board for years. Its full-size headers, familiar layout, and large collection of example projects make it easy to compare your setup with a tutorial. The Arduino Uno Rev3 documentation provides board details, while the Arduino built-in examples give you projects to try.
A long-running advantage is not simply the hardware. It’s the ecosystem around it: forum answers, lesson plans, library examples, and project instructions. That’s why an older board can still be a better first purchase than a newer board with more impressive specifications.
🔎 How We Chose the Best Arduino Boards for Beginners
We judged each board by what usually matters during a first project: getting started, learning from tutorials, connecting common components, and having room to grow. These are editorial ratings for beginner usefulness, not laboratory measurements or manufacturer scores.
| Board | Setup | Learning resources | Breadboard use | Project flexibility | Beginner fit |
|---|---|---|---|---|---|
| Uno Rev3 | 9/10 | 10/10 | 9/10 | 8/10 | 9/10 |
| Uno R4 Minima | 9/10 | 8/10 | 9/10 | 9/10 | 9/10 |
| Uno R4 WiFi | 8/10 | 8/10 | 9/10 | 10/10 | 9/10 |
| Nano Every | 8/10 | 8/10 | 7/10 | 8/10 | 8/10 |
| Nano ESP32 | 7/10 | 7/10 | 7/10 | 10/10 | 8/10 |
| Nano 33 IoT | 7/10 | 7/10 | 7/10 | 9/10 | 7/10 |
| Leonardo | 8/10 | 8/10 | 8/10 | 8/10 | 8/10 |
| Micro | 7/10 | 7/10 | 6/10 | 8/10 | 7/10 |
| Mega 2560 Rev3 | 8/10 | 8/10 | 9/10 | 10/10 | 8/10 |
| GIGA R1 WiFi | 6/10 | 6/10 | 8/10 | 10/10 | 6/10 |
What matters more than processor speed
For a first LED, button, or temperature-sensor project, processor speed is rarely the bottleneck. Tutorial fit, voltage, pin layout, and available examples matter more. A fast board won’t fix a mismatched library or a motor wired directly to a GPIO pin.
When projects grow, you may care more about wireless connectivity, memory, peripheral support, or the number of pins. Arduino’s board comparison documentation is the place to verify specifications for the exact model and revision you’re considering.
A note on community advice and differing recommendations
In an Arduino Forum discussion about choosing between Uno Rev3 and Rev4, one contributor emphasizes that “so many resources” exist for the Rev3. That’s a strong argument if you want to follow older tutorials with minimal adaptation. It is not proof that the R4 is unsuitable: it reflects the age and breadth of the R3 tutorial ecosystem.
Another forum thread about starter kits makes the sensible point that there is no universally “best starter kit.” We agree. The right kit depends on what you want to build, whether you need guided lessons, and whether its included components match your goals. You can read the Uno Rev3 vs. Rev4 discussion and the starter-kit discussion for additional user perspectives.
🏆 10 Best Arduino Boards for Beginners
Here’s our shortlist, from classic learning boards to wireless and higher-capacity options. The best board is the one that fits your actual first project—not the one with the longest feature list.
1. Arduino Uno R4 Minima: Best Overall Starter Board
The Uno R4 Minima is a strong choice if you want a current Arduino Uno-style board without built-in wireless features. It keeps the familiar full-size Uno form factor and provides a modern hardware platform. Check the official Uno R4 Minima technical documentation for current specifications and setup information.
Why beginners may like it
- Full-size Uno layout makes wiring and breadboard work approachable.
- A good fit for LED, button, sensor, and display lessons.
- Lets you start with basic projects before adding wireless complexity.
- Works with many Uno-shaped accessories, though you should check compatibility for specific shields and libraries.
Potential drawbacks
- It has no onboard Wi-Fi or Bluetooth.
- Some older Uno tutorials or libraries may need checking for R4 compatibility.
- It does not include components just because it is a beginner-friendly board.
Our team’s recommendation: choose this board if you want the classic learning experience with newer hardware. If the tutorial you plan to follow explicitly uses the Uno Rev3, check its library and wiring assumptions first.
2. Arduino Uno R4 WiFi: Best for Wireless Projects
The Uno R4 WiFi combines a familiar Uno footprint with Wi-Fi and Bluetooth capabilities and a built-in LED matrix. See the official Uno R4 WiFi documentation for board features and setup.
Why beginners may like it
- Familiar Uno-style layout for hands-on circuit lessons.
- Wireless connectivity for connected sensors and Internet of Things experiments.
- Onboard LED matrix offers a ready-made way to practice simple animations and status displays.
Potential drawbacks
- Wireless setup introduces more concepts: networks, credentials, libraries, and sometimes cloud services.
- A wireless feature is useful only if your project needs one.
- Some tutorials written for the Rev3 may not transfer exactly.
This is a good choice if you already have a Wi-Fi project in mind. If your goal is simply learning digital input and output, the wireless features can wait. For project ideas involving connected devices and sensors, see our related topics on robotic sensors and automation.
3. Arduino Uno Rev3: Best for Classic Tutorials and Compatibility
The Uno Rev3 remains a highly practical first Arduino because so many lessons, books, kits, and example circuits use it. The official Uno Rev3 page lists its technical details and support resources.
Why beginners may like it
- Tutorials and example projects are exceptionally easy to find.
- Full-size headers make wiring less fiddly than on tiny boards.
- Broad support for Uno-shaped shields and common learning components.
- A useful reference board when comparing your circuit to published instructions.
Potential drawbacks
- No built-in Wi-Fi or Bluetooth.
- Its memory and processing resources are more limited than on newer boards.
- Some bundled starter kits include parts of uneven quality, so inspect the contents and instructions.
The Arduino Forum discussion comparing Rev3 and Rev4 offers a useful community perspective: several participants favor Rev3 for tutorial coverage and familiarity. That’s a reasonable preference—not a blanket verdict that every R4 project is incompatible.
4. Arduino Nano Every: Best Compact Beginner Board
The Nano Every offers a compact board for projects where an Uno is physically too large. It is especially useful when you have learned the basics and want to build something that can fit into a smaller enclosure. See the Nano Every documentation before choosing components.
Why beginners may like it
- Small footprint suited to compact builds.
- Uses the Arduino Nano form factor.
- A sensible choice for small sensor projects and wearables.
Potential drawbacks
- Its small size can make breadboard wiring and pin identification less comfortable at first.
- Some accessories made for full-size Uno boards do not fit it directly.
- It does not provide onboard Wi-Fi or Bluetooth.
If you’re learning with loose wires and a full-size breadboard, begin with an Uno unless portability is a real requirement. The Nano Every shines once a project needs to shrink.
5. Arduino Nano ESP32: Best for Wi-Fi and Bluetooth Projects
The Nano ESP32 brings ESP32-based wireless capability to a compact Nano-style board. Its official Nano ESP32 documentation is the best source for board setup, supported features, and pin details.
Why beginners may like it
- Compact form factor with built-in wireless capabilities.
- Strong fit for connected sensors, remote controls, and small Internet of Things projects.
- Lets you learn wireless project concepts without adding a separate radio module.
Potential drawbacks
- It is less suitable than a full-size Uno for tutorials that assume the Uno pin layout.
- Wireless boards commonly use 3.3V logic, so check the board documentation and component requirements before connecting 5V devices.
- Board package and library setup can be more involved than a basic Uno project.
Choose it if connectivity is central to what you want to build. If you’re new to circuits, do your first project with the exact board’s official examples rather than copying a random diagram for another model.
6. Arduino Nano 33 IoT: Best for Connected Sensor Projects
The Nano 33 IoT is designed for compact connected projects, with Wi-Fi and Bluetooth support. The official Nano 33 IoT documentation covers its capabilities and hardware details.
Why beginners may like it
- Wireless connectivity in a small Nano-format board.
- Useful for sensor monitoring, simple remote control, and connected prototypes.
- A good bridge from basic Arduino coding to networked hardware.
Potential drawbacks
- Smaller headers and board size make beginner wiring more cramped.
- Its voltage and pin behavior need to be checked before using components intended for 5V Uno projects.
- Some legacy Uno shields won’t fit its form factor.
Don’t choose it just because “wireless sounds cool.” Choose it because your project needs to send or receive data without a cable. For a first reading from a basic sensor, a plain Uno is usually simpler.
7. Arduino Leonardo: Best for USB Keyboard and Mouse Projects
The Leonardo can communicate with a computer as a USB keyboard or mouse, which makes it interesting for custom controllers and input devices. Arduino’s Leonardo documentation explains its hardware and supported functions.
Why beginners may like it
- Useful for programmable USB input devices.
- Familiar full-size board layout.
- Can introduce projects that go beyond LEDs and sensors.
Potential drawbacks
- Some Uno tutorials and shields need adaptation.
- USB-device projects can be confusing if you’re still learning basic input and output.
- The board’s special USB behavior means it is not always a drop-in Uno replacement.
Pick Leonardo for a project that needs its USB capabilities—not merely because it looks like another Uno.
8. Arduino Micro: Best for Small USB Input Devices
The Arduino Micro provides USB-device functionality in a smaller format. For model-specific features and setup, use the official Micro documentation.
Why beginners may like it
- Compact enough for some small controller builds.
- Can be used for USB input projects such as custom buttons or interfaces.
- Handy when the board needs to fit inside a limited enclosure.
Potential drawbacks
- Small size can make connecting parts less comfortable during early learning.
- Full-size Uno accessories may not fit.
- It’s a more specialized choice than the Uno Rev3.
If you’re still learning breadboard basics, a full-size board is easier to work with. Keep the Micro in mind for the smaller version of a project you already understand.
9. Arduino Mega 2560 Rev3: Best for Larger Projects
The Mega 2560 Rev3 offers more input/output pins than an Uno-style board, which is useful when a project has many sensors, displays, or controls. The official Mega 2560 Rev3 documentation provides board information.
Why beginners may like it
- More pins for large builds.
- A familiar, full-size development-board layout.
- Helpful when a project genuinely outgrows the Uno’s available connections.
Potential drawbacks
- Larger than most beginners need.
- Its extra pins can encourage unnecessary complexity.
- Uno-format shields may not fit the same way on every project.
A Mega is not “better” just because it is bigger. Start with an Uno unless your project’s pin count, memory needs, or board-specific requirements make a Mega appropriate.
10. Arduino GIGA R1 WiFi: Best for Ambitious Beginners
The GIGA R1 WiFi is a powerful board aimed at more demanding projects, including advanced connected builds. Its official GIGA R1 WiFi documentation explains the platform and its capabilities.
Why beginners may like it
- Extensive capabilities for ambitious projects.
- Wi-Fi and Bluetooth support.
- More room to experiment with complex interfaces and connected systems.
Potential drawbacks
- More features mean more to learn and more ways to get sidetracked.
- Many beginner lessons do not require its capabilities.
- It’s an inefficient first choice if your goal is to learn basic circuits and sketches.
We recommend it when you already know why you need its extra capabilities. Otherwise, start with a simpler board and let the project tell you when it’s time to upgrade.
📊 Arduino Board Comparison: Features, Connectivity, and Best Uses
| Board | Form factor | Wireless built in | General beginner fit | Best for |
|---|---|---|---|---|
| Uno Rev3 | Full-size Uno | No | Excellent | Tutorials, starter kits, basic electronics |
| Uno R4 Minima | Full-size Uno | No | Excellent | Modern Uno-style learning |
| Uno R4 WiFi | Full-size Uno | Yes | Excellent if needed | Connected Uno projects |
| Nano Every | Compact Nano | No | Good | Small builds |
| Nano ESP32 | Compact Nano | Yes | Good with care | Compact wireless projects |
| Nano 33 IoT | Compact Nano | Yes | Good with care | Connected sensor prototypes |
| Leonardo | Full-size style | No | Good for its specialty | USB keyboard and mouse projects |
| Micro | Compact | No | Fair for a first board | Small USB input projects |
| Mega 2560 Rev3 | Large | No | Good, but often more than needed | Many-pin projects |
| GIGA R1 WiFi | Large advanced board | Yes | Better after basics | Ambitious connected prototypes |
Important: “Wireless built in” does not mean “automatic.” You still need to configure the connection, use the correct library, and follow the board’s voltage and pin guidance. For exact pin counts and electrical limits, consult the official Arduino hardware documentation.
Which board should you buy for your first three projects?
A useful progression looks like this:
- Blink an LED to learn how to upload a sketch and control an output.
- Read a button or sensor to learn digital or analog input.
- Control an actuator through a driver or send sensor data wirelessly.
If all three projects are on your roadmap, a standard Uno-style board gives you a comfortable learning path. If project three must be wireless, choose an appropriate wireless board from the start.
⚖️ Arduino Uno R4 vs. Uno Rev3: Which Should You Buy?
Both are reasonable beginner choices. The difference is mostly about tutorial alignment, onboard features, and what your projects require.
| Consideration | Uno Rev3 | Uno R4 Minima | Uno R4 WiFi |
|---|---|---|---|
| Familiar Uno form factor | Yes | Yes | Yes |
| Best reason to choose it | Tutorial and kit compatibility | Newer Uno-style learning platform | Wireless projects and onboard LED matrix |
| Built-in Wi-Fi/Bluetooth | No | No | Yes |
| Works with all old Uno sketches and shields automatically | No board can promise this for every library or shield | Check the specific library or shield | Check the specific library or shield |
| A strong first board? | Yes | Yes | Yes, if you need wireless |
The Rev3’s advantage is the breadth of existing learning material. The R4 boards offer newer hardware and, in the WiFi model, built-in wireless features. Neither fact means one board is universally superior.
Community discussion often recommends the Rev3 because tutorials are plentiful and familiar. That advice is especially useful if you want to follow a particular older book or kit exactly. For the R4, check the product documentation and the library’s compatibility notes rather than guessing. The official R4 documentation and Arduino Forum comparison are good starting points.
Our recommendation: choose the Rev3 for the widest match with older lessons; choose the R4 Minima for a current Uno-style board without wireless; choose the R4 WiFi if wireless is part of your project plan.
🧰 Arduino Starter Kits: What Should Be in the Box?
A starter kit can remove the classic beginner problem of having a board but no LEDs, resistors, jumper wires, or sensors to test. The Arduino education and learning resources and official documentation can help you assess whether a kit’s projects are explained clearly.
| Kit ingredient | Why it helps | What to check |
|---|---|---|
| Board | Runs your sketches | Exact model and revision |
| USB cable | Connects board to computer | Correct connector and data capability |
| Breadboard | Lets you prototype without soldering | Standard size and usable condition |
| Jumper wires | Connect components | Enough male-to-male and other needed types |
| Resistors and LEDs | Teach basic circuits | Several values and clear labeling |
| Buttons and potentiometer | Teach input | Instructions explain wiring and code |
| Sensors | Enable real-world readings | Specific sensor models and example code |
| Motor driver | Enables safer motor control | Motor voltage and current compatibility |
| Tutorials or project guide | Helps you learn in sequence | Clear diagrams and board-specific instructions |
The biggest starter-kit trap: impressive quantity, weak instructions
A large kit may advertise dozens of modules, but that does not guarantee a useful learning path. As one participant in the Arduino starter-kit forum discussion points out, the right kit depends on the learner’s goals. We’d rather see a smaller, well-documented set of parts than a box of mystery boards with no suitable example code.
Before buying, check:
- Does it include the exact board you want?
- Are project instructions written for that board?
- Are component names and pinouts identified?
- Are the parts useful for your first few projects?
- Does it include a data-capable USB cable?
You can also learn effectively without a kit: buy a board and choose components for one project. That approach can be more focused, but it requires you to verify that the parts work together.
🛒 Official Arduino Boards vs. Compatible Clones
An official Arduino board provides a well-documented path and direct product support. A compatible board can offer a similar learning experience, but you should check its exact USB interface, voltage, board package, and documentation. Arduino’s official board catalog is useful for identifying official models.
| Factor | Official Arduino board | Compatible board |
|---|---|---|
| Documentation | Direct model-specific documentation | Varies by manufacturer and seller |
| Tutorial match | Often straightforward for official examples | May need to identify its exact variant |
| USB setup | Usually clearly documented | USB driver or cable details may vary |
| Component compatibility | Check board specifications | Check both the board and component specs |
| Support path | Arduino documentation and community | Manufacturer, seller, and community |
Some beginners prefer a compatible board for their first experiments; some want the official documentation and predictable support. Both views are reasonable. The crucial point is don’t buy based on the word “Uno” alone. Read the full model description and make sure it matches the guide you’ll use.
🧩 Choosing an Arduino Board for Your First Project
Instead of asking “Which board is best?”, start with “What will I build first?” The answer can turn a confusing list into a clear choice.
LEDs, Buttons, and Basic Electronics
For a traffic-light simulator, button input, simple display, or first sensor reading, an Uno Rev3 or Uno R4 Minima is a strong choice. The Uno’s spacious layout makes it easier to compare your wiring with a diagram.
A simple first-project sequence:
- Connect the board using a data-capable USB cable.
- Open an example sketch in the Arduino IDE.
- Select the correct board and port.
- Upload the sketch.
- Change one value or behavior.
- Add a button or sensor only after the basic circuit works.
Arduino’s Blink example is a classic first test. It checks both your software setup and the board’s ability to run a sketch.
Robots, Motors, and Moving Parts
For a small robot, the board is only one part of the system. You may also need motor drivers, a suitable power source, chassis, wheels, and sensors. Do not connect a motor directly to an Arduino GPIO pin. A GPIO pin is designed for signal-level control, not to supply the current a motor needs. Start with a properly rated motor driver and follow its wiring instructions.
| Robot subsystem | Typical beginner component | What to verify |
|---|---|---|
| Controller | Uno or Nano-style board | Pin count and voltage |
| Motion | Motor driver and DC motors | Driver current and motor supply |
| Obstacle sensing | Ultrasonic or distance sensor | Voltage compatibility and library |
| Line following | Reflectance sensors | Output type and mounting |
| Power | Battery pack or regulated supply | Voltage, current, polarity, and grounding |
A Uno is often the easiest controller to learn with because many beginner robot tutorials use it. If your robot needs numerous sensors or outputs, the Mega may be useful, but confirm the project actually needs the extra pins. Explore more project context in our sections on robotic sensors and automation.
Wi-Fi, Bluetooth, and Internet of Things Projects
Choose a board with onboard wireless if your project needs to communicate with a network or nearby device. The Uno R4 WiFi, Nano ESP32, and Nano 33 IoT are possible candidates, but they differ in form factor and setup. Read the official documentation for the exact board before wiring sensors.
A good beginner wireless project could:
- Read a temperature or light sensor.
- Send readings to a dashboard or local service.
- Use a button or web interface to change an output.
- Log data without keeping the board connected to your computer.
Wireless projects also involve network credentials, libraries, and security considerations. Keep credentials private, use reputable libraries, and start with the vendor’s official examples. Our robotic sensor resources and automation articles can help you explore related concepts.
Wearables, USB Controllers, and Compact Builds
For wearable projects, small enclosures, or compact electronics, Nano boards can be more convenient than a full-size Uno. For a USB keyboard-style controller, Leonardo or Micro may be a better fit because of their USB-device capabilities.
But compact does not always mean beginner-friendly. Small boards have tighter pin spacing and can be trickier to connect on a breadboard. If you’re just learning, prototype the circuit on a full-size Uno first, then move it to a smaller board once the wiring and code are understood.
💻 Arduino IDE, Setup, and Your First Sketch
The Arduino IDE is the standard starting point for many Arduino projects. Get it from the official Arduino software page, then follow the board-specific instructions in the Arduino getting-started guide.
Step-by-step: upload a first sketch
- Install the Arduino IDE from Arduino’s official site.
- Connect your board with a USB cable that supports data transfer.
- Select your board model in the IDE.
- Choose the correct port for the connected board.
- Open the built-in Blink example.
- Upload the sketch.
- Check the board’s onboard LED or the IDE’s upload message.
If the upload fails, don’t immediately assume the board is broken. First check the cable, selected board, selected port, and any board package instructions. For a compatible board, consult its manufacturer’s setup guide.
What Arduino code looks like
Arduino sketches are generally written in C++ using the Arduino framework. The basic structure includes setup(), which runs once at startup, and loop(), which repeats. The Arduino language reference explains functions, variables, and built-in commands.
void setup() {
 pinMode(LED_BUILTIN, OUTPUT);
}

void loop() {
 digitalWrite(LED_BUILTIN, HIGH);
 delay(500);
 digitalWrite(LED_BUILTIN, LOW);
 delay(500);
}
``

This blink sketch is deliberately simple: it teaches output control, timing, and uploading. Once it works, changing a delay or adding a button gives you a first taste of program behavior. More on programming fundamentals is available in our [coding languages section](https://roboticcoding.com/category/coding-languages/).

## [🔌 Arduino Pins, Voltage, Power, and USB Basics](#-arduino-pins-voltage-power-and-usb-basics)

Pin names can look intimidating, but the essentials are manageable. Digital pins read or produce on/off signals; analog inputs read varying voltages within the board’s supported range; power pins supply or receive power according to the board’s design. **Always check the voltage limits for your exact board.**

| Term | Beginner-friendly meaning | Why it matters |
|---|---|---|
| GPIO | General-purpose input/output pin | Used to read buttons or control simple outputs |
| Analog input | Reads a changing voltage | Common for potentiometers and some sensors |
| PWM | Repeated on/off signal used for some control tasks | Can dim LEDs or provide motor-driver control signals |
| Logic voltage | Voltage levels the board uses for signals | A 5V signal may not be safe for a 3.3V-only input |
| Ground (GND) | Shared electrical reference | Components often need a common ground |
| VIN or power input | Board-specific external power connection | Use only within the board’s stated requirements |

Arduino’s [official hardware documentation](https://docs.arduino.cc/hardware/) is the authority for board-specific voltage and pin limits. Avoid powering motors or high-current devices from an Arduino pin. Use an appropriate driver or power circuit, and check the component manufacturer’s specifications.

## [🧪 Essential Beginner Components and Accessories](#-essential-beginer-components-and-accessories)

You don’t need a drawer full of modules to begin. A focused collection is enough for several useful projects.

| Component | What you can learn |
|---|---|
| Breadboard and jumper wires | Prototyping and circuit connections |
| LEDs and resistors | Outputs, polarity, and current limiting |
| Push buttons | Digital input and debouncing |
| Potentiometer | Variable analog input |
| Buzzer | Simple audible feedback |
| Light or temperature sensor | Reading environmental data |
| Servo motor | Position control with the right power setup |
| Motor driver | Safer motor control |
| OLED or LCD display | Showing sensor readings |
| USB data cable | Uploading sketches and serial communication |

**Begin with the project, then buy its parts.** A kit may include useful extras, but there is no learning prize for owning 40 modules you can’t identify. The [Arduino starter-kit forum discussion](https://forum.arduino.cc/t/best-kit-for-beginners/971048) makes the same practical point: what’s useful depends on what you intend to build.

## [🛠️ Common Arduino Beginner Problems and How to Fix Them](#️-common-arduino-beginer-problems-and-how-to-fix-them)

| Symptom | Likely cause | First check |
|---|---|---|
| Board doesn’t appear in the IDE | Cable, port, driver, or board setup issue | Try a data-capable cable and verify board instructions |
| Upload fails | Wrong board or port selected | Recheck board model and port |
| LED does not light | Reversed LED, wrong pin, or missing resistor | Compare wiring with a trusted diagram |
| Sensor readings are strange | Wrong pin, voltage, wiring, or library | Confirm the sensor model and example |
| Motor won’t run | Inadequate supply or missing driver | Check the motor driver and power requirements |
| Board resets unexpectedly | Power instability or wiring short | Disconnect peripherals and retest the board alone |
| Example code won’t compile | Wrong board package or library mismatch | Check the tutorial’s board and library versions |

### A calm troubleshooting sequence

1. **Return to the simplest setup.** Disconnect extra components.
2. **Upload Blink** to confirm the IDE can communicate with the board.
3. **Check the exact board and port selection.**
4. **Review polarity and pin numbers** against the board documentation.
5. **Add one component at a time.**
6. **Read the error message carefully** before changing several things at once.

In our experience, the fastest fix is often the least dramatic one: a charge-only USB cable, a wrong port, or a swapped wire. Keep your troubleshooting systematic. One change at a time makes the cause much easier to spot.

## [🚫 Arduino Buying Mistakes to Avoid](#-arduino-buying-mistakes-to-avoid)

- **Buying the most powerful board “just in case.”** Extra hardware does not automatically make learning easier.
- **Assuming every Uno tutorial works unchanged on every Uno revision.** Check library, shield, and board compatibility.
- **Choosing a wireless board without a wireless project.** You may be adding setup work you don’t need.
- **Ignoring voltage levels.** Confirm whether your board and components use compatible logic voltage.
- **Forgetting the cable and components.** A bare board may not arrive with everything needed for a project.
- **Buying a large kit based only on module count.** Look for useful instructions and components you can identify.
- **Connecting a motor directly to a GPIO pin.** Use a suitable driver and power arrangement.
- **Treating a compatible board as an exact official-board replica.** Check its USB interface, setup steps, and specifications.

A little homework can prevent a box of parts that are technically impressive and practically confusing. Match the board to a real learning goal, and check the documentation before ordering.

## [🔭 When to Upgrade to a Different Arduino Board](#-when-to-upgrade-to-a-different-arduino-board)

You don’t need to predict every future project before buying your first board. Upgrade when you encounter a genuine limitation:

- You need **more pins** than your current board provides.
- You need **Wi-Fi or Bluetooth** and your board has no wireless capability.
- Your project must fit inside a smaller enclosure.
- A library or peripheral requires a different board family.
- You need additional memory or processing capacity for a specific application.

A useful approach is to first build the project with the board you understand, then identify what is actually limiting you. If the issue is simply an unclear sketch, a different board probably won’t solve it. If the project needs wireless communication, more I/O, or a smaller footprint, then a board change may be justified.

That brings us back to the question at the heart of this guide: which board gives you the smoothest first win? For most learners, it’s an Uno-style board—Rev3 for the broadest tutorial match, R4 Minima for a newer straightforward platform, and R4 WiFi when wireless is part of the plan.