
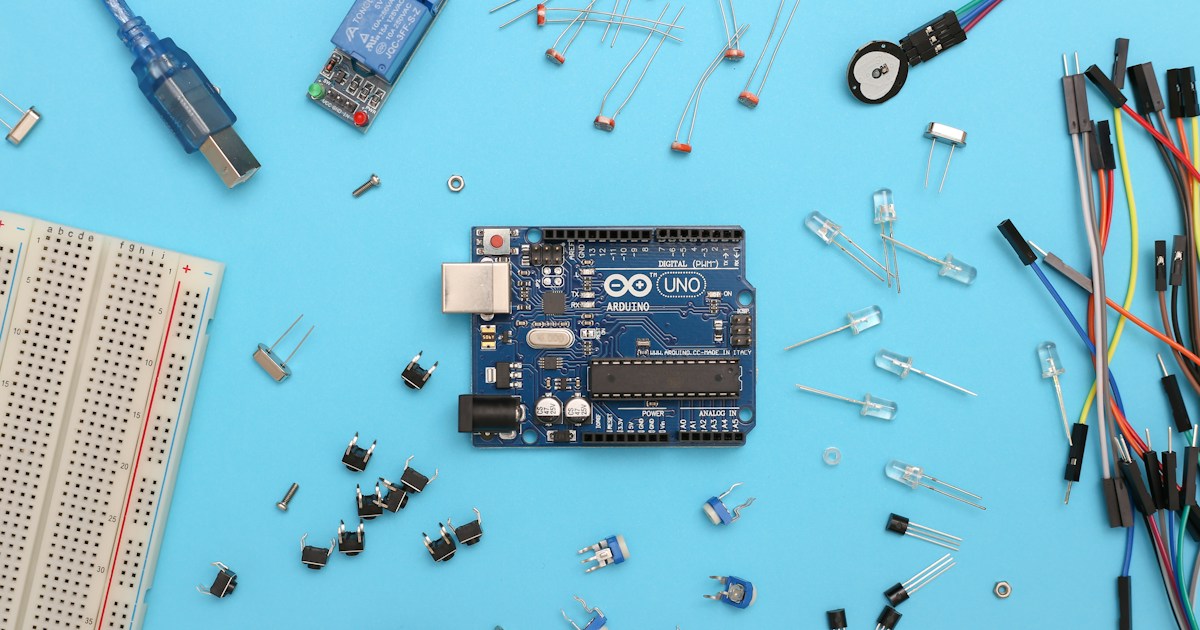
Arduino automation turns sensor readings into useful actions, from a light that responds to motion to a robot that avoids obstacles. Start with one sensor, one clear rule, and one safely controlled output; then add features only after the basics work.
That simple pattern is surprisingly powerful. We’ve seen a tiny sensor turn a blinking-LED experiment into a plant-watering prototype—and discovered that the real challenge wasn’t writing the code, but making the moisture readings reliable enough to trust.
This guide covers the boards, sensors, programming, connections, safety checks, and 15 Arduino automation project ideas to help you choose a build that fits your skills and goals.
Key Takeaways
- Think in three steps: Arduino automation senses a condition, decides what to do, and controls an output.
- Choose components for the task: Match the board, sensor, motor driver, and power supply to your project’s requirements.
- Begin with low-voltage projects: Test LEDs and small motors before considering household appliances or installed systems.
- Keep essential behavior reliable offline: Wi-Fi and cloud tools add convenience, but should not be the only way to control critical functions.
- Plan for failure: Use safe startup states, sensor checks, sensible run-time limits, and manual overrides where appropriate.
- Pick a project that teaches one skill: Automatic lighting, plant monitoring, and obstacle-avoiding robots are practical places to start.
Table of Contents
- ⚡️ Quick Tips and Facts
- 🤖 What Is Arduino Automation?
- 🕰️ Arduino Automation: Background and Evolution
- 🧰 Arduino Automation Hardware and Components
- Arduino Boards for Automation Projects
- Sensors, Actuators, and Relays
- Power Supplies, Wiring, and Protection
- Choosing Components for Your Project
- 💻 Arduino Automation Software and Programming
- Arduino IDE, Libraries, and Board Setup
- Core Programming Concepts for Automation
- Using Arduino Cloud, Wi-Fi, and Bluetooth
- 🏠 Arduino Home Automation: 15 Project Ideas
- 1. Automatic Room Lighting
- 2. Motion-Activated Security Light
- 3. Smart Doorbell and Visitor Alert
- 4. Temperature-Controled Fan
- 5. Automatic Plant-Watering System
- 6. Soil Moisture and Garden Monitor
- 7. Smart Irrigation Controller
- 8. Automated Curtains or Blinds
- 9. Water Leak Detection and Shutoff
- 10. Garage Door Status Monitor
- 11. Automatic Pet Feder
- 12. Smart Energy and Power Monitor
- 13. Room Occupancy and Air-Quality Monitor
- 14. RFID Access Control
- 15. Appliance Timer and Remote Control
- 🏭 Arduino Industrial Automation and Robotics
- Motor Control, Encoders, and Motion
- PLC-Style Control and Machine Monitoring
- Data Logging and Remote Telemetry
- 🔌 Connecting Arduino to Home Automation Platforms
- Home Assistant and MQTT
- IFTT, Node-RED, and Cloud Services
- Matter, Thread, and Interoperability
- 🛠️ Building an Arduino Automation Project Step by Step
- Plan Inputs, Outputs, and Control Logic
- Wire Sensors and Actuators Safely
- Write, Upload, and Test the Sketch
- Enclosure, Installation, and Maintenance
- 🔐 Safety, Security, and Reliability
- Mains Voltage and Electrical Safety
- Network Security and Privacy
- Fail-Safes, Watchdogs, and Manual Overrides
- 🐛 Arduino Automation Troubleshooting
- Common Sensor and Wiring Problems
- Wi-Fi, Bluetooth, and MQTT Connection Issues
- Power, Timing, and Code Debuging
- 🆚 Arduino vs. Raspberry Pi, ESP32, and PLCs
- ❓ Frequently Asked Questions
- Can Arduino run automation continuously?
- Can Arduino control household appliances?
- Which Arduino board is best for home automation?
- Does Arduino automation work without internet?
- How can Arduino automation be controlled from a phone?
- Is Arduino suitable for industrial automation?
- ✅ Quick Tips for Better Arduino Automation
- Conclusion
- Recommended Links
- Reference Links
⚡️ Quick Tips and Facts
Arduino automation means using a microcontroller to read inputs, make decisions, and control outputs—anything from a plant-watering pump to a small robot. If you’re new to the platform, start with our Arduino guides, then build a project that solves one small, real problem.
| Quick fact | What it means for your project |
|---|---|
| Inputs → brain → outputs | Sensors and switches provide inputs; the Arduino runs your control logic; motors, lights, buzzers, or relays provide outputs. |
| An Arduino is not a universal power supply | Its GPIO pins are for control signals, not for powering motors or household appliances directly. Use a suitable driver, relay module, or other interface. |
| Local automation can work offline | A project can respond to sensors without Wi-Fi or cloud access. Networking is optional unless you need remote control or monitoring. |
| Small experiments teach big lessons | An LED, button, and a few lines of code can demonstrate the same input-and-output logic used in more involved systems. |
| Mains electricity needs serious care | Household AC wiring can cause electric shock, fire, or equipment damage. Choose certified, properly enclosed hardware and get qualified help when needed. |
A useful way to think about automation
Picture a thermostat:
- A temperature sensor measures the room.
- The Arduino compares the reading with a setpoint.
- A control rule decides whether to switch an output.
- A correctly rated interface controls the fan or heater.
That’s the basic pattern behind everything from robotics to sensor-driven projects. The clever part isn’t the board; it’s choosing a safe, dependable rule for what happens when the real world gets messy.
🤖 What Is Arduino Automation?
Arduino automation is the use of an Arduino-compatible microcontroller to monitor conditions and trigger actions automatically. You might respond to motion, temperature, distance, light, moisture, a button press, or a message from another device.
It helps to separate automation into three jobs:
| Job | Example | Typical hardware |
|---|---|---|
| Sense | Detect motion in a hallway | PIR sensor |
| Decide | Turn on a light only when it’s dark | Arduino sketch and sensor readings |
| Act | Switch a lamp or move a mechanism | LED, motor driver, servo, or properly rated relay |
An Arduino doesn’t “understand” its surroundings the way a person does. It receives electrical signals, follows code, and changes outputs. That straightforward model is why the platform works well for coding and electronics projects.
Automation, remote control, and robotics: what’s the difference?
These ideas overlap, but they’re not identical:
- Automation performs a task automatically based on rules, a schedule, or sensor input.
- Remote control lets a person issue commands over Bluetooth, Wi-Fi, or another connection.
- Robotics combines sensing, control, and physical movement; a robot may operate autonomously, by remote control, or both.
A phone-controlled lamp is remote control. A lamp that turns on when a motion sensor detects someone is automation. A mobile robot that detects an obstacle and changes direction combines automation with robotics.
What an Arduino can—and can’t—do
✅ Good fit: Reading common sensors, controlling LEDs and small motors through suitable drivers, running simple control loops, logging measurements, and communicating with other devices.
❌ Not a direct fit: Driving motors or high-current loads straight from GPIO pins, replacing certified safety controls, or serving as a safety-rated industrial controller.
Arduino’s official documentation explains how boards, programming tools, and supported hardware work; the exact capabilities depend on the board model. A classic Uno and a network-capable board don’t have identical memory, connectivity, or pin capabilities, so check the technical documentation for the model you plan to use.
🕰️ Arduino Automation: Background and Evolution
Arduino became popular with makers because it made the microcontroller workflow easier to approach: connect a board, write a sketch, upload it, and test the result. The Arduino project has since grown into a broad ecosystem of boards, software, learning materials, and cloud services.
That accessibility matters in automation. You can test a sensor in a few lines of code, see its output in the Serial Monitor, and adjust the design before putting it into a case or connecting it to a larger system.
From blinking LEDs to connected devices
A typical learning path looks like this:
| Stage | What you learn | Example |
|---|---|---|
| Basic electronics | Polarity, current paths, resistors, and common ground | Blink an LED |
| Inputs and decisions | Read buttons and sensors; use conditions | Switch a fan based on temperature |
| Actuator control | Use drivers and interface circuits | Run a small DC motor |
| Communication | Exchange data with phones, computers, or networks | Send sensor readings over Wi-Fi |
| System reliability | Handle faults, resets, and safe defaults | Keep a pump off if a sensor reading is invalid |
Connected projects have expanded what a small controller can do, but internet connectivity isn’t a requirement. A local, offline controller can be simpler and more resilient when all it needs to do is respond to a sensor.
Learning from other builders
In the Arduino automation and robotics video playlist, LeMaster Tech presents projects through the input–brain–output model. The first video’s example uses an IR turret to make the idea concrete: sensors and controls feed the Arduino, which then operates components such as servos, a DC motor, LEDs, and a buzer.
That’s a useful teaching lens, not a full engineering checklist. A playful demo can show how a system works, while a real installation also needs attention to electrical ratings, enclosures, error handling, and what happens when a sensor or connection fails.
🧰 Arduino Automation Hardware and Components
An automation build usually needs a controller, inputs, outputs, power, and wiring. The parts list depends on what you’re controlling; choosing components by job is more reliable than buying a large kit and hoping it contains the right answer.
Arduino Boards for Automation Projects
| Board family or type | Useful strengths | Check before choosing |
|---|---|---|
| Arduino Uno | Familiar, widely documented, and suitable for many beginner projects | Available pins, memory, and communications |
| Arduino Mega | More I/O pins than a classic Uno | Board size, pin needs, and compatibility |
| Arduino Nano family | Compact form factor for smaller builds | Exact model, operating voltage, and pinout |
| Wi-Fi-capable Arduino boards | Network projects without an add-on Wi-Fi module | Radio support, supported libraries, and power needs |
| Third-party Arduino-compatible boards | May offer different sizes, features, or cost structures | Logic voltage, board package, documentation, and support |
Always look up the official pinout and technical specifications for the exact board. Even familiar names can cover different hardware generations. Browse the official Arduino hardware catalog before connecting modules.
Sensors, Actuators, and Relays
| Component | Role | Practical note |
|---|---|---|
| PIR motion sensor | Detects changes infrared radiation associated with movement | It detects motion, not identity |
| Temperature sensor | Measures temperature | Check accuracy, range, and interface |
| Light sensor | Measures brightness | Shield it from unwanted light if readings matter |
| Ultrasonic distance sensor | Estimates distance from reflected sound pulses | Soft, angled, or narrow objects can be harder to detect |
| Soil-moisture sensor | Estimates moisture in growing medium | Calibrate for your soil; avoid leaving unsuitable probes energized continuously |
| Servo motor | Moves to a commanded position within its design limits | Use a suitable supply; don’t assume the Arduino pin can power it |
| DC motor | Spins continuously | Requires an appropriate motor driver and power source |
| Relay module | Electrically switches a separate circuit | Confirm coil voltage, contact ratings, isolation, and enclosure |
A relay is a switch, not a permission slip to wire anything. Contact ratings depend on the type of load and operating conditions; a motor or heater can behave differently from a small resistive lamp. Follow the component’s official data sheet and applicable electrical rules.
Power Supplies, Wiring, and Protection
Power problems are among the most common reasons a prototype behaves unpredictably. Motors can draw more current when starting or stalled than they do while spinning freely, which can reset a board or damage a driver if the supply is undersized.
Before applying power:
- Check each component’s voltage and current requirements.
- Use a separate, appropriately rated supply when an actuator needs more current than the board can provide.
- Connect grounds as required by the interface circuit; some isolated interfaces have different wiring requirements.
- Add the protection specified by the motor-driver or module documentation.
- Keep wiring short and secure; label connections before closing an enclosure.
- Use strain relief and proper enclosures for installed equipment.
- Never assume a breadboard, jumper wire, or hobby relay module is suitable for mains voltage.
For additional context on safe electrical work, consult the U.S. Consumer Product Safety Commission’s electrical safety guidance.
Choosing Components for Your Project
Start with the load, not the shopping cart:
- Identify what you want to sense or control.
- Write down the actuator’s voltage, current, and operating conditions.
- Choose a sensor and interface compatible with your board.
- Confirm the board has the necessary pins and communications.
- Check the component documentation and test with a low-risk setup first.
A beginner may value clear examples and easy wiring more than a tiny footprint. A more experienced builder may prioritize low power, connectivity, or a custom PCB. Both perspectives are valid; the project’s requirements decide.
💻 Arduino Automation Software and Programming
Arduino code is often called a sketch. A basic sketch uses setup() to initialize hardware and loop() to repeatedly check inputs and update outputs. The official Arduino language reference covers the programming building blocks.
Arduino IDE, Libraries, and Board Setup
The Arduino IDE lets you select a board and port, edit sketches, compile code, and upload it. Libraries provide reusable code for many sensors and modules, but the correct library depends on the hardware and board.
A sensible first setup:
- Install the IDE from Arduino’s official software page.
- Connect your board using a suitable USB data cable.
- Select the correct board and serial port.
- Upload a basic example.
- Open the Serial Monitor if the project needs readable diagnostic output.
If compilation fails, check the selected board, installed board package, library version, and spelling of the library’s name before rewriting the whole sketch. Software bugs love disguises; a missing board selection can look like a mysterious electronics failure.
Core Programming Concepts for Automation
A practical controller should do more than switch something on. It should cope with noise, startup behavior, invalid readings, and changes in conditions.
const int ledPin = LED_BUILTIN;
const int sensorPin = A0;
const int threshold = 500;

void setup() {
 pinMode(ledPin, OUTPUT);
 Serial.begin(960);
}

void loop() {
 int reading = analogRead(sensorPin);
 bool conditionMet = reading > threshold;

 digitalWrite(ledPin, conditionMet ? HIGH : LOW);

 Serial.println(reading);
 delay(100);
}
``

This example demonstrates the control pattern, not a universal sensor calibration. The threshold and even the direction of the comparison depend on the sensor and its wiring.

Useful programming habits include:

- Give pins and thresholds descriptive names.
- Initialize outputs to a **safe state** in `setup()`.
- Print readings while testing, then reduce or remove unnecessary serial logging.
- Use **hysteresis** when a value hovers around a switching threshold.
- Avoid long blocking delays when the project must monitor several events.
- Check how your specific board handles pin modes, voltage, timers, and serial connections.

### [Using Arduino Cloud, Wi-Fi, and Bluetooth](#using-arduino-cloud-wi-fi-and-bluetooth)

Networking adds remote dashboards, alerts, and integrations—but also adds configuration, power consumption, security, and connectivity failure modes. The [Arduino Cloud](https://cloud.arduino.cc/) offers tools for connected projects; local control should still have a sensible fallback when the internet or router is unavailable.

Bluetooth is useful for nearby control. Wi-Fi is useful for network access and integrations. Neither should replace a physical manual override when one is appropriate for the device.

A tutorial from [Predictable Designs](https://predictabledesigns.com/home-automation-with-an-arduino-a-basic-tutorial/) demonstrates a smartphone-controlled lamp using an Arduino Uno, an HC-05 Bluetooth module, and a relay. Its key takeaway is that a control signal can operate a load through an interface. **The lesson is about the architecture, not a blanket endorsement of wiring a household lamp from a breadboard.** Follow current module documentation, use appropriate enclosures, and have mains wiring handled by someone qualified.

## [🏠 Arduino Home Automation: 15 Project Ideas](#arduino-home-automation-15-project-ideas)

These projects range from simple demonstrations to more involved installations. Start with low-voltage outputs, and treat any project that touches household wiring as a separate safety challenge.

### [1. Automatic Room Lighting](#1-automatic-room-lighting)

**Idea:** Use a light sensor and motion sensor to switch an LED strip or other suitable low-voltage light.

**Build outline:**

1. Read the light level.
2. Detect motion.
3. Turn on the light only when it’s dark and movement is detected.
4. Add a timeout so the light doesn’t stay on forever.

Use a proper driver matched to the light strip. For household lamps, use certified switching equipment and safe installation practices rather than exposed hobby wiring.

### [2. Motion-Activated Security Light](#2-motion-activated-security-light)

A PIR sensor can trigger an outdoor-rated light or send an alert. Place the sensor to reduce false triggers from moving branches, pets, or heat sources. **A motion sensor is not a complete security system**: it doesn’t identify a person, and its range depends on the device and placement.

### [3. Smart Doorbell and Visitor Alert](#3-smart-doorbell-and-visitor-alert)

A button can trigger a chime, LED, or notification. Debounce the button in software or hardware so one press doesn’t create a flurry of events. Keep the doorbell’s power circuitry appropriate to its voltage, and avoid tying a hobby board directly into an unfamiliar existing circuit.

### [4. Temperature-Controled Fan](#4-temperature-controlled-fan)

Measure temperature and switch a low-voltage fan through a suitable driver. Add separate turn-on and turn-off thresholds to prevent rapid cycling. For instance, turn the fan on above one temperature and off only after the reading falls several degrees.

### [5. Automatic Plant-Watering System](#5-automatic-plant-watering-system)

Use a moisture sensor to trigger a small pump. Test the sensor in the actual growing medium, set limits that suit the plant, and add a maximum pump runtime. A leak, empty reservoir, or failed sensor should not leave the pump running indefinitely.

### [6. Soil Moisture and Garden Monitor](#6-soil-moisture-and-garden-monitor)

Log soil moisture and temperature over time, then compare readings with your watering routine. Soil sensors vary, so calibrate them in dry and damp conditions. For garden projects, weatherproof enclosures and cable glands are as important as the code.

### [7. Smart Irrigation Controller](#7-smart-irigation-controller)

A larger version of plant watering can operate multiple valves or zones. Add rules for watering schedules, sensor faults, and maximum run duration. Never let a cloud connection be the only safeguard against an open valve.

### [8. Automated Curtains or Blinds](#8-automated-curtains-or-blinds)

A light sensor or schedule can command a motorized mechanism. Use limit switches or other position feedback to prevent the motor pushing past its travel. Test movement with the mechanism unloaded before mounting it near hands, pets, or fragile objects.

### [9. Water Leak Detection and Shutoff](#9-water-leak-detection-and-shutoff)

A leak sensor can sound an alarm or send a notification. A motorized shutoff valve is a more advanced step: the valve, power supply, and control logic must be compatible, and manual access should remain possible.

### [10. Garage Door Status Monitor](#10-garage-door-status-monitor)

Use a suitable magnetic switch to report whether the door is open or closed. Monitoring status is simpler and safer than controlling the door. If you add remote operation, preserve the door opener’s safety systems and follow the manufacturer’s instructions.

### [11. Automatic Pet Feder](#11-automatic-pet-feder)

A timer and motor can dispense measured portions, but a prototype should not become your pet’s only food source until it has been thoroughly tested. Detect jams, keep food dry, and provide a manual way to dispense food. For critical feeding, use a purpose-built product with appropriate safeguards.

### [12. Smart Energy and Power Monitor](#12-smart-energy-and-power-monitor)

Monitor a low-voltage circuit or use a properly isolated, rated measurement device designed for the application. **Do not experiment with exposed mains conductors.** An Arduino project is educational, but certified energy-monitoring equipment is the safer choice for installed household circuits.

### [13. Room Occupancy and Air-Quality Monitor](#13-room-occupancy-and-air-quality-monitor)

Combine motion or presence sensing with temperature and air-quality measurements. Sensor readings require careful interpretation: hobby air-quality sensors may provide an indicator rather than a calibrated measurement suitable for health or regulatory decisions.

### [14. RFID Access Control](#14-rfid-access-control)

An RFID reader can trigger a low-voltage demonstration lock or log a card identifier. Don’t treat a simple card UID as strong security. For real access control, choose a professionally designed system and account for tampering, credential management, and emergency egress.

### [15. Appliance Timer and Remote Control](#15-apliance-timer-and-remote-control)

A timer can control a low-voltage device, or a properly rated and enclosed switching product can control a load. Check the exact load type and ratings. Inductive loads such as motors may need different switching considerations from simple resistive loads.

## [🏭 Arduino Industrial Automation and Robotics](#arduino-industrial-automation-and-robotics)

Arduino is useful for protyping, education, and low-risk monitoring tasks. That doesn’t make every board an industrial controller. Industrial environments can require certified hardware, noise immunity, safety-rated systems, documented maintenance, and predictable long-term support.

### [Motor Control, Encoders, and Motion](#motor-control-encoders-and-motion)

To control a motor, pair the Arduino with a driver suited to the motor’s voltage, current, and type. For position or speed feedback, an encoder can tell the controller how the motor is moving.

A typical closed-loop process:

1. Set a target speed or position.
2. Read feedback from the encoder.
3. Calculate the difference between target and measured motion.
4. Adjust the driver command.
5. Stop or enter a safe state if feedback is missing or outside expected limits.

For learning, this can lead naturally into [robotic simulation projects](https://roboticcoding.com/category/robotic-simulations/). For a real machine, use equipment appropriate to the hazards and operating environment.

### [PLC-Style Control and Machine Monitoring](#plc-style-control-and-machine-monitoring)

A hobby board can demonstrate simple control logic or log noncritical measurements. A production machine may need a PLC or other certified controller designed for industrial conditions. Consider:

- Electrical noise and isolation
- Temperature, moisture, vibration, and enclosure ratings
- Watchdogs and power-loss recovery
- Documented wiring and maintenance
- Safety interlocks and emergency-stop design
- Compliance with relevant regulations and standards

**A prototype that works on a bench is not automatically production-ready.** That distinction protects both equipment and people.

### [Data Logging and Remote Telemetry](#data-logging-and-remote-telemetry)

Arduino can send readings to a computer, cloud service, or local dashboard. Log timestamps and units alongside readings so future you can understand the data. For reliability, decide what happens when storage fills up, the network disappears, or a sensor reports an impossible value.

## [🔌 Connecting Arduino to Home Automation Platforms](#connecting-arduino-to-home-automation-platforms)

Integration can make a sensor or actuator part of a wider smart-home setup, but it also creates dependencies. Make a local, safe control path the priority; add remote convenience after the basics work.

### [Home Assistant and MQTT](#home-assistant-and-mqtt)

[Home Assistant](https://www.home-assistant.io/) is an open-source home automation platform. [MQTT](https://mqtt.org/) is a lightweight messaging protocol often used to exchange sensor data and commands between devices.

A common pattern is:

- Arduino-compatible device publishes a sensor reading.
- Home Assistant displays it or uses it in an automation.
- A command is sent to a controller that operates a suitable output.

Keep credentials private, restrict access to the network, and avoid exposing control interfaces directly to the public internet.

### [IFTT, Node-RED, and Cloud Services](#iftt-node-red-and-cloud-services)

Visual tools such as [Node-RED](https://nodered.org/) can connect events, messages, and services without writing every integration from scratch. Cloud automations can be convenient for alerts and remote dashboards, but they depend on internet access and third-party service availability.

Use cloud services for convenience—not as the only way to stop a pump, turn off a heater, or make another safety-critical decision.

### [Matter, Thread, and Interoperability](#matter-thread-and-interoperability)

Smart-home standards and ecosystems evolve. Before buying a board or radio module, verify that the **exact model and firmware** support the protocol and integration you need. Don’t infer compatibility from a product’s marketing category or the presence of Wi-Fi alone.

## [🛠️ Building an Arduino Automation Project Step by Step](#building-an-arduino-automation-project-step-by-step)

A good build starts with a clear requirement and a safe test—not a frantic search for a code snippet.

### [Plan Inputs, Outputs, and Control Logic](#plan-inputs-outputs-and-control-logic)

Write down:

- **Input:** What condition does the system need to detect?
- **Decision:** What rule determines the response?
- **Output:** What action should occur?
- **Limits:** What readings or run times are acceptable?
- **Failure behavior:** What should happen if a sensor disconnects or power returns?

Example: “If the moisture reading indicates dry soil, run the low-voltage pump briefly, then wait and measure again. Stop if the reservoir sensor reports empty.”

### [Wire Sensors and Actuators Safely](#wire-sensors-and-actuators-safely)

1. Read the board pinout and each module’s documentation.
2. Check logic levels and power requirements.
3. Wire the controller and sensor with power off.
4. Test sensor readings by themselves.
5. Add the actuator through its proper driver.
6. Keep any high-current or mains wiring separate from fragile signal wiring.

The [Arduino language and hardware documentation](https://docs.arduino.cc/) is a better starting point than guessing what a pin or module can tolerate.

### [Write, Upload, and Test the Sketch](#write-upload-and-test-the-sketch)

Build up in small steps:

1. Upload a board example to confirm the programming connection.
2. Read and print sensor data.
3. Add the decision rule.
4. Test the output using an LED or other low-risk load.
5. Test abnormal readings and disconnections.
6. Only then test the intended actuator under controlled conditions.

The Predictable Designs Bluetooth tutorial notes that the classic Uno uses its serial connection for programming; attached hardware on the serial pins can interfere with uploading. Check the exact board’s documentation before using those pins, because board designs differ.

### [Enclosure, Installation, and Maintenance](#enclosure-installation-and-maintenance)

An installation needs more than a working sketch. Protect electronics from dust, moisture, vibration, accidental contact, and cable strain as appropriate. Label connectors, document pin assignments, and make it easy to inspect or replace a component.

A quick maintenance checklist:

- Inspect wires and connectors for wear.
- Test sensors against a known condition.
- Confirm the system recovers safely after a power cycle.
- Check that manual overrides still work.
- Review software changes before deploying them.

## [🔐 Safety, Security, and Reliability](#safety-security-and-reliability)

A clever automation project that fails safely is better than a clever project that leaves a pump running or a motor jamed. Build safety into the design before adding remote control or decorative features.

### [Mains Voltage and Electrical Safety](#mains-voltage-and-electrical-safety)

**Do not connect exposed mains wiring to a breadboard or improvise a household appliance circuit.** Use equipment designed and rated for the application, with suitable enclosures, isolation, wiring, and installation. If the project involves fixed household wiring, use a qualified electrician and follow local requirements.

The Predictable Designs tutorial demonstrates a relay-based lamp-control concept, but its example should not be read as a universal safe wiring recipe. Relay ratings vary by module, load type, and conditions. A device marked for a particular current is not automatically appropriate for every heater, motor, or appliance.

### [Network Security and Privacy](#network-security-and-privacy)

For connected projects:

- Change default credentials where supported.
- Keep firmware and software up to date.
- Use a trusted network and restrict who can control the device.
- Don’t publish tokens, Wi-Fi passwords, or private endpoints.
- Review what data a cloud service collects and how it is used.

Arduino’s [privacy policy](https://www.arduino.cc/en/privacy-policy/) and [cookie policy](https://www.arduino.cc/en/cookie-policy/) explain how its website handles data. That is separate from the privacy behavior of any third-party app, library, or cloud platform you choose.

### [Fail-Safes, Watchdogs, and Manual Overrides](#fail-safes-watchdogs-and-manual-overides)

Plan for common failures:

- **Sensor disconnected:** Don’t assume the last reading remains valid.
- **Network unavailable:** Keep essential local behavior available.
- **Board resets:** Initialize outputs to a safe state.
- **Actuator stalls:** Limit run time and monitor feedback where practical.
- **Power returns:** Avoid unexpected motion or restarting a hazardous load automatically.

A manual override is often the simplest and most reassuring feature in the whole build. It also gives you a way to test whether the automation is behaving—or merely feeling confident.

## [🐛 Arduino Automation Troubleshooting](#arduino-automation-troubleshooting)

Troubleshooting gets easier when you isolate one layer at a time: power, wiring, sensor, code, then actuator. Change one thing between tests so you know which change mattered.

### [Common Sensor and Wiring Problems](#common-sensor-and-wiring-problems)

| Symptom | Common cause | First check |
|---|---|---|
| No sensor readings | Wrong pin, loose ground, or unsuitable power | Confirm the pinout and shared reference where required |
| Readings jump around | Electrical noise, poor connection, or unfiltered sensor | Check wiring and test whether averaging or filtering helps |
| Motor resets the board | Supply cannot handle startup current or wiring is unsuitable | Separate actuator power as specified by the driver |
| Relay behaves backwards | Module is active-low or logic is reversed | Check the module documentation and test output states |
| Sensor triggers at the wrong threshold | No calibration or unsuitable placement | Log readings under real operating conditions |

### [Wi-Fi, Bluetooth, and MQTT Connection Issues](#wi-fi-bluetooth-and-mqtt-connection-issues)

Check the basics first: device is on the right network, credentials are correct, required permissions are granted, and the controller can reach the broker or service. For Bluetooth, verify pairing and permissions on the phone. For MQTT, check the broker address, topic names, and authentication.

Keep troubleshooting local where possible. If the device works offline but not through a cloud service, the sensor and control logic may be fine; the problem could be network configuration or a service dependency.

### [Power, Timing, and Code Debuging](#power-timing-and-code-debuging)

Use the Serial Monitor to print sensor readings and state changes. If a project becomes unresponsive, look for long `delay()` calls, repeated blocking operations, or code waiting indefinitely for a connection.

When debugging a reset or erratic output:

1. Test the board alone.
2. Test the sensor alone.
3. Test the actuator through its driver with an appropriate supply.
4. Reconnect parts one at a time.
5. Record what changed before adjusting the code.

## [🆚 Arduino vs. Raspberry Pi, ESP32, and PLCs](#arduino-vs-raspberry-pi-esp32-and-plcs)

These platforms solve different problems; there isn’t one universal winner.

| Platform | Usually a good fit for | Considerations |
|---|---|---|
| **Arduino boards** | Direct hardware control, simple embedded projects, education, and prototypes | Board capabilities vary; many projects need external drivers or connectivity modules |
| **Raspberry Pi** | Linux applications, networking, graphical interfaces, and higher-level computing | An operating system adds complexity; GPIO pins still cannot directly drive most loads |
| **ESP32 boards** | Embedded projects that need Wi-Fi or Bluetooth features | Verify the specific board’s logic level, radio, pin constraints, and power needs |
| **PLCs** | Industrial control and installation environments where ruggedness and industrial integration matter | Choose a model and system that meet the application’s standards and safety requirements |

A useful rule: **use Arduino-style control when the project is primarily reading inputs and controlling hardware; use a Linux computer when it needs an operating system or heavier applications; use a PLC when industrial requirements call for one.** Product specifications and integration needs should decide the final choice.

## [❓ Frequently Asked Questions](#frequently-asked-questions)

### [Can Arduino run automation continuously?](#can-arduino-run-automation-continuously)

Yes. An Arduino sketch can run continuously while the board has power, checking inputs and updating outputs. Continuous operation still depends on the board, power supply, environment, code quality, and workload. For a permanent installation, add suitable protection, test power-loss recovery, and monitor for faults rather than assuming a prototype is maintenance-free.

### [Can Arduino control household appliances?](#can-arduino-control-household-apliances)

It can control a suitable interface that switches an appliance, but **the Arduino must not directly switch household mains through ordinary GPIO pins**. Use certified, correctly rated, enclosed equipment and qualified installation where required. A low-voltage lamp or motor prototype is a safer learning project.

### [Which Arduino board is best for home automation?](#which-arduino-board-is-best-for-home-automation)

There is no single best board for every home automation project. Choose based on required pins, memory, wireless connectivity, power consumption, and supported libraries. A classic Uno can be a useful learning board; a connected board may reduce add-on hardware for a Wi-Fi project. Check the exact model’s [official documentation](https://docs.arduino.cc/hardware/).

### [Does Arduino automation work without internet?](#does-arduino-automation-work-without-internet)

Yes. Local sensor-to-output control can run without internet access. You need a network only for features that depend on remote dashboards, cloud services, or network-based commands. For reliability, keep essential control logic local whenever practical.

### [How can Arduino automation be controlled from a phone?](#how-can-arduino-automation-be-controlled-from-a-phone)

Common options include Bluetooth, Wi-Fi, or a home automation platform. Bluetooth is useful for nearby control; Wi-Fi can support access across a local network or an online service. The Predictable Designs tutorial demonstrates an HC-05 Bluetooth module communicating with an Arduino Uno, but phone apps, module compatibility, and security practices vary. Always confirm the module’s logic voltage and follow its documentation.

### [Is Arduino suitable for industrial automation?](#is-arduino-suitable-for-industrial-automation)

Arduino can be useful for education, protyping, and noncritical monitoring. It is not automatically a replacement for an industrial PLC or safety-rated controller. Industrial use requires careful evaluation of environmental conditions, electrical protection, standards, failure modes, support, and risk. Choose equipment specifically suited to the machine and its hazards.

### [How can Arduino be used to automate a robot?](#how-can-arduino-be-used-to-automate-a-robot)

A robot can use sensors to detect its surroundings, run control logic on an Arduino-compatible board, and drive motors through appropriate motor drivers. For example, a robot might follow a line using reflectance sensors or stop when an ultrasonic sensor detects an obstacle. Start with low-speed tests and include an easy stop or power disconnect.

### [What sensors are best for Arduino automation projects?](#what-sensors-are-best-for-arduino-automation-projects)

The best sensor depends on what you need to measure. PIR sensors are useful for motion detection; temperature sensors measure heat; light sensors measure brightness; ultrasonic sensors estimate distance; and moisture sensors can support plant-care experiments. Compare the sensor’s range, accuracy, response time, output type, and environment rating before choosing.

### [How do you program an Arduino to control motors automatically?](#how-do-you-program-an-arduino-to-control-motors-automatically)

Use a motor driver matched to the motor, then write code that reads an input or target and changes the driver’s control signal. A basic system may run a motor for a set time; a more precise system uses encoder feedback to regulate speed or position. Do not connect a motor directly to a GPIO pin, and check the driver’s current and voltage limits.

### [Can Arduino automate tasks using artificial intelligence?](#can-arduino-automate-tasks-using-artificial-intelligence)

Some Arduino-compatible hardware can support lightweight inference, and a board can also communicate with a more powerful computer or cloud service that runs AI software. The practical choice depends on the model size, memory, processing needs, latency, power, and privacy requirements. For broader context, see our [artificial intelligence resources](https://roboticcoding.com/category/artificial-intelligence/). A simple threshold rule is often more dependable than AI when the task is just “turn on the fan when it gets warm.”

### [How do you build an Arduino-based robotic arm?](#how-do-you-build-an-arduino-based-robotic-arm)

Begin with a small arm kit or a lightweight mechanism, suitable servos, a stable external power supply, and a board. Test each joint separately, define safe movement limits, then add coordinated motions. Keep fingers clear of pinch points and don’t assume a servo’s maximum torque is safe for the mechanism or its users.

### [What are some beginner-friendly Arduino automation projects?](#what-are-some-beginer-friendly-arduino-automation-projects)

Good first builds include an LED that responds to a button, a motion-triggered buzer, a light-level indicator, a temperature-controlled low-voltage fan, or a small plant-watering demo. These teach sensing, conditions, outputs, and calibration without requiring mains wiring. The official [Arduino built-in examples](https://docs.arduino.cc/built-in-examples/) are a dependable place to start.

### [How can Arduino robots navigate and avoid obstacles?](#how-can-arduino-robots-navigate-and-avoid-obstacles)

A simple robot can use ultrasonic or infrared distance sensing to detect obstacles, then stop, turn, or choose another direction. Sensor placement, surface characteristics, speed, and motor response affect performance. Begin with a slow robot in an open test area, and treat obstacle avoidance as a helpful behavior—not a safety guarantee.

## [✅ Quick Tips for Better Arduino Automation](#quick-tips-for-better-arduino-automation)

- **Test one component at a time.** It makes faults easier to identify.
- **Measure before setting thresholds.** Real sensors rarely match example values exactly.
- **Keep critical behavior local.** Cloud access should not be the sole control path.
- **Use the right driver and supply.** GPIO pins are for signals, not high-current loads.
- **Default outputs to a safe state.** Think about startup, reset, and sensor failure.
- **Document the wiring.** A pin map saves time when you revisit the project.
- **Treat tutorials as learning aids, not electrical certifications.** Verify ratings and safety requirements against official documentation.
- **Add a manual override when appropriate.** Your future self—and anyone else using the device—will appreciate it.

The input–brain–output model from the first video is a friendly way to begin: connect a sensor, make one clear decision, and control one safe output. The less glamorous details—power, calibration, failure behavior, and enclosures—are what turn that satisfying bench demo into dependable automation.