
The best Arduino boards for robotics are the Uno R4 Minima for a straightforward first robot, the Uno R4 WiFi for a connected build, and the Mega 2560 Rev3 when you need more pins for sensors and actuators. For compact wireless robots, the Nano ESP32 is a strong pick; for camera-based projects, consider the Nicla Vision.
We’ve seen plenty of robot builds stall before the first lap—not because the controller lacked computing power, but because the motor supply dipped or the builder ran out of pins. Choosing the right board is less about buying the most powerful option and more about matching the controller, motor driver, sensors, and power system to the job.
Key Takeaways
- Best simple starter: Arduino Uno R4 Minima keeps a first robot’s electronics manageable.
- Best connected starter: Arduino Uno R4 WiFi adds wireless features to a familiar board format.
- Best for lots of I/O: Arduino Mega 2560 Rev3 suits sensor-rich robots and multi-axis projects.
- Best compact wireless option: Arduino Nano ESP32 fits small builds that need Wi-Fi or Bluetooth.
- Best for vision experiments: Arduino Nicla Vision is designed for camera-based sensing and embedded vision.
- Plan power as carefully as pins: Use a properly rated motor driver and suitable motor supply; don’t power motors directly from Arduino GPIO pins.
👉 Shop recommended boards:
- Arduino Uno R4 Minima: Amazon | Arduino Official
- Arduino Uno R4 WiFi: Amazon | Arduino Official
- Arduino Mega 2560 Rev3: Amazon | Arduino Official
- Arduino Nano ESP32: Amazon | Arduino Official
- Arduino Nicla Vision: Amazon | Arduino Official
Table of Contents
- ⚡️ Quick Tips and Facts
- 🧭 Arduino Robotics Boards: Background and Evolution
- 🤖 Best Arduino Boards for Robotics: At a Glance
- 🏆 Best Arduino Boards for Robotics
- 1. Arduino Uno R4 WiFi: Best All-Around Starter Board
- 2. Arduino Uno R4 Minima: Best Simple Control Board
- 3. Arduino Mega 2560 Rev3: Best for Lots of Motors and Sensors
- 4. Arduino Nano Every: Best Compact Robot Controller
- 5. Arduino Nano 33 IoT: Best for Connected Robots
- 6. Arduino Nano RP2040 Connect: Best for Wireless and Edge Projects
- 7. Arduino Nano ESP32: Best for Wi-Fi and Bluetooth Robotics
- 8. Arduino GIGA R1 WiFi: Best for Advanced, Sensor-Rich Robots
- 9. Arduino Portenta H7: Best for High-Performance Robotics
- 10. Arduino Nicla Vision: Best for Camera-Based Robotics
- 🧩 How to Choose an Arduino Board for Your Robot
- Microcontroller, Memory, and Processing Power
- Digital Pins, Analog Inputs, PWM, and Interrupts
- Wi-Fi, Bluetooth, and Wireless Control
- Board Size, Connectors, and Expansion Options
- Arduino IDE Compatibility and Library Support
- ⚙️ Match the Board to Your Robotics Project
- Arduino Board for a Robotic Arm
- Arduino Board for a Line-Following or Obstacle-Avoiding Robot
- Arduino Board for a Bluetooth or Wi-Fi Robot
- Arduino Board for a Quadruped or Servo-Heavy Robot
- Arduino Board for a Camera, Vision, or AI Robot
- 🔌 Motor Drivers, Servos, Sensors, and Power Requirements
- Why an Arduino Board Cannot Power Most Motors Directly
- Choosing a Motor Driver and Servo Controller
- Powering the Board, Motors, and Sensors Safely
- Voltage Logic, Grounding, and Electrical Noise
- 🛠️ Arduino Robotics Setup and Programming Basics
- Install the Arduino IDE and Select Your Board
- Connect Sensors and Test Motor Control
- Use Serial Debuging and Sensor Calibration
- Plan Pins Before Building Your Robot
- 🧯 Common Arduino Robot Problems and Practical Fixes
- The Board Resets When Motors Start
- Motors Jitter, Stall, or Run in the Wrong Direction
- Sensors Give Noisy or Unreliable Readings
- Not Enough Pins, PWM Channels, or Memory
- USB, Driver, and Board-Selection Issues
- 🆚 Arduino vs. Raspberry Pi and ESP32 for Robotics
- ✅ Final Board Recommendations by Robot Type
- Conclusion
- Recommended Links
- FAQ
- Which Arduino board is best for a beginner robot?
- Is an Arduino Uno powerful enough for robotics?
- Is Arduino Mega better than Uno for a robot?
- Can an Arduino run multiple motors and servos?
- Can I power DC motors directly from an Arduino board?
- Which Arduino board has Wi-Fi and Bluetooth?
- Can Arduino boards run ROS?
- Should I choose an Arduino board with a camera for robotics?
- Reference Links
Table of Contents
- ⚡️ Quick Tips and Facts
- 🧭 Arduino Robotics Boards: Background and Evolution
- 🤖 Best Arduino Boards for Robotics: At a Glance
- 🏆 Best Arduino Boards for Robotics
- 1. Arduino Uno R4 WiFi: Best All-Around Starter Board
- 2. Arduino Uno R4 Minima: Best Simple Control Board
- 3. Arduino Mega 2560 Rev3: Best for Lots of Motors and Sensors
- 4. Arduino Nano Every: Best Compact Robot Controller
- 5. Arduino Nano 33 IoT: Best for Connected Robots
- 6. Arduino Nano RP2040 Connect: Best for Wireless and Edge Projects
- 7. Arduino Nano ESP32: Best for Wi-Fi and Bluetooth Robotics
- 8. Arduino GIGA R1 WiFi: Best for Advanced, Sensor-Rich Robots
- 9. Arduino Portenta H7: Best for High-Performance Robotics
- 10. Arduino Nicla Vision: Best for Camera-Based Robotics
- 🧩 How to Choose an Arduino Board for Your Robot
- Microcontroller, Memory, and Processing Power
- Digital Pins, Analog Inputs, PWM, and Interrupts
- Wi-Fi, Bluetooth, and Wireless Control
- Board Size, Connectors, and Expansion Options
- Arduino IDE Compatibility and Library Support
- ⚙️ Match the Board to Your Robotics Project
- Arduino Board for a Robotic Arm
- Arduino Board for a Line-Following or Obstacle-Avoiding Robot
- Arduino Board for a Bluetooth or Wi-Fi Robot
- Arduino Board for a Quadruped or Servo-Heavy Robot
- Arduino Board for a Camera, Vision, or AI Robot
- 🔌 Motor Drivers, Servos, Sensors, and Power Requirements
- Why an Arduino Board Cannot Power Most Motors Directly
- Choosing a Motor Driver and Servo Controller
- Powering the Board, Motors, and Sensors Safely
- Voltage Logic, Grounding, and Electrical Noise
- 🛠️ Arduino Robotics Setup and Programming Basics
- Install the Arduino IDE and Select Your Board
- Connect Sensors and Test Motor Control
- Use Serial Debuging and Sensor Calibration
- Plan Pins Before Building Your Robot
- 🧯 Common Arduino Robot Problems and Practical Fixes
- The Board Resets When Motors Start
- Motors Jitter, Stall, or Run in the Wrong Direction
- Sensors Give Noisy or Unreliable Readings
- Not Enough Pins, PWM Channels, or Memory
- USB, Driver, and Board-Selection Issues
- 🆚 Arduino vs. Raspberry Pi and ESP32 for Robotics
- ✅ Final Board Recommendations by Robot Type
- Conclusion
- Recommended Links
- FAQ
- Which Arduino board is best for building a robot?
- Is Arduino Uno or Arduino Mega better for robotics projects?
- What Arduino board is best for controlling multiple motors?
- Which Arduino board is best for a beginner robotics project?
- Can Arduino boards run advanced robotics and AI applications?
- What sensors are compatible with Arduino robotics projects?
- How do you choose an Arduino board for a robot coding project?
⚡️ Quick Tips and Facts
If you’re planning an Arduino robot, start with our Arduino guides and one practical question: how many motors, sensors, and communication features will your robot need at the same time? That answer usually matters more than raw clock speed.
At Robotic Coding™, we’ve found that many first robot builds don’t fail because the board is too slow. They fail because the motor supply sags, the pin plan gets crowded, or a motor is connected directly to an I/O pin. Let’s avoid the smoke-and-regret phase. 🤖
| Quick decision | Our practical recommendation |
|---|---|
| First two-wheel robot | Arduino Uno R4 Minima or Uno R4 WiFi |
| Lots of sensors, motors, or steper drivers | Arduino Mega 2560 Rev3 |
| Small robot chassis | Arduino Nano Every |
| Wireless control | Arduino Nano ESP32 or Uno R4 WiFi |
| Camera or onboard vision | Arduino Nicla Vision or a single-board computer paired with an Arduino |
| Many hobby servos | Any suitable Arduino board plus a dedicated servo driver and separate servo power supply |
| Motors | Use a correctly rated motor driver; never drive a motor directly from an Arduino GPIO pin |
A classic Uno R3 has 14 digital I/O pins, six of which support PWM, and six analog inputs according to the Arduino Uno Rev3 technical specifications. But that pin count is not a promise that the board can supply power to six motors. Pins are control signals; motors need a driver and their own power path.
Fast shortlist:
- ✅ Best general-purpose starter: Uno R4 Minima or Uno R4 WiFi.
- ✅ Best when pin count is the bottleneck: Mega 2560 Rev3.
- ✅ Best compact option: Nano Every.
- ✅ Best wireless-first option: Nano ESP32.
- ✅ Best for vision experiments: Nicla Vision.
- ❌ Don’t choose by the word “robotics” on a kit box alone. Check motor voltage, current, sensor count, board logic voltage, and the libraries you’ll actually use.
We’ll compare ten boards below. First, though, why do experienced builders sometimes recommend a humble Uno while others reach for a Mega or a faster 32-bit board? The short answer is that they may be solving entirely different robots.
🧭 Arduino Robotics Boards: Background and Evolution
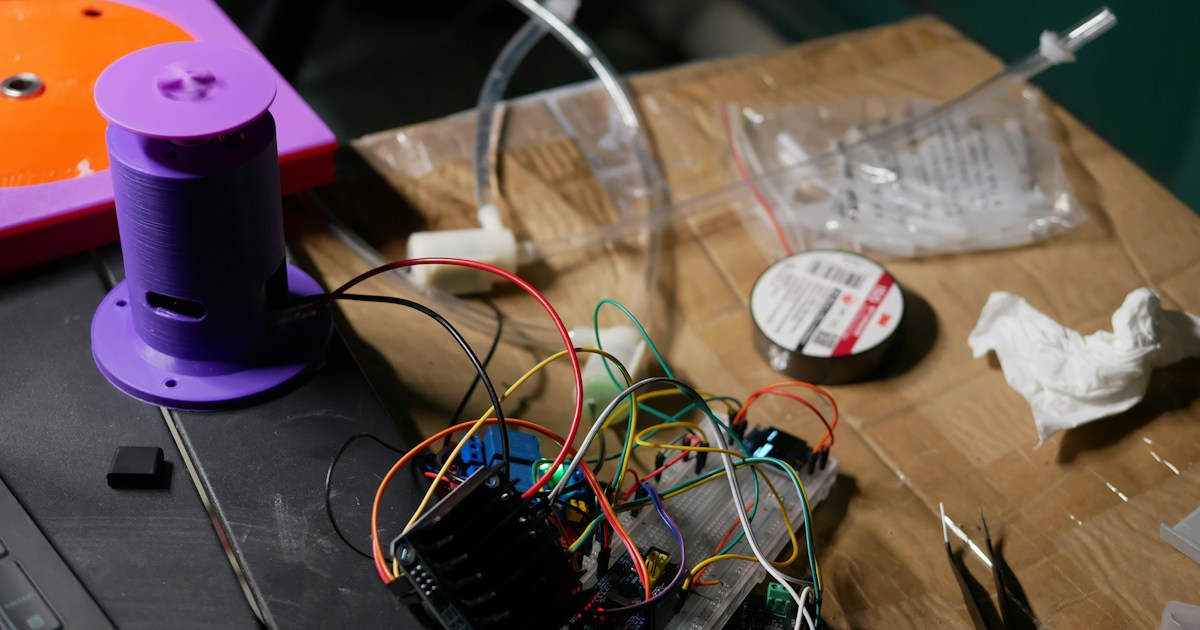
Arduino became popular with makers because it made microcontroller projects approachable: a board, a USB connection, an editor, and a large community of examples. The official Arduino documentation spans classic AVR boards such as the Uno and Mega as well as newer boards with 32-bit processors, wireless radios, and more memory.
That history explains why “the best Arduino for robotics” has no single universal answer. A small line-following car and a camera-equipped mobile robot have different jobs:
- A basic rover needs reliable motor control and a few sensor inputs.
- A multi-axis arm needs enough outputs, careful timing, and a sound servo-power design.
- A wireless robot may need Wi-Fi or Bluetooth.
- A vision robot needs image capture and processing resources that a small 8-bit board was never designed to provide.
A robotics discussion on the Arduino Forum captures the core trade-off well: “Any Arduino can handle basic robotics tasks” such as switching motors and reading sensors, while the number of available I/O pins can determine whether a build stays simple or becomes a wiring puzzle. That’s a useful perspective, but it needs a safety footnote: an Arduino can control a motor through suitable electronics; its pins generally cannot power that motor.
What changed in modern Arduino boards?
Classic boards such as the Uno and Mega are still useful because their ecosystem is mature and their 5 V logic suits many older modules. Newer families add features that matter for connected or computationaly heavier robots:
- More processing headroom: 32-bit microcontrollers can handle richer control logic and data processing.
- Wireless options: Wi-Fi and Bluetooth can simplify remote control and telemetry.
- Smaller formats: Nano boards suit compact chassis and custom enclosures.
- Specialized modules: Boards such as Nicla Vision bring onboard sensing and machine-vision capabilities.
The trade-off is compatibility. A board with more power may use 3.3 V logic, a different processor architecture, or a different set of libraries. More capable doesn’t automatically mean easier.
How to read community recommendations
Older forum threads are valuable for practical design lessons, but exact board specifications and software support can change. One 2017 discussion compares the Uno and Mega and mentions alternatives such as the Arduino Due and Teensy 3.2. Those are useful historical perspectives, not a current shopping list: the Due is an older 3.3 V board, and Teensy is a separate brand, not an Arduino board.
We trust community advice most when it explains why a board suits a project, then check the details against the manufacturer’s current documentation. That’s how we’ll handle the recommendations here: use real project needs first, verify specifications second, and don’t treat a forum preference as a universal rule.
🤖 Best Arduino Boards for Robotics: At a Glance
The ratings below are editorial fit ratings for robotics use, not laboratory measurements or manufacturer scores. We weigh ease of setup, I/O and expansion, performance, connectivity, and how naturally each board fits common robot builds.
| Board | Best robotics fit | Setup | I/O & expansion | Processing | Wireless | Overall fit |
|---|---|---|---|---|---|---|
| Uno R4 WiFi | General-purpose connected robot | 9/10 | 7/10 | 8/10 | 9/10 | 9/10 |
| Uno R4 Minima | Straightforward starter robot | 9/10 | 7/10 | 2/10 | 2/10 | 8/10 |
| Mega 2560 Rev3 | Many sensors and control signals | 8/10 | 10/10 | 4/10 | 2/10 | 8/10 |
| Nano Every | Compact, conventional robot | 8/10 | 6/10 | 5/10 | 2/10 | 7/10 |
| Nano 33 IoT | Small connected robot | 7/10 | 6/10 | 7/10 | 9/10 | 8/10 |
| Nano RP2040 Connect | Wireless experiments and edge projects | 7/10 | 6/10 | 8/10 | 9/10 | 8/10 |
| Nano ESP32 | Wi-Fi/Bluetooth robot in a small footprint | 8/10 | 6/10 | 8/10 | 10/10 | 9/10 |
| GIGA R1 WiFi | Advanced, sensor-rich builds | 6/10 | 9/10 | 10/10 | 9/10 | 8/10 |
| Portenta H7 | High-performance embedded robotics | 5/10 | 8/10 | 10/10 | 8/10 | 8/10 |
| Nicla Vision | Camera and machine-vision experiments | 6/10 | 5/10 | 8/10 | 6/10 | 8/10 |
Our quick verdict: Start with an Uno if you want the clearest path through basic robot control. Pick a Mega if your design needs lots of pins. Choose an ESP32-based board if wireless control is central. Move to a GIGA, Portenta, or Nicla when the project genuinely needs more computing or vision capability.
The caveat? A board’s advertised processing power won’t compensate for a weak motor driver or unstable battery. We’ll return to that when we get to the power section.
🏆 Best Arduino Boards for Robotics
1. Arduino Uno R4 WiFi: Best All-Around Starter Board
Robotic Coding™ rating: 9/10
The Arduino Uno R4 WiFi is a strong starting point if you want familiar Uno-style development with built-in wireless connectivity. It pairs a 32-bit Renesas RA4M1 microcontroller with an ESP32-S3 module for Wi-Fi and Bluetooth functions; see the official Uno R4 WiFi documentation.
| Aspect | Robotics take |
|---|---|
| Design | Familiar Uno form factor and shield ecosystem |
| Functionality | General control plus wireless features |
| Best for | Rover prototypes, telemetry, remote control |
| Main benefit | Less wiring for networked projects |
| Main drawback | More complexity than a simple wired robot needs |
Why we like it: You can build the core robot with ordinary sensors and motor-driver hardware, then add a wireless dashboard or remote commands without immediately introducing a separate computer. The Uno footprint also makes it easier to use many established shields and tutorials.
Watch-outs: Wi-Fi doesn’t remove the need for a motor driver, and wireless features don’t make the board a vision computer. Check the board’s logic voltage and peripheral requirements before connecting modules. The wireless co-processor also means you should follow the official setup and library guidance instead of assuming every old Uno sketch transfers unchanged.
Best fit: A first mobile robot that may grow into a Wi-Fi-controlled rover.
Skip it if: Your project is purely local and you’d rather keep the circuit and software as simple as possible. The Uno R4 Minima is the tidier choice.
👉 CHECK PRICE on:
- Arduino Uno R4 WiFi: Amazon | Walmart | Arduino Official Website
2. Arduino Uno R4 Minima: Best Simple Control Board
Robotic Coding™ rating: 8/10
The Uno R4 Minima keeps the familiar Uno layout while offering a newer 32-bit microcontroller. It’s a good fit when the robot’s job is sensing and control, not wireless networking. The official Uno R4 Minima hardware page is the place to check its current pinout and board details.
| Aspect | Robotics take |
|---|---|
| Design | Familiar Uno-compatible form factor |
| Functionality | Sensors, control logic, and motor-driver signals |
| Best for | Beginner rover, simple arm, classroom prototype |
| Main benefit | Straightforward project architecture |
| Main drawback | No onboard Wi-Fi or Bluetooth |
Why it works: Most beginner robots benefit from a clean separation between the controller, motor driver, and power supply. The Uno R4 Minima leaves you free to learn those fundamentals without paying the mental tax of configuring a wireless link at the same time.
Potential snag: “Uno-compatible” is not a guarantee that every legacy shield or library will work without adjustment. Confirm compatibility, especially if a library depends on a particular microcontroller or timer behavior.
Best fit: A wired robot or a first build where you want fewer moving parts—electrical and otherwise.
👉 CHECK PRICE on:
- Arduino Uno R4 Minima: Amazon | Walmart | Arduino Official Website
3. Arduino Mega 2560 Rev3: Best for Lots of Motors and Sensors
Robotic Coding™ rating: 8/10
When a design starts accumulating encoders, limit switches, ultrasonic sensors, displays, and steper-driver signals, the Arduino Mega 2560 Rev3 earns its keep. Its official specifications list 54 digital I/O pins, 16 analog inputs, and 15 PWM outputs; see Arduino’s Mega 2560 Rev3 documentation.
| Aspect | Robotics take |
|---|---|
| Design | Large board with extensive through-hole I/O |
| Functionality | Many independent signals and common Arduino libraries |
| Best for | Multi-sensor rover, robot arm, educational workbench |
| Main benefit | Reduces pin juggling |
| Main drawback | Large footprint and older 8-bit architecture |
Why builders choose it: A forum contributor described the Mega as a practical choice when a robot needs many I/O connections. That advice still makes sense: you can wire more peripherals directly instead of immediately adding expanders or redesigning the system.
The trade-off: The Mega’s spacious pin count doesn’t mean unlimited speed or current. It’s an 8-bit AVR board, so a demanding computer-vision or high-rate data-processing job belongs elsewhere. And pins still only provide control signals—not motor power.
Best fit: A large educational robot or an arm with several sensors and control channels, especially if 5 V compatibility and mature examples are valuable.
👉 CHECK PRICE on:
- Arduino Mega 2560 Rev3: Amazon | Walmart | Arduino Official Website
4. Arduino Nano Every: Best Compact Robot Controller
Robotic Coding™ rating: 7/10
The Arduino Nano Every is a compact board for builds where a full-size Uno is awkward. Its small form factor suits a tight chassis, a wearable mechanism, or a robot where the controller must tuck beside the battery and motor driver. Review the official Nano Every pinout and specifications.
| Aspect | Robotics take |
|---|---|
| Design | Compact Nano format |
| Functionality | Core microcontroller control |
| Best for | Small rover, compact prototype, embedded controller |
| Main benefit | Fits small builds |
| Main drawback | Less convenient wiring and no built-in wireless |
A Nano can simplify the final robot, but it may make early protyping less comfortable than a full-size Uno. On a crowded breadboard, tiny headers and jumper wires can turn a clean circuit into a spaghetti audition. Use a breakout or carrier board if you need easier access.
Best fit: You already know your project’s pin needs and want a small, conventional Arduino board.
👉 CHECK PRICE on:
- Arduino Nano Every: Amazon | Walmart | Arduino Official Website
5. Arduino Nano 33 IoT: Best for Connected Robots
Robotic Coding™ rating: 8/10
The Arduino Nano 33 IoT combines a compact Nano form factor with wireless connectivity. It’s a useful choice for a robot that needs networked control, sensor reporting, or a simple IoT dashboard. Check Arduino’s Nano 33 IoT documentation for its specifications and board setup.
| Aspect | Robotics take |
|---|---|
| Design | Small Nano-style board |
| Functionality | Microcontroller control with wireless features |
| Best for | Telemetry, remote monitoring, small connected robots |
| Main benefit | Wireless capability in a compact package |
| Main drawback | 3.3 V logic needs careful peripheral matching |
Important compatibility check: Many older Arduino modules expect 5 V signals. The Nano 33 IoT uses 3.3 V logic, so verify every sensor and accessory’s voltage requirements and use a suitable level shifter where needed. Never assume “Arduino compatible” means electrically safe for every Arduino-family board.
Best fit: A small robot that needs Wi-Fi or Bluetooth-related connectivity and uses compatible 3.3 V peripherals.
6. Arduino Nano RP2040 Connect: Best for Wireless and Edge Projects
Robotic Coding™ rating: 8/10
The Nano RP2040 Connect combines a compact format with the Raspberry Pi RP2040 microcontroller and wireless capabilities. It also includes onboard sensing features, which can be handy for experiments where a robot needs to collect data without a separate module. See the official Nano RP2040 Connect documentation.
| Aspect | Robotics take |
|---|---|
| Design | Compact Nano layout |
| Functionality | Wireless protyping and additional onboard features |
| Best for | Connected experiments, data collection, small robots |
| Main benefit | More flexible than a basic Nano |
| Main drawback | Library and peripheral compatibility must be checked |
This board can be appealing when you want one small controller to handle motion logic and communicate with a dashboard. But it isn’t a substitute for a dedicated motor driver, and its 3.3 V environment matters when you connect classic 5 V modules.
Best fit: A compact connected robot where you value wireless experimentation and are comfortable checking libraries and voltage compatibility.
7. Arduino Nano ESP32: Best for Wi-Fi and Bluetooth Robotics
Robotic Coding™ rating: 9/10
The Arduino Nano ESP32 puts an ESP32-S3-based board into a Nano-compatible footprint. It’s a compelling option for a robot that needs Wi-Fi, Bluetooth, a web-based control panel, or remote telemetry. The Arduino Nano ESP32 documentation covers board setup and technical details.
| Aspect | Robotics take |
|---|---|
| Design | Small Nano-style board |
| Functionality | Wi-Fi/Bluetooth plus microcontroller control |
| Best for | Remote-controlled rover, connected robot, IoT telemetry |
| Main benefit | Strong connectivity in a small board |
| Main drawback | 3.3 V logic and ESP32-specific details can surprise Uno users |
Our take: If wireless is part of the robot’s core design, choose the board for connectivity from the beginning rather than bolting on a radio later. If wireless is just a “maybe,” keep the first prototype simple and add it once the drive system works.
Be aware that ESP32 boards may differ from classic Uno boards in pin behavior, voltage, and library support. Follow the official board documentation and test one subsystem at a time.
Best fit: A compact rover controlled from a phone or browser, with the motor driver and battery handled separately.
8. Arduino GIGA R1 WiFi: Best for Advanced, Sensor-Rich Robots
Robotic Coding™ rating: 8/10
The Arduino GIGA R1 WiFi is aimed at more demanding projects that need substantial I/O, processing, and wireless connectivity. It can make sense for a sensor-rich robot, a complex interactive installation, or a prototype that needs more headroom than an Uno-class board. See the GIGA R1 WiFi hardware documentation.
| Aspect | Robotics take |
|---|---|
| Design | Larger, feature-rich development board |
| Functionality | Higher-end embedded control and connectivity |
| Best for | Advanced prototypes, many peripherals, data-heavy tasks |
| Main benefit | More room to grow |
| Main drawback | More board than most starter robots need |
The GIGA’s extra capability is useful only when the project can use it. For a basic line follower, it’s like bringing a workshop crane to move a LEGO brick: impressive, but not the limiting factor.
Best fit: An advanced build with a clear need for more I/O or computation, and a developer comfortable validating library and peripheral support.
9. Arduino Portenta H7: Best for High-Performance Robotics
Robotic Coding™ rating: 8/10
The Arduino Portenta H7 targets high-performance embedded applications. It can handle more demanding computation than a traditional Uno-class board, but it is not the automatic choice for a beginner rover. The Portenta H7 documentation is essential reading before you plan the system around it.
| Aspect | Robotics take |
|---|---|
| Design | Advanced, high-performance module |
| Functionality | Embedded applications with heavier processing demands |
| Best for | Sophisticated prototypes and specialized control systems |
| Main benefit | Significant computation headroom |
| Main drawback | Greater complexity and ecosystem learning curve |
Use a Portenta when you can name the workload that needs it—such as complex processing, multiple software components, or an industrial-style prototype. For ordinary wheel control and a few sensors, a simpler board will be easier to wire, debug, and maintain.
Best fit: Experienced makers developing a compute-intensive embedded robot and willing to design around the board’s platform and accessories.
10. Arduino Nicla Vision: Best for Camera-Based Robotics
Robotic Coding™ rating: 8/10
The Arduino Nicla Vision is a compact board built for vision and machine-learning experiments. Its camera and sensing features make it more relevant to perception tasks than a typical Uno, but camera-based robotics still requires careful planning around lighting, frame processing, mechanical mounting, and motor control. See the official Nicla Vision documentation.
| Aspect | Robotics take |
|---|---|
| Design | Compact vision-oriented board |
| Functionality | Camera and edge-vision experimentation |
| Best for | Visual recognition and sensing prototypes |
| Main benefit | Vision features in a small package |
| Main drawback | Not a general replacement for a motion controller |
For a robot that needs both vision and reliable real-time motor control, consider dividing the work: use a vision-capable board for perception and a separate microcontroller for motor control. That architecture can be easier to debug than asking one board to do every job.
Best fit: A prototype that must experiment with camera input or embedded vision, not a simple beginner rover.
🧩 How to Choose an Arduino Board for Your Robot
A good board choice starts with a list, not a shopping cart. Write down what the robot must sense, move, and communicate with. Then choose the smallest board that can handle those tasks with a little expansion room.
Microcontroller, Memory, and Processing Power
A microcontroller runs your control program and responds to sensors and outputs. More processing power can help with complex filtering, communication, or image-related work, but basic drive control doesn’t need a powerhouse.
| Project workload | Sensible starting point |
|---|---|
| Two DC motors, a few sensors | Uno R4 Minima or Nano Every |
| Many I/O signals, several steper drivers | Mega 2560 Rev3 |
| Wi-Fi/Bluetooth control | Uno R4 WiFi or Nano ESP32 |
| More demanding embedded processing | GIGA R1 WiFi or Portenta H7 |
| Camera-based perception | Nicla Vision, often paired with a motion controller |
For projects involving robotic sensors or artificial intelligence, check whether the intended algorithms and libraries actually run on the target board. “AI-ready” on a product page does not mean every model fits in memory or performs at a useful speed.
Digital Pins, Analog Inputs, PWM, and Interrupts
The number of pins is only one part of the plan. You also need the right kinds of pins and enough timing resources for your peripherals.
- Digital I/O: Reads switches or sets a logic output.
- Analog input: Measures analog voltage, within the board’s electrical limits.
- PWM output: Provides a pulse-width-modulated signal often used for speed or brightness control. For DC motors, PWM usually goes to the motor driver’s control input—not directly to the motor.
- Interrupts: Help capture events, such as encoder pulses, without relying on slow polling loops.
- Serial, I²C, and SPI: Communication interfaces used by many sensors and add-on devices.
The Arduino Uno Rev3 documentation lists 14 digital pins, six PWM-capable pins, and six analog inputs. The Mega 2560 provides substantially more I/O. Actual capabilities differ by board, so use the official pinout instead of assuming the same pin number means the same function everywhere.
Make a pin budget before wiring
A rough example for a two-wheel robot might look like this:
| Device | Typical control signals to budget |
|---|---|
| Dual DC motor driver | 2–4 digital/PWM signals, depending on driver |
| Two wheel encoders | 2–4 input signals, depending on encoder design |
| Line sensor array | One or more inputs; interface-dependent |
| Distance sensor | Typically several signals, depending on model |
| Status LED or buzer | 1–2 outputs |
| Serial debugging | Reserve the board’s serial pins or USB interface as appropriate |
Don’t count pins without counting conflicts. A pin used by a shield, bootloader function, or communication interface may not be freely available for your sensor.
Wi-Fi, Bluetooth, and Wireless Control
Wireless control is convenient, but it introduces a communication system that can fail independently of the robot’s motion control.
Choose onboard wireless when you need:
- A phone or browser-based control interface.
- Remote telemetry or configuration.
- Network communication between the robot and another device.
- A compact build without a separate radio module.
Choose a wired or simpler first prototype when you’re still validating motor direction, sensor placement, and battery behavior. Once the robot drives reliably, wireless control becomes an upgrade instead of a second mystery.
Board Size, Connectors, and Expansion Options
A full-size board is often easier for first prototypes; a Nano is easier to fit in a small chassis. Shields and breakout boards can help, but check:
- Board outline and mounting holes
- Header spacing and connector access
- Battery and USB clearance
- Whether a shield blocks pins you need
- How you’ll reach the reset button and programming port
- Whether the completed assembly can survive vibration
We’ve seen a theoretically perfect board become a poor practical choice because its USB connector ended up trapped under a battery plate. Leave room for the cable you need to upload the code.
Arduino IDE Compatibility and Library Support
The Arduino IDE and the board’s official core determine how you upload sketches and manage libraries. A popular sensor library may support an Uno but not every newer architecture or feature.
Before you commit:
- Identify the sensor and motor-driver models.
- Find the manufacturer’s or library maintainer’s current documentation.
- Confirm the library supports the board’s microcontroller.
- Check whether the code expects 5 V or 3.3 V logic.
- Search for examples that match your exact board family.
If you’re learning embedded code as part of a bigger coding languages path, prioritize documentation and examples over headline specs. A board you can debug is more useful than a faster one you can’t.
⚙️ Match the Board to Your Robotics Project
Arduino Board for a Robotic Arm
For a basic arm, start by counting servos, end stops, and any gripper or force sensors. A small arm with a few servos may be controlled by an Uno-class board, but a larger arm can outgrow its convenient I/O quickly.
- A few servos: Uno R4 Minima or Nano Every can handle the control logic, with suitable servo power.
- Several joints plus switches and sensors: Mega 2560 gives you more built-in I/O.
- Many servos: Add a dedicated multi-channel PWM/servo controller and a separate power supply rather than trying to source servo current from the Arduino.
A helpful community discussion asks “What is the best Arduino board for a robotic arm?”. The deeper answer is that servo count alone doesn’t settle it. You also need to know torque, current draw, control update needs, and whether the arm requires feedback from encoders or limit switches.
Robotic Coding™ recommendation: For a beginner arm, use an Uno or Mega based on I/O needs, plus a dedicated servo driver if the servo count or current demand warrants it. Don’t confuse “enough pins” with “enough power.”
Arduino Board for a Line-Following or Obstacle-Avoiding Robot
A basic line follower or obstacle-avoiding rover is usually a straightforward microcontroller project:
- Uno R4 Minima: Easiest general starting point.
- Nano Every: Good if the chassis has very limited room.
- Uno R4 WiFi: Useful if you want to stream data or operate it remotely.
A line sensor array may use multiple analog or digital outputs, so check its interface and pin requirements before deciding. For a distance sensor, verify the sensor’s voltage and library requirements. Browse the robotic sensor guides for help understanding sensor types and their roles.
Build order tip: Get the wheels turning with a basic test sketch first. Then add the line sensors. Finally, combine sensor readings and steering behavior. One subsystem at a time makes a robot far less mysterious.
Arduino Board for a Bluetooth or Wi-Fi Robot
For a wireless rover, select the radio based on your control plan:
| Need | Possible board |
|---|---|
| Wi-Fi dashboard or network control | Uno R4 WiFi, Nano 33 IoT, Nano ESP32 |
| Bluetooth-linked experiments | Uno R4 WiFi or Nano ESP32, subject to feature and library needs |
| Small footprint with wireless | Nano ESP32 or Nano 33 IoT |
Wireless range and reliability depend on the environment, antenna placement, and the robot’s power and enclosure design. Test the link with the motors running: electrical noise and voltage dips can make an apparently reliable prototype behave like it has stage fright.
Arduino Board for a Quadruped or Servo-Heavy Robot
A leged robot may have many servo outputs and a demanding power profile. Here, the servo power system is usually more important than the board’s processor speed.
A sensible architecture often includes:
- Arduino Mega, Uno, or another board that fits the control and sensor needs.
- A dedicated servo controller if many channels are required.
- A battery and regulator sized for the servo load.
- A shared signal ground between the controller and servo supply.
- Mechanical limits and software safeguards to avoid binding.
Servos can draw large current spikes, especially under load or near stall. Measure or check the actuator specifications and design around the expected load rather than powering them from the board’s 5 V rail.
Arduino Board for a Camera, Vision, or AI Robot
An Uno or Mega is not the right tool for most camera-processing tasks. For embedded vision experiments, consider the Nicla Vision or a more capable board such as the Portenta H7, depending on the required camera pipeline and software. For workloads involving a full operating system, higher-level vision libraries, or substantial AI models, pair an Arduino controller with a single-board computer such as a Raspberry Pi.
That split gives each system a clear job:
- Computer or vision board: Image processing, navigation decisions, user interface.
- Arduino microcontroller: Predictable motor commands and sensor I/O.
- Motor driver: Electrical power switching for the motors.
For ideas about simulation before real hardware, see our robotic simulations category. Testing the logic in simulation can expose design mistakes before your robot meets its first table leg.
🔌 Motor Drivers, Servos, Sensors, and Power Requirements
Why an Arduino Board Cannot Power Most Motors Directly
Arduino GPIO pins are intended for logic-level signals, not motor loads. A motor draws current that can exceed what a pin or board regulator is designed to handle; motors also generate electrical noise and voltage spikes.
The safe pattern is:
Arduino control signal → motor-driver input → motor power from a suitable supply
The driver is selected based on the motor’s operating voltage and current, including startup and stall conditions. Follow the driver manufacturer’s datasheet and board documentation rather than relying on a generic wiring picture.
✅ Use a driver rated for the motor’s voltage and current.
❌ Don’t connect a DC motor directly to an Arduino I/O pin.
❌ Don’t assume the USB port can run a motor or a bank of servos.
Choosing a Motor Driver and Servo Controller
Common categories include:
- H-bridge driver: Controls a brushed DC motor’s direction and usually speed.
- Stepper driver: Accepts step/direction or similar signals and supplies motor current.
- Servo PWM controller: Generates control pulses for multiple servos; servos still need an appropriate power supply.
- Integrated robot motor shield: Combines connectors and driver circuitry for easier protyping, but must match the motors.
When choosing a motor driver, confirm:
| Check | Why it matters |
|---|---|
| Motor voltage range | Must include the motor’s required supply voltage |
| Continuous current | Must meet the expected running load |
| Peak/stall current | Startup or jamed motors may draw much more current |
| Logic voltage | Must be compatible with the Arduino board |
| Thermal limits | A driver can overheat if pushed too hard |
| Control interface | Must match your code and available pins |
Don’t size a driver from the motor’s no-load current alone. The Polu motor-driver and motor documentation explains why motor current and stall conditions matter for driver selection. Check the exact driver’s datasheet, too.
Powering the Board, Motors, and Sensors Safely
A robot often works beautifully on USB and resets the moment it leaves the desk. That’s a classic sign that the computer’s USB supply was masking a weak or poorly separated power setup.
A robust approach:
- Read the battery and motor specifications. Confirm voltage and current requirements.
- Choose a motor supply that suits the motors and driver.
- Provide regulated power to logic devices within their specified range.
- Keep high-current motor wiring separate from sensitive signal wiring where practical.
- Connect grounds correctly when the design requires a shared signal reference.
- Secure the battery and add appropriate protection according to your battery and charger documentation.
- Test stationary first, with wheels lifted or the mechanism unloaded.
Never guess a board’s input-voltage range. Use the official board documentation, and don’t feed a battery voltage into a pin or input that isn’t designed for it.
Voltage Logic, Grounding, and Electrical Noise
Many classic Arduino modules use 5 V logic; several newer Arduino boards use 3.3 V logic. A 5 V signal may damage a 3.3 V input if the board does not tolerate it.
- Check the logic level of the board and each peripheral.
- Use a level shifter when needed.
- Connect grounds as required so signal levels have a shared reference.
- Keep motor leads away from sensitive analog sensor wires.
- Add filtering or follow the driver and motor manufacturer’s recommendations when noise causes trouble.
A neat-looking wiring diagram is not enough. The important question is whether the exact voltages, currents, and grounds are electrically compatible.
🛠️ Arduino Robotics Setup and Programming Basics
Install the Arduino IDE and Select Your Board
Start with the official Arduino IDE download page and the documentation for your specific board.
Step-by-step setup
- Install the IDE for your computer’s operating system.
- Connect the board by USB using a data-capable cable.
- Open the IDE’s Boards Manager and install the correct board platform if prompted.
- Select the matching board model and serial port.
- Upload a basic example, such as Blink, to confirm the connection.
- Add libraries only after the board upload works.
That tiny Blink test is unglamorous, but it separates “the board can be programmed” from “the robot circuit is wrong.” We recommend doing it before attaching motors, shields, and a battery all at once.
Connect Sensors and Test Motor Control
Build the robot in stages:
- Test the board alone. Confirm uploads and serial output.
- Test one sensor. Print its readings and verify they change as expected.
- Test one motor through its driver. Start with the robot lifted or the wheels unloaded.
- Test direction and speed. Confirm the software’s forward command actually moves the robot forward.
- Add the second motor.
- Integrate sensors with movement.
- Test the complete system on the floor at a low, safe speed.
This order is slower for the first few minutes and much faster over the full build. If the completed robot fails, you’ll know which new component introduced the problem.
Use Serial Debuging and Sensor Calibration
The Arduino IDE’s Serial Monitor can reveal values that otherwise remain invisible. Print sensor readings, state changes, and motor commands while testing.
Useful debugging habits:
- Label output clearly, such as
left_sensor=.... - Avoid printing so rapidly that serial output disrupts time-sensitive control.
- Test sensors under the same lighting and surface conditions the robot will face.
- Record minimum and maximum readings before choosing thresholds.
- Calibrate encoders and sensor offsets after the hardware is mounted.
For more advanced development, log sensor data and review it outside the robot. That can reveal patterns—such as a distance sensor becoming noisy whenever the motor starts—that are easy to miss while watching a moving chassis.
Plan Pins Before Building Your Robot
Write a simple pin map before connecting wires:
| Pin or interface | Device | Notes |
|---|---|---|
| PWM output | Motor-driver speed input | Confirm PWM capability for this board |
| Digital output | Motor-driver direction input | Check driver logic levels |
| I²C | Sensor or display | Confirm addresses and pull-up requirements |
| Analog input | Line or position sensor | Check voltage range |
| Interrupt-capable input | Encoder signal | Verify board-specific interrupt support |
| USB/Serial | Debuging | Avoid accidental conflicts with device wiring |
Keep a reserve of pins for testing and future features. A robot that uses every available signal on day one leaves no easy room for a buzer, an extra switch, or the sensor you discover you desperately need.
🧯 Common Arduino Robot Problems and Practical Fixes
The Board Resets When Motors Start
Likely causes: The motor supply dips, the logic supply is overloaded, wiring is loose, or motor noise reaches the controller.
Try this:
- Run the controller from a stable, correctly rated logic supply.
- Use a motor supply appropriate for the motors and driver.
- Check wiring, connectors, and ground connections.
- Test with the motor disconnected, then through the driver at low load.
- Follow the driver manufacturer’s recommendations for decoupling and noise suppression.
If the reset happens exactly when a motor starts or reverses, suspect the power path before rewriting the code. Software gets blamed for many electrical problems it didn’t commit.
Motors Jitter, Stall, or Run in the Wrong Direction
Check one factor at a time:
- Verify motor-driver wiring and control-pin mapping.
- Confirm the code’s PWM and direction pins match the actual wiring.
- Check for a depleted battery or undersized power supply.
- Make sure the robot’s wheels or arm aren’t mechanically binding.
- Verify that the driver can handle the motor’s load.
- Test each motor separately before testing both together.
If one wheel spins backward, swap its motor leads or adjust the direction logic—after confirming the driver’s wiring and safety requirements.
Sensors Give Noisy or Unreliable Readings
Noise can come from electrical interference, poor grounding, lighting, vibration, or an unsuitable sensor placement.
- Separate sensor wiring from motor leads.
- Confirm the sensor’s supply and signal voltages.
- Secure sensors so they don’t move during operation.
- Read values with the motors off and on to compare.
- Use filtering, averaging, or hysteresis where appropriate.
- Recalibrate on the actual surface and under expected lighting.
A sensor that works perfectly on a clear desk may struggle on a glossy floor or in direct sunlight. Test where the robot will actually live, not just where it was assembled.
Not Enough Pins, PWM Channels, or Memory
First, confirm whether the shortage is real. Some pins may support alternate functions, and some sensors can share a bus such as I²C. Then consider:
- Moving to a board with more I/O, such as the Mega 2560.
- Using an I/O expander or multiplexer.
- Adding a dedicated servo or PWM controller.
- Simplifying the design or sharing signals where the hardware supports it.
- Reducing unnecessary library and data use if memory is tight.
A port expander can save a board swap, but it adds code and wiring. If the design is already complex, the cleaner solution may be a board with more built-in pins.
USB, Driver, and Board-Selection Issues
When an upload fails:
- Try a known-good data USB cable.
- Select the correct board model and port in the IDE.
- Check whether your operating system needs a USB driver.
- Close other programs using the serial port.
- Follow the official board’s upload instructions.
- Test with a simple sketch before restoring the robot program.
If the board is powered but no serial port appears, the cable may be charge-only or the computer may not have the right driver. A blinking power LED doesn’t prove the USB data connection is working.
🆚 Arduino vs. Raspberry Pi and ESP32 for Robotics
These platforms overlap, but they don’t do exactly the same job.
| Platform | Best at | Common limitation | Robotics role |
|---|---|---|---|
| Arduino microcontroller board | Direct sensor and actuator control | Limited compute and memory versus a computer | Real-time-ish low-level control |
| Raspberry Pi | Operating-system applications, networking, and higher-level processing | Requires care for precise timing and direct hardware interfacing | Vision, UI, planning, network services |
| ESP32 board | Wireless embedded control and compact connected projects | 3.3 V compatibility and platform-specific details | Wireless microcontroller control |
A Raspberry Pi is a single-board computer that runs an operating system; an Arduino board is typically a microcontroller platform designed for embedded control. They can complement each other: let the Pi process images or host a user interface, while an Arduino controls motor drivers and reads low-level sensors.
An ESP32 board is closer to Arduino’s microcontroller role, with wireless features built into many models. For a wireless rover, the Arduino Nano ESP32 may be a neat integrated choice. For a simple robot with no network needs, an Uno may be easier to learn.
Our rule of thumb: Choose an Arduino-class board for predictable peripheral control, a Raspberry Pi for operating-system-level tasks and heavier applications, and a combined architecture when the robot needs both.
✅ Final Board Recommendations by Robot Type
| Your robot | Board we’d start with | Why |
|---|---|---|
| First two-wheel rover | Uno R4 Minima | Familiar setup and manageable scope |
| Starter rover with wireless plans | Uno R4 WiFi | Uno-style workflow with connectivity |
| Large sensor-rich robot | Mega 2560 Rev3 | Many built-in I/O connections |
| Compact, conventional robot | Nano Every | Small form factor |
| Compact wireless robot | Nano ESP32 or Nano 33 IoT | Wireless features without a separate radio |
| Servo-heavy arm | Mega 2560 or Uno plus a servo controller | More signals or better servo-channel expansion |
| Vision prototype | Nicla Vision | Camera-oriented capabilities |
| Advanced compute-heavy embedded build | GIGA R1 WiFi or Portenta H7 | More processing and expansion headroom |
Our confident recommendation: For most first-time builders, choose an Uno R4 Minima for a simple robot or an Uno R4 WiFi if wireless is part of the plan. Choose a Mega 2560 Rev3 when you can already see the pin count climbing. For compact connected builds, look closely at the Nano ESP32. And if your robot needs camera vision, select a vision-capable board or pair one with a dedicated motion controller.
Whatever board you pick, the real success formula is the same: match the board to the job, use a properly rated motor driver, plan the power system, and test one subsystem at a time.