
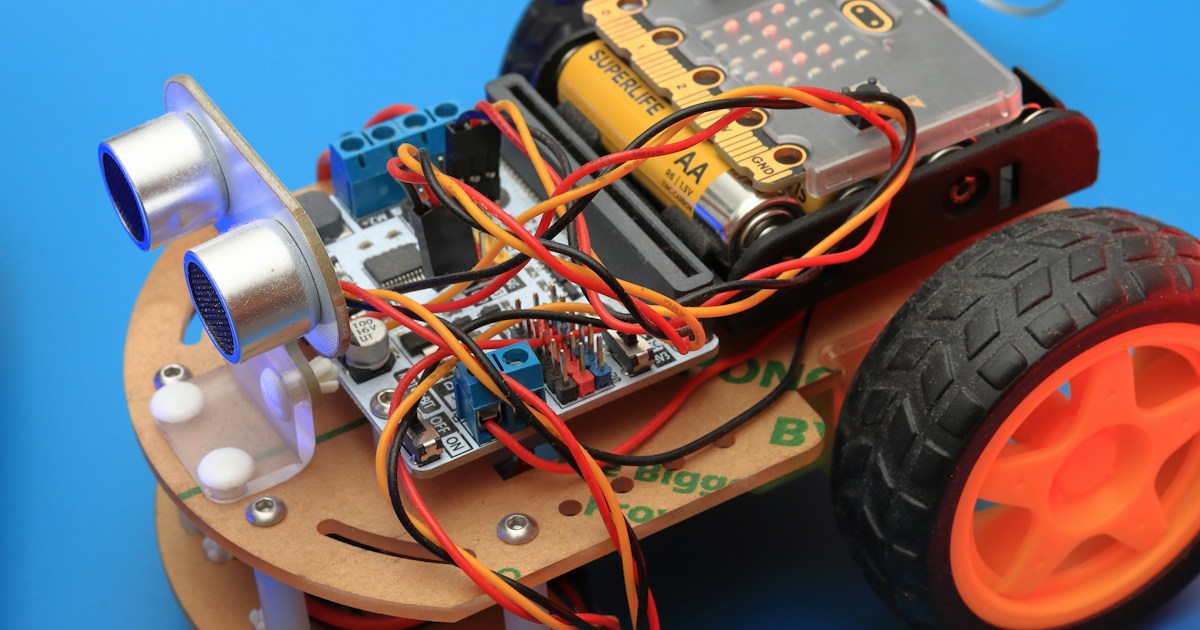
Yes, Arduino can be integrated with other robotic platforms through USB serial, UART, I²C, SPI, Bluetooth, Wi-Fi, CAN bus, and RS-485. The most reliable setup usually pairs Arduino with a Raspberry Pi, NVIDIA Jetson, ESP32, ROS 2 system, or modular chassis: Arduino handles real-time motor and sensor control while the companion computer manages vision, navigation, AI, or networking.
That division of labor is wonderfully practical. During one of our Robotic Coding™ rover tests, the Raspberry Pi was busy processing camera data while an Arduino quietly maintained encoder readings and motor PWM. When the camera application briefly stalled, the Arduino still stopped the motors safely instead of letting the rover continue its unscheduled furniture tour.
You can use Arduino as the robot’s main controller, a dedicated motor-control board, a sensor hub, or one node in a distributed robotic system. The real challenge isn’t connecting the boards; it’s defining who controls each actuator, how messages are formatted, and what happens when communication fails.
Key Takeaways
- Arduino integrates with many robotic platforms, including Raspberry Pi robots, ROS 2 systems, ESP32 projects, Makeblock kits, Polu Zumo robots, OSOYOO FlexiRover platforms, and custom robotic arms.
- Arduino is excellent for real-time tasks such as motor PWM, encoder feedback, servo control, sensor sampling, watchdogs, and emergency-stop behavior.
- Raspberry Pi and NVIDIA Jetson are better for high-level workloads, including computer vision, mapping, artificial intelligence, web dashboards, and ROS 2 navigation.
- USB serial is the easiest starting point, while CAN, RS-485, Wi-Fi, Bluetooth, I²C, and SPI support more specialized designs.
- Power and logic-level compatibility matter. A 5 V Arduino signal should not be connected directly to a 3.3 V Raspberry Pi GPIO input.
- Use a command timeout and fail-safe motor state so the robot stops if a cable disconnects, a wireless link drops, or the companion computer crashes.
- Choose a single owner for every actuator. Two controllers fighting over the same motor is less “multi-agent intelligence” and more “robotic argument.”
- The best architecture is usually hierarchical: a companion computer plans and perceives, while Arduino controls hardware quickly and predictably.
Table of Contents
- ⚡️ Quick Tips and Facts
- Can Arduino Be Integrated With Other Robotic Platforms?
- Arduino’s Role in a Multi-Controller Robot
- 🤖 Arduino Robotics Integration Explained
- What Counts as a Robotic Platform?
- Arduino Boards, Shields, and Compatible Ecosystems
- Advantages and Limitations of Combining Controllers
- 🧭 A Brief History of Arduino and Open-Source Robotics
- From Arduino UNO Projects to Autonomous Robots
- Why Arduino Remains Popular in Educational and DIY Robotics
- 🔌 10 Robotic Platforms That Work With Arduino
- 1. Raspberry Pi Robots and Companion Computers
- 2. ROS and ROS 2 Robot Systems
- 3. LEGO Mindstorms and SPIKE Prime Builds
- 4. Makeblock mBot and Makeblock MegaPi
- 5. VEX Robotics Platforms
- 6. TurtleBot Research Robots
- 7. NVIDIA Jetson Autonomous Robots
- 8. Robot Operating Platforms From Polu
- 9. DFRobot and SunFounder Robot Kits
- 10. Industrial PLC, CAN Bus, and Collaborative Robot Systems
- ⚙️ Common Arduino Integration Architectures
- Arduino as the Main Robot Controller
- Arduino as a Real-Time Motor and Sensor Controller
- Arduino as a Sensor Hub or Peripheral Module
- Distributed Arduino Controllers for Modular Robots
- 📡 Communication Protocols for Multi-Platform Robots
- Serial UART and USB Communication
- I2C for Sensors and Short-Distance Controller Links
- SPI for Fast Peripheral Data
- Bluetooth Classic and Bluetooth Low Energy
- Wi-Fi, MQTT, and WebSocket Robot Control
- CAN Bus for Reliable Distributed Robotics
- RS-485 for Long-Cable Industrial Applications
- 🧠 Arduino With Raspberry Pi, ESP32, and Single-Board Computers
- Dividing High-Level and Low-Level Robot Tasks
- Arduino-to-Raspberry Pi Serial Messaging
- Using ESP32 for Wireless Arduino-Compatible Robotics
- When to Choose an Arduino Nano, Mega, Uno, or Portenta
- 🦾 Arduino and ROS 2 Integration
- micro-ROS and Microcontroller-Based Robot Nodes
- roserial Alternatives and Serial Bridges
- Publishing Sensor Data and Receiving Velocity Commands
- Odometry, Encoders, and Real-Time Control Lops
- ROS 2 Compatibility Considerations
- 🔩 Motors, Sensors, and Actuators: Hardware Compatibility
- DC Motors, Steper Motors, and Servo Motors
- Motor Drivers and H-Bridge Selection
- Encoders, IMUs, LiDAR, Ultrasonic Sensors, and Cameras
- Power Supplies, Logic Levels, and Voltage Regulation
- Grounding, Noise, and Electrical Protection
- 💻 Software, Libraries, and Firmware Design
- Arduino IDE, PlatformIO, and Board Support Packages
- Choosing Reliable Arduino Libraries
- Message Formats, Data Rates, and Command Protocols
- Finite-State Machines for Robot Behaviors
- Real-Time Timing, Interrupts, and Watchdogs
- Firmware Updates and Remote Maintenance
- 🛠️ Practical Integration Guide: Connect Arduino to Another Robot Platform
- Step 1: Define Control, Sensing, and Compute Requirements
- Step 2: Select the Arduino Board and Companion Platform
- Step 3: Map Signals, Voltage Levels, and Data Packets
- Step 4: Build and Test the Communication Link
- Step 5: Integrate Motors, Sensors, and Safety Controls
- Step 6: Tune Control Lops and Validate Robot Behavior
- 🧪 Example Projects and Integration Patterns
- Arduino and Raspberry Pi Line-Following Robot
- ROS 2 Mobile Robot With Arduino Motor Control
- Arduino-Based Robotic Arm With a Vision Computer
- Bluetooth-Controled Arduino Rover
- Multi-Arduino Quadruped or Humanoid Robot
- ✅ Benefits and ❌ Drawbacks of Arduino Robot Integration
- Why Arduino Is Excellent for Sensor and Motor Control
- Where Arduino Falls Short
- When a Single-Board Computer Is the Better Choice
- When an Industrial Controller or PLC Makes More Sense
- 🔒 Safety, Reliability, and Security Considerations
- Emergency Stops and Fail-Safe Motor Behavior
- Preventing Runaway Robots and Communication Failures
- Battery, Thermal, and Mechanical Safety
- Securing Wireless Robot Commands
- 🐞 Troubleshooting Arduino Multi-Platform Robotics
- Serial Communication Problems
- Incompatible Voltage and Logic Levels
- Motor Noise, Resets, and Brownouts
- Latency, Packet Loss, and Synchronization
- Library Conflicts and Firmware Bugs
- 📊 Arduino Integration Comparison: Platforms, Protocols, and Use Cases
- Best Platform for Beginners
- Best Platform for ROS-Based Research
- Best Platform for Computer Vision
- Best Platform for Wireless Projects
- Best Platform for Industrial Robotics
- 🚀 Advanced Arduino Robotics Applications
- Autonomous Navigation and Sensor Fusion
- PID Motor Control and Trajectory Tracking
- Swarm Robotics and Inter-Robot Communication
- Edge AI and Machine Learning Assistants
- Teleoperation, Digital Twins, and Remote Robotics
- 🧰 Essential Tools and Components for Arduino Integration
- Logic-Level Converters and Communication Adapters
- Motor Drivers, Encoders, and Power Modules
- Debuging Tools, Multimeters, and Logic Analyzers
- Recommended Arduino-Compatible Robot Kits
- 📚 Learning Resources and Robotics Communities
- Official Arduino Documentation
- ROS 2, micro-ROS, and Open-Source Robotics Resources
- Robot-Building Forums and Project Repositories
- Conclusion
- Recommended Links
- FAQ
- Can Arduino work with Raspberry Pi robots?
- Can Arduino communicate with ROS and ROS 2?
- Can Arduino control motors while another computer handles navigation?
- Which Arduino board is best for robotic platforms?
- Can Arduino integrate with industrial robots?
- Is Arduino powerful enough for autonomous robotics?
- What communication protocol is best for Arduino robotics?
- Reference Links
Quick Tips and Facts
If you’re asking, “Can Arduino be integrated with other robotic platforms?”, the short answer is a cheerful yes. Our Arduino robotics guide at Robotic Coding™ covers the same principle we use in our workshops: let each computer do what it does best.
- Arduino excels at deterministic, low-level control: reading encoders, generating PWM motor signals, sampling sensors, and reacting quickly to switches.
- Raspberry Pi, NVIDIA Jetson, and similar computers excel at high-level workloads: computer vision, mapping, artificial intelligence, web dashboards, and ROS 2.
- Arduino can integrate through UART, USB, I²C, SPI, Bluetooth, Wi-Fi, CAN, and RS-485.
- Arduino does not directly power motors. Use a suitable motor driver, separate motor supply, common ground, and protection circuitry.
- ROS 2 integration is possible, commonly through micro-ROS, serial bridges, or a custom node running on a companion computer.
- Board compatibility is not universal. A robotic shield designed for an Arduino UNO may not fit an Arduino Mega, Due, or Portenta without wiring or software changes.
- Power and logic levels are frequent troublemakers. A 5 V Arduino and a 3.3 V ESP32 or Raspberry Pi need correctly designed signal interfaces.
- A two-controller robot is often better than a single overloaded controller. One board handles real-time motion while another handles planning and perception.
- The OSOYOO FlexiRover, Polu Zumo, Arduino Robot, Makeblock, and many ROS-compatible platforms demonstrate different integration approaches.
Here’s the practical rule we keep taped above the workbench: Arduino is the reflexes; the companion computer is the brain. But what happens when both “brains” try to steer the same wheel? We’ll solve that knot when we reach architecture and debugging.
Can Arduino Be Integrated With Other Robotic Platforms?
Yes. Arduino can be integrated with robotic platforms as a primary controller, a motor-control coprocessor, a sensor hub, or an expansion module.
A robotic platform usually combines:
| Layer | Typical responsibility | Example hardware |
|---|---|---|
| Mechanical layer | Chassis, wheels, gears, joints | Polu Zumo, OSOYOO FlexiRover |
| Actuation layer | Motors, servos, grippers | DRV8835, TB6612FNG, L298N, servo controllers |
| Embedded-control layer | Timing-critical I/O and motion | Arduino UNO R3, Arduino Mega 2560, Arduino Nano |
| Companion-computing layer | Vision, navigation, AI, networking | Raspberry Pi 5, NVIDIA Jetson Orin Nano |
| Robotics middleware | Messaging, transforms, planning | ROS 2, micro-ROS |
| User interface | Remote control, telemetry, dashboards | Web app, Bluetooth controller, gamepad |
The integration may be as simple as an Arduino UNO controlling four motors on an OSOYOO chassis, or as sophisticated as an Arduino-compatible microcontroller publishing wheel data to ROS 2 while a Jetson runs visual navigation.
What Does “Integrated” Actually Mean?
Integration can mean several different things:
- Mechanical integration: mounting an Arduino inside a chassis.
- Electrical integration: wiring Arduino GPIO, PWM, I²C, SPI, or serial connections to another board.
- Software integration: sharing commands, sensor values, and status messages.
- Functional integration: assigning separate responsibilities to multiple controllers.
- System integration: coordinating power, safety, timing, firmware, and higher-level behavior.
That distinction matters. Mounting a Raspberry Pi beside an Arduino is not, by itself, a robot architecture. The two must exchange well-defined messages and follow a clear authority model.
Arduino’s Role in a Multi-Controller Robot
At Robotic Coding™, we usually divide responsibilities like this:
| Task | Arduino | Raspberry Pi / Jetson |
|---|---|---|
| Read wheel encoders | ✅ Excellent | ⚠️ Possible, but timing-sensitive |
| Generate motor PWM | ✅ Excellent | ⚠️ Requires extra hardware or timing care |
| Read ultrasonic sensors | ✅ Excellent | ✅ Suitable |
| Run camera-based object detection | ❌ Not practical on classic UNO | ✅ Excellent |
| Run SLAM or Nav2 | ❌ | ✅ |
| Manage emergency-stop input | ✅ Excellent | ✅, but should not be the only safety layer |
| Host a web dashboard | ⚠️ Limited | ✅ |
| Run machine-learning inference | ❌ | ✅ |
| Maintain precise control loop timing | ✅ Excellent | ⚠️ Depends on operating-system load |
The most reliable pattern is hierarchical control: the computer decides where the robot should go; Arduino decides how to drive the motors safely and consistently.
Arduino’s Role in a Multi-Controller Robot
A classic Arduino UNO has limited memory and processing capacity, but that limitation becomes an advantage when the task is focused. A small firmware program with a 10 ms motor-control loop is easier to reason about than a giant application juggling cameras, networking, and actuator timing.
The “Reflex Layer” Pattern
A low-level Arduino firmware might:
- Receive a target velocity or left/right motor command.
- Read encoder pulses.
- Calculate wheel speed.
- Apply a PID correction.
- Generate PWM output.
- Stop the motors if a command timeout occurs.
- Send telemetry back to the companion computer.
The companion computer might:
- Read camera and LiDAR data.
- Build a map.
- Estimate the robot’s pose.
- Plan a path.
- Send velocity commands.
- Display status and record logs.
This separation reduces software coupling and makes testing easier. You can test the motor controller with a serial terminal before introducing ROS 2, computer vision, or a navigation stack.
Why Not Use Only a Raspberry Pi?
A Raspberry Pi is powerful, but Linux is not normally a hard real-time operating system. Scheduling delays can occur when the computer handles storage, networking, camera processing, or background services. That doesn’t make Raspberry Pi unsuitable for robotics; it simply means timing-critical motor control deserves careful design.
The Raspberry Pi documentation and ROS 2 documentation provide useful foundations, but neither magically turns a general-purpose computer into a dedicated motor controller. An Arduino can fill that gap neatly.
Why Not Use Only Arduino?
A classic UNO has:
- 32 KB flash memory, with some used by the bootloader
- 2 KB SRAM
- 16 MHz clock speed
- Limited storage for large libraries and data
- No built-in Wi-Fi or Bluetooth
Those specifications are perfectly comfortable for line following, obstacle avoidance, encoder feedback, and servo control. They are a poor match for camera-based recognition, modern SLAM, or large neural networks.
For a more powerful Arduino-compatible option, the Arduino Portenta H7 offers substantially more computing capability. For wireless projects, the Arduino UNO R4 WiFi or ESP32 development boards on Amazon can be more suitable than a traditional UNO.
Arduino Robotics Integration Explained
Arduino integration works because the Arduino ecosystem exposes simple, predictable interfaces. A motor driver may need two direction pins and one PWM pin. An encoder may generate pulses on an interrupt-capable pin. An I²C sensor may need only SDA, SCL, power, and ground.
That simplicity is the ecosystem’s superpower. It is also where beginners occasionally discover that “simple wiring” can become a small plate of spaghetti 🍝.
What Counts as a Robotic Platform?
A robotic platform can be:
- A wheled chassis such as the OSOYOO FlexiRover.
- A tracked competition robot such as the Polu Zumo Robot for Arduino.
- A two-board integrated system such as the discontinued Arduino Robot.
- A modular educational system such as Makeblock mBot.
- A ROS 2 mobile robot such as TurtleBot 4.
- A robotic arm, quadruped, humanoid, or custom industrial mechanism.
Arduino can integrate with these platforms if four conditions are met:
- Electrical signals are compatible.
- The controller has enough I/O and processing capacity.
- The software can communicate using a defined protocol.
- The power system can safely supply every component.
Arduino Boards, Shields, and Compatible Ecosystems
| Arduino family | Best integration role | Strengths | Watch-outs |
|---|---|---|---|
| Arduino UNO R3 | Beginner robot controller | Huge library ecosystem, simple pinout | Limited RAM and I/O |
| Arduino UNO R4 Minima | Modern UNO projects | More capable MCU, UNO form factor | Check library and shield compatibility |
| Arduino UNO R4 WiFi | Networked robot | Wi-Fi and wireless features | 3.3 V peripheral considerations |
| Arduino Mega 2560 | Many sensors and servos | Lots of GPIO, serial ports | Larger board; not every shield fits |
| Arduino Nano | Compact embedded controller | Small footprint | Limited pins and power handling |
| Arduino Leonardo | USB HID and ATmega32U4 projects | Native USB capability | Some older libraries assume UNO behavior |
| Arduino Due | Faster 32-bit projects | More processing and I/O | 3.3 V logic; shield compatibility issues |
| Arduino Portenta H7 | Advanced embedded robotics | High performance and connectivity | More complex development and hardware choices |
The Arduino board documentation should be your first compatibility check. Do not rely solely on the phrase “Arduino compatible” printed on a product listing. It may mean code-compatible, physically compatible, or merely inspired by the platform.
Advantages and Limitations of Combining Controllers
Benefits ✅
- Better timing: Arduino can maintain a predictable motor loop.
- Modularity: Replace the vision computer without redesigning the motor firmware.
- Fault isolation: A crashed camera application need not disable a hardware safety timeout.
- Simpler code: Each controller has a narrower job.
- Scalable hardware: Add another Arduino for a robotic arm, gripper, or sensor cluster.
- Educational value: Learners see how embedded systems and high-level robotics software connect.
Drawbacks ❌
- More wiring and connectors.
- Multiple firmware projects to maintain.
- Protocol design becomes essential.
- Debuging crosses hardware and software boundaries.
- Power sequencing can become complicated.
- A poor authority model can produce conflicting commands.
Our team once tested a small rover where both a Raspberry Pi node and Arduino firmware attempted to correct steering. The rover did not navigate; it performed a nervous little argument with itself. The fix was simple: one command source, one actuator owner, and explicit timeout behavior.
A Brief History of Arduino and Open-Source Robotics
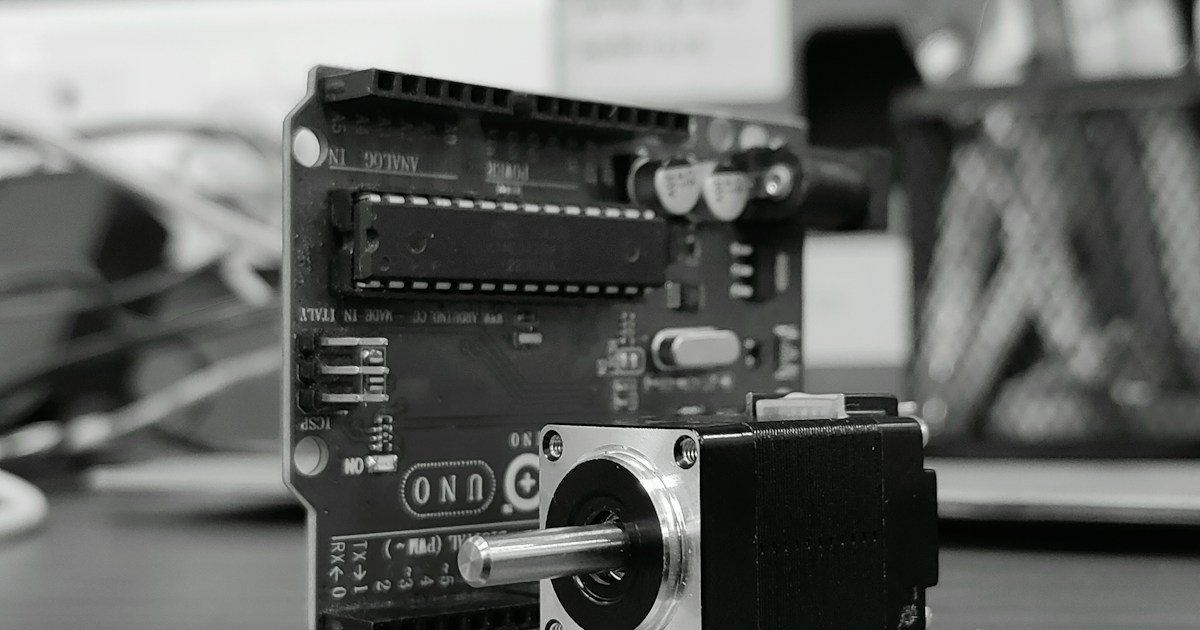
Arduino began as an accessible open-source electronics platform for artists, designers, educators, and makers. Its low barrier to entry helped turn microcontroller programming into a practical, hands-on activity rather than a mysterious basement ritual involving a soldering iron and ancient manuals.
The Arduino open-source hardware philosophy helped create a broad ecosystem of boards, shields, libraries, robot chassis, sensors, and tutorials.
From Arduino UNO Projects to Autonomous Robots
Early Arduino robots commonly used:
- Infrared line sensors
- Ultrasonic distance sensors
- L298N motor drivers
- Hobby servos
- Bluetooth serial modules
- Simple obstacle-avoidance logic
Modern systems add:
- Wheel encoders
- Inertial measurement units
- Time-of-flight sensors
- LiDAR
- ROS 2
- Wireless telemetry
- Edge AI
- Computer vision
The hardware may look more sophisticated, but the integration principle remains familiar: measure, decide, act, and report status.
Why Arduino Remains Popular in Educational and DIY Robotics
Arduino stays popular because:
- The Arduino IDE is easy to install.
- USB programming is straightforward.
- Community examples are abundant.
- Shields and breakout boards reduce wiring complexity.
- C/C++ skills transfer to embedded development.
- The platform encourages experimentation without requiring a full robotics middleware stack.
The Arduino Project Hub is especially useful for seeing how real builders combine boards, sensors, and actuators.
10 Robotic Platforms That Work With Arduino
The following platforms show ten different integration styles, from a tiny sumo robot to industrial communication networks.
1. Raspberry Pi Robots and Companion Computers
A Raspberry Pi can handle:
- Camera streaming
- Object detection
- Web control
- Mapping
- ROS 2 nodes
- Data logging
- Speech interfaces
Arduino can handle:
- Motor PWM
- Encoder capture
- Servo timing
- Battery monitoring
- Emergency-stop logic
- Low-level sensor polling
A Raspberry Pi 5 paired with an Arduino UNO or Mega is a practical architecture for an autonomous rover.
Integration options:
| Link | Advantages | Limitations |
|---|---|---|
| USB serial | Easy setup and debugging | Cable required |
| UART GPIO | Low overhead | Voltage-level care required |
| I²C | Multiple peripherals | Shorter, noise-sensitive bus |
| SPI | High speed | More wiring and chip-select management |
| Wi-Fi | Flexible remote architecture | Network latency and security |
Recommended division: Raspberry Pi runs ROS 2 or the user interface; Arduino owns motors and fast sensors.
2. ROS and ROS 2 Robot Systems
ROS 2 is not an operating system in the conventional desktop sense. It is a framework for communication, tools, and robotics software components.
Arduino can participate through:
- micro-ROS
- A serial protocol connected to a ROS 2 node
- A USB serial bridge
- A custom Arduino library and message format
A ROS 2 computer might publish /cmd_vel, while Arduino receives target wheel speeds. Arduino can return:
/wheel_states/encoder_ticks/battery_state/joint_states- Diagnostic messages
The key is not merely “connecting Arduino to ROS.” The key is defining message ownership, timing, units, and failure behavior.
3. LEGO Mindstorms and SPIKE Prime Builds
LEGO robotics platforms use their own hubs and software ecosystems, but Arduino can work alongside them in experimental builds through:
- Bluetooth communication
- Custom motor and sensor modules
- Mechanical integration
- External Arduino-controlled mechanisms
Compatibility depends heavily on the hub generation and firmware. Official LEGO systems are not automatically Arduino-compatible, so verify electrical and software details before connecting anything.
For a cleaner Arduino-first educational route, consider an Arduino-compatible chassis such as the Polu Zumo or an Arduino robot kit search on Amazon.
4. Makeblock mBot and Makeblock MegaPi
Makeblock platforms combine modular mechanics, motor drivers, sensors, and programming tools. Some Makeblock controllers are Arduino-compatible or based on Arduino-like development concepts.
Arduino integration may involve:
- Replacing the controller
- Adding custom sensor boards
- Connecting external actuators
- Using serial or wireless communication
- Building a custom extension around the platform
Check the exact controller model. “mBot,” “mBot2,” and MegaPi are not interchangeable from a pinout or firmware perspective.
5. VEX Robotics Platforms
VEX Robotics uses its own controllers, motors, and software tools. Arduino can integrate as an auxiliary controller for demonstrations or custom sensors, but direct replacement of the VEX brain may not be supported or may violate competition rules.
Possible uses include:
- A custom environmental sensor
- An independent telemetry board
- An experimental vision or communication module
- A non-competition classroom prototype
For regulated competitions, always follow the current official rules rather than assuming that technically possible means competition-legal.
6. TurtleBot Research Robots
TurtleBot platforms commonly use a single-board computer and ROS 2 for navigation. Arduino can supplement a TurtleBot with:
- Custom grippers
- Additional bumper sensors
- External motor controllers
- Battery monitoring
- Experimental actuators
However, replacing core TurtleBot drive electronics requires careful attention to ROS 2 interfaces, odometry, wheel geometry, encoder resolution, and safety behavior.
7. NVIDIA Jetson Autonomous Robots
NVIDIA Jetson boards are well suited to:
- Object detection
- Deep-learning inference
- Visual tracking
- Stereo vision
- GPU-accelerated robotics applications
Arduino remains useful as the hardware interface layer. A Jetson can send target velocities while Arduino converts them into closed-loop wheel commands.
This arrangement is especially attractive when a robot needs artificial intelligence and robotics without forcing a microcontroller to process camera frames.
8. Polu Robot Platforms
Polu offers several excellent examples of Arduino-centered robotics.
The Polu Zumo Robot for Arduino uses an Arduino-compatible controller as its main computer. Its integrated motor drivers, reflectance sensor array, buzer, and inertial sensors make it a compact platform for sumo, line following, and embedded control.
The older Arduino Robot demonstrates a different architecture: two independently programmable ATmega32U4 boards connected by a 10-pin link. Polu’s description calls it “the first official Arduino on wheels,” while also emphasizing that the Control Board handles higher-level decisions and the Motor Board focuses on actuation.
These examples show two valid designs:
- One controller with integrated peripherals
- Two coordinated controllers with separate responsibilities
9. DFRobot and SunFounder Robot Kits
DFRobot and SunFounder offer Arduino-compatible motor drivers, sensor modules, robot cars, arms, and educational kits.
They are useful when you want:
- A documented pin map
- Modular sensors
- Example Arduino sketches
- Expandable chassis designs
- Beginner-friendly tutorials
Always inspect the motor-driver current rating, battery connector, logic voltage, and library maintenance before building a serious autonomous system.
10. Industrial PLC, CAN Bus, and Collaborative Robot Systems
Arduino can connect to industrial equipment through:
- CAN bus
- RS-485
- Modbus RTU
- Ethernet modules
- Digital I/O interfaces
But Arduino is not automatically an industrial safety controller. Industrial robots and collaborative systems require certified safety systems, guarded operating zones, emergency stops, and validated risk assessments.
Use Arduino for:
- Prototyping
- Non-safety monitoring
- Test fixtures
- Educational demonstrators
- Data collection
Do not use a hobby microcontroller as the sole safety mechanism for machinery capable of injuring people.
Common Arduino Integration Architectures
Arduino as the Main Robot Controller
This is the simplest design:
Sensors → Arduino → Motor Driver → Motors
 ↓
 Servos / LEDs / Buzzer
``

Use it for:

- Line followers
- Obstacle-avoidance cars
- Small robot arms
- Sumo robots
- Sensor experiments

A [Polu Zumo](https://www.polu.com/product/2510) is a strong example because the controller, motors, sensors, and expansion points are designed to work together.

### Arduino as a Real-Time Motor and Sensor Controller

```text
Camera / LiDAR → Raspberry Pi or Jetson
 ↓
 UART / USB / CAN
 ↓
 Arduino
 ↓
 Motor Driver and Encoders
``

This is our preferred architecture for many mobile robots. The high-level computer sends commands such as:

```text
linear_velocity = 0.25 m/s
angular_velocity = 0.10 rad/s
``

Arduino converts those values into wheel targets according to the robot’s wheel separation and radius.

### Arduino as a Sensor Hub or Peripheral Module

Arduino can gather data from several sensors and forward a compact message:

```text
Arduino → {temperature, battery_voltage, bumper_state, encoder_ticks}
``

This is useful when:

- Sensors are physically far from the main computer.
- A sensor requires precise timing.
- GPIO expansion is needed.
- The main computer should remain electrically isolated from noisy hardware.

### Distributed Arduino Controllers for Modular Robots

A larger robot might use:

| Controller | Responsibility |
|---|---|
| Arduino Mega | Main torso sensors and servos |
| Arduino Nano | Left arm |
| Arduino Nano | Right arm |
| Arduino-compatible CAN node | Wheel module |
| Raspberry Pi | Planning and user interface |

Distributed systems scale well, but the communication protocol must identify each node and define what happens if a node disappears.

## Communication Protocols for Multi-Platform Robots

### Serial UART and USB Communication

UART is often the easiest starting point. A typical message might look like:

```text
<CMD,0.25,0.10,173>
``

Where:

- `CMD` identifies the message type.
- `0.25` is linear velocity.
- `0.10` is angular velocity.
- `173` is a sequence number.

USB serial provides the same conceptual communication through a convenient cable. It is excellent during development because a terminal can display raw messages.

**Avoid sending unframed text such as:**

```text
forward
``

Use:

- Start and end markers
- Message types
- Length or checksum
- Sequence numbers
- Timeouts
- Unit definitions

### I2C for Sensors and Short-Distance Controller Links

I²C is useful for:

- IMUs
- OLED displays
- GPIO expanders
- EEPROM
- Short-distance microcontroller communication

The [NXP I²C specification](https://www.nxp.com/docs/en/user-guide/UM10204.pdf) explains the bus’s addressing and electrical behavior.

Watch for:

- Duplicate device addresses
- Excessive cable length
- Missing pull-up resistors
- Mixed 3.3 V and 5 V logic
- Bus lockups after a peripheral resets

### SPI for Fast Peripheral Data

SPI is faster than I²C and useful for:

- Displays
- SD cards
- Fast ADCs
- Radio modules
- Inertial sensors

Its trade-off is additional wiring and chip-select management. A robot with several SPI devices needs a clean pin map and a plan for device initialization.

### Bluetooth Classic and Bluetooth Low Energy

Bluetooth is convenient for:

- Phone-controlled robots
- Gamepad interfaces
- Configuration tools
- Short-range telemetry

Classic serial Bluetooth modules such as HC-05 are beginner-friendly, while BLE is better suited to modern mobile applications and low-power devices.

For wireless microcontroller robotics, an [ESP32 development board](https://www.amazon.com/s?k=ESP32+robotics+development+board&tag=bestbrands0a9-20) is compelling because it combines microcontroller control with Wi-Fi and Bluetooth.

### Wi-Fi, MQTT, and WebSocket Robot Control

Wi-Fi enables:

- Remote dashboards
- Video streaming
- Cloud telemetry
- Robot fleet management
- Browser-based control

MQTT is useful for telemetry and command topics, while WebSockets work well for interactive dashboards.

Do not let a Wi-Fi connection become your only safety mechanism. If communication stops, the robot should stop locally through a watchdog.

### CAN Bus for Reliable Distributed Robotics

CAN is well suited to:

- Multiple motor modules
- Longish wiring runs
- Noisy electrical environments
- Distributed actuator nodes

Each message carries an identifier, and nodes can prioritize traffic. Arduino-compatible CAN transceivers and boards are widely available, but correct termination and wiring matter.

The [CAN specification overview from Bosch](https://www.bosch-semiconductors.com/products/ip-modules/can-ip-modules/) is a useful technical reference.

### RS-485 for Long-Cable Industrial Applications

RS-485 supports differential signaling and multiple devices on a bus. Combined with Modbus RTU, it is common industrial equipment.

Arduino can act as:

- A Modbus sensor
- A test controller
- A data logger
- A gateway between sensors and a computer

Use proper transceivers, termination, biasing, and cable practices. A breadboard jumper wire is not an industrial bus strategy, no matter how optimistic the jumper wire looks.

## Arduino With Raspberry Pi, ESP32, and Single-Board Computers

### Dividing High-Level and Low-Level Robot Tasks

A useful decision table:

| Function | Arduino UNO | ESP32 | Raspberry Pi 5 |
|---|---:|---:|---:|
| GPIO control | ✅ | ✅ | ✅, with care |
| Hardware PWM | ✅ | ✅ | Limited compared with MCU |
| Wi-Fi | ❌ | ✅ | ✅ |
| Bluetooth | ❌ | ✅ | ✅ |
| Linux software | ❌ | ❌ | ✅ |
| Camera AI | ❌ | Limited | ✅ |
| Precise encoder handling | ✅ | ✅ | Possible, but software-dependent |
| ROS 2 host | ❌ | Limited/micro-ROS | ✅ |

### Arduino-to-Raspberry Pi Serial Messaging

#### Step 1: Define the contract

Before writing code, specify:

- Command names
- Units
- Valid ranges
- Update frequency
- Reply messages
- Error codes
- Timeout behavior

#### Step 2: Choose the physical connection

USB is simplest. UART GPIO can reduce cable clutter, but Raspberry Pi GPIO is 3.3 V logic. Do not connect a 5 V Arduino TX line directly to a Raspberry Pi RX pin without suitable level shifting.

#### Step 3: Frame the messages

A robust binary packet might contain:

| Field | Purpose |
|---|---|
| Header | Identifies packet start |
| Version | Allows protocol evolution |
| Type | Command or telemetry |
| Length | Defines payload size |
| Payload | Values and flags |
| CRC | Detects corruption |

#### Step 4: Add a heartbeat

The Pi sends a heartbeat at a fixed interval. Arduino records the last valid timestamp. If the interval expires, Arduino commands a safe stop.

### Using ESP32 for Wireless Arduino-Compatible Robotics

The ESP32 is often described as a natural next step from the UNO because it adds Wi-Fi, Bluetooth, more processing power, and more flexible communication options. The [Espressif ESP32 documentation](https://docs.espressif.com/projects/esp-idf/en/latest/esp32/) confirms its broad connectivity and peripheral support.

The first video’s perspective is useful here: it compares ESP32 and UNO performance, demonstrates setup in the Arduino IDE, and highlights Wi-Fi modes, Bluetooth, UART, I²C, SPI, and ESP-NOW. You can revisit that practical comparison in the [featured video](#featured-video).

Use ESP32 when you need:

- Wireless robot control
- ESP-NOW communication between robots
- Multiple UART or SPI peripherals
- More demanding sensor processing
- Compact connected hardware

Remember that ESP32 GPIO is generally **3.3 V logic**. A motor driver that accepts 3.3 V input is preferable; otherwise use level shifting.

### When to Choose an Arduino Nano, Mega, Uno, or Portenta

- Choose **UNO** for beginner projects and standard shields.
- Choose **Nano** when space matters.
- Choose **Mega 2560** when you need many servos, sensors, or serial ports.
- Choose **UNO R4 WiFi** when you want a familiar form factor with modern connectivity.
- Choose **Portenta H7** when performance, networking, and advanced embedded processing justify greater complexity.
- Choose **ESP32** when wireless connectivity is central.

## Arduino and ROS 2 Integration

### micro-ROS and Microcontroller-Based Robot Nodes

[micro-ROS](https://micro.ros.org/) brings ROS 2 concepts to microcontrollers. It can let a microcontroller participate in a ROS graph through a micro-ROS client and an agent running on a companion computer.

This approach is powerful for:

- Multiple embedded nodes
- Standardized topics and services
- Sensor publishing
- Actuator commands
- Distributed robot architectures

It also requires more setup than a simple serial protocol. For a first robot, begin with a clear serial bridge; migrate to micro-ROS when the project benefits from ROS-native communication.

### roserial Alternatives and Serial Bridges

A serial bridge is often easier to understand:

```text
ROS 2 Node → Serial Driver → Arduino Firmware → Motor Driver
``

The ROS 2 node converts messages into a compact protocol. Arduino does not need to understand every ROS concept; it only needs a reliable embedded contract.

This architecture is easier to debug with a terminal and logic analyzer. The trade-off is that you must maintain your own message definitions.

### Publishing Sensor Data and Receiving Velocity Commands

A typical mobile robot flow:

1. ROS 2 publishes a velocity target.
2. Arduino receives linear and angular velocity.
3. Arduino converts them to left and right wheel targets.
4. Encoder feedback closes the motor loop.
5. Arduino publishes measured wheel speeds.
6. ROS 2 estimates odometry and performs navigation.

For a differential-drive robot:

```text
left_wheel_velocity = v - (ω × wheel_separation / 2)
right_wheel_velocity = v + (ω × wheel_separation / 2)
``

Use consistent units. Mixing centimeters per second, encoder ticks, and radians per second without explicit conversion is a reliable way to make a robot behave like it has recently discovered interpretive dance.

### Odometry, Encoders, and Real-Time Control Lops

Encoders provide wheel rotation data. Arduino can count pulses using interrupts or hardware peripherals and calculate:

- Wheel speed
- Distance traveled
- Direction
- Slip indicators
- Estimated odometry

Odometry drifts over time, so ROS 2 may combine it with IMU, LiDAR, or visual data. The [ROS 2 navigation documentation](https://navigation.ros.org/) explains how navigation components use sensor and transform data.

### ROS 2 Compatibility Considerations

Check:

- ROS 2 distribution
- micro-ROS support
- MCU architecture
- Available RAM and flash
- Transport method
- Message definitions
- Clock synchronization
- Real-time expectations

The Arduino UNO is excellent for low-level control but may be too constrained for a complex ROS-native client. A more capable STM32, RP2040, ESP32, or Arduino Portenta board may be a better fit.

## Motors, Sensors, and Actuators: Hardware Compatibility

### DC Motors, Steper Motors, and Servo Motors

| Actuator | Arduino directly? | Required hardware |
|---|---:|---|
| Small LED | ✅ | Current-limiting resistor |
| Hobby servo | ⚠️ Signal only | Separate 5–6 V supply recommended |
| DC gearmotor | ❌ | H-bridge motor driver |
| Steper motor | ❌ | Steper driver |
| Solenoid | ❌ | MOSFET or relay driver and flyback protection |
| Brushless motor | ❌ | ESC |

The Arduino pin provides a control signal, not a motor power supply. Connecting a motor directly to an I/O pin can damage the MCU.

### Motor Drivers and H-Bridge Selection

Consider:

- Continuous current
- Startup or stall current
- Motor voltage
- Logic voltage
- Heat dissipation
- Current sensing
- Braking behavior
- Reverse-polarity protection

The [Polu DRV8835 carrier](https://www.polu.com/product/2135) is suited to small low-voltage motors. The [TB6612FNG](https://www.sparkfun.com/products/14450) is common in maker robots. The L298N is popular and inexpensive in educational projects, but it is older and less electrically efficient than modern MOSFET-based drivers.

### Encoders, IMUs, LiDAR, Ultrasonic Sensors, and Cameras

Arduino is strong at reading:

- Quadrature encoders
- Hall sensors
- Ultrasonic echo timing
- Reflectance arrays
- Analog distance sensors
- IMUs over I²C or SPI

A companion computer is better suited to:

- Camera frames
- Point clouds
- Image segmentation
- Object recognition
- Large sensor-fusion pipelines

The [Adafruit sensor ecosystem](https://learn.adafruit.com/) and [SparkFun tutorials](https://learn.sparkfun.com/) provide practical wiring and code references.

### Power Supplies, Logic Levels, and Voltage Regulation

A robust robot typically has separate power paths:

```text
Battery
 ├── Motor regulator / motor driver → Motors
 ├── 5 V regulator → Arduino / servos / peripherals
 └── 5 V or USB-C regulator → Raspberry Pi
``

Use a common ground where required, but do not assume that one regulator can safely feed every load. Motors create surges and electrical noise. Servos can also draw substantial current when stalled.

The OSOYOO FlexiRover example uses a 18650 battery holder and a separate motor driver connected to an Arduino-compatible board. Its documentation warns users to observe polarity and disconnect batteries during code upload, which is sensible practice for a modular rover.

### Grounding, Noise, and Electrical Protection

Add:

- Bulk capacitors near motor-driver supply pins
- Small ceramic bypass capacitors near logic ICs
- Flyback protection where required
- Twisted motor wires
- Separate motor and logic routing
- Fuse or resetable protection
- Proper connectors
- Strain relief

The [Polu electronics application notes](https://www.polu.com/docs/0J15) offer useful guidance on motor noise and power design.

## Software, Libraries, and Firmware Design

### Arduino IDE, PlatformIO, and Board Support Packages

The [Arduino IDE](https://www.arduino.cc/en/software/) is ideal for:

- First-time setup
- Small projects
- Official examples
- Fast board testing

[PlatformIO](https://platformio.org/) becomes attractive when you need:

- Multiple environments
- Dependency management
- Unit tests
- Structured source trees
- Continuous integration
- Reproducible builds

### Choosing Reliable Arduino Libraries

Evaluate a library by checking:

- Supported boards
- Recent maintenance
- Documentation quality
- Example sketches
- License
- Issue history
- Memory usage
- Interrupt behavior

A library that works perfectly on an UNO may fail on a Mega, Due, ESP32, or Portenta because of timer assignments, pin mappings, architecture differences, or assumptions about AVR registers.

### Message Formats, Data Rates, and Command Protocols

A useful robot protocol should define:

- Data types
- Units
- Endianness
- Valid ranges
- Maximum packet size
- Retry behavior
- Checksum or CRC
- Versioning
- Safety timeout

For a beginner system, newline-delimited JSON is readable but relatively heavy:

```json
{"cmd":"drive","left":120,"right":125}
``

For a compact embedded link, a binary packet is more efficient but harder to inspect. A practical compromise is framed CSV or key-value text during development, followed by binary messages when bandwidth or timing requires it.

### Finite-State Machines for Robot Behaviors

Avoid scattering behavior across dozens of `if` statements. Use named states:

```text
IDLE
SEARCHING
APPROACHING
LINE_FOLLOWING
OBSTACLE_STOP
LOW_BATERY
EMERGENCY_STOP
``

Each state should define:

- Entry action
- Allowed transitions
- Motor behavior
- Sensor conditions
- Timeout behavior

This makes robot behavior easier to test and explain.

### Real-Time Timing, Interrupts, and Watchdogs

Use:

- `millis()` instead of long blocking delays where possible
- Hardware timers carefully
- Interrupts for high-rate encoder signals
- Watchdog timers for fault recovery
- Fixed-rate control loops
- Non-blocking communication

An Arduino that spends two seconds inside `delay()` cannot respond quickly to a bumper switch. That might be acceptable for a toy demonstration; it is not acceptable for a moving robot near people.

### Firmware Updates and Remote Maintenance

Plan updates before the robot is sealed inside its chassis. Options include:

- USB bootloader
- Serial bootloader
- OTA updates on ESP32 or networked boards
- Removable controller modules
- Versioned firmware packages

Add a firmware version command so the companion computer knows what it is talking to.

## Practical Integration Guide: Connect Arduino to Another Robot Platform

### Step 1: Define Control, Sensing, and Compute Requirements

Write down:

- Number of motors
- Motor voltage and stall current
- Encoder type and pulse rate
- Sensor count
- Required control-loop frequency
- Wireless requirements
- Camera or AI requirements
- Battery voltage
- Safety functions

This prevents the classic mistake of selecting a controller based only on how impressive its product photo looks.

### Step 2: Select the Arduino Board and Companion Platform

Example choices:

| Project | Arduino-side choice | Companion platform |
|---|---|---|
| Line follower | UNO or Nano | None |
| Four-wheel rover | Mega or UNO R4 | Optional ESP32/Raspberry Pi |
| Vision rover | Mega, Nano, or Portenta | Raspberry Pi 5 or Jetson |
| ROS 2 mobile base | Portenta, ESP32, STM32-based board | Raspberry Pi or Jetson |
| Multi-servo arm | Mega or Portenta | Raspberry Pi for vision |

For a modular beginner rover, the [OSOYOO FlexiRover](https://osoyoo.com/2024/06/12/osoyoo-universal-robot-platform-for-uno/) supports UNO, Mega, Due, and several Raspberry Pi mounting options. That flexibility is useful, but verify the exact motor-driver pin mapping before writing code.

### Step 3: Map Signals, Voltage Levels, and Data Packets

Create a table before wiring:

| Signal | Source | Destination | Voltage | Direction |
|---|---|---|---:|---|
| Motor PWM left | Arduino D9 | Driver ENA | 5 V or 3.3 V | Output |
| Motor direction 1 | Arduino D12 | Driver IN1 | Logic-level | Output |
| Encoder A | Encoder | Arduino interrupt pin | Sensor-dependent | Input |
| Telemetry TX | Arduino | Raspberry Pi RX | Must be compatible | Output |
| Emergency stop | Switch | Arduino input | Defined by pull-up/down | Input |

The OSOYOO Model X example maps ENA to D9, IN1 to D12, IN2 to D11, IN3 to D7, IN4 to D8, and ENB to D6. Treat those mappings as platform-specific rather than universal Arduino conventions.

### Step 4: Build and Test the Communication Link

Test in this order:

1. Confirm board detection over USB.
2. Upload a blink or serial test.
3. Send a fixed command.
4. Verify the Arduino replies.
5. Add checksum or framing.
6. Disconnect and reconnect the link.
7. Confirm timeout behavior.
8. Only then connect motor power.

This sequence feels slower for about ten minutes and saves several hours of “why did the robot suddenly reverse?” debugging.

### Step 5: Integrate Motors, Sensors, and Safety Controls

Add one subsystem at a time:

1. Motor driver with wheels lifted.
2. One motor at low duty cycle.
3. Both motors with direction tests.
4. Encoder feedback.
5. Bumper or emergency-stop input.
6. Battery monitoring.
7. Companion-computer commands.
8. Autonomous behavior.

Never begin with full-speed autonomous mode. Robots are enthusiastic, powerful, and emotionally indifferent to your furniture.

### Step 6: Tune Control Lops and Validate Robot Behavior

For PID motor control:

1. Start with proportional gain only.
2. Increase until response is quick but stable.
3. Add integral gain to reduce steady-state error.
4. Add derivative gain carefully if overshoot appears.
5. Test forward, reverse, turning, and battery-voltage changes.
6. Record telemetry.
7. Validate under realistic load.

Document:

- Wheel diameter
- Gear ratio
- Encoder counts per revolution
- Track width
- Maximum velocity
- Control frequency
- Battery voltage range

## Example Projects and Integration Patterns

### Arduino and Raspberry Pi Line-Following Robot

**Arduino responsibilities:**

- Read reflectance sensors
- Calculate line position
- Control motor PWM
- Stop on lost-line timeout

**Raspberry Pi responsibilities:**

- Display camera footage
- Log sensor data
- Provide remote configuration
- Store performance results

This hybrid approach keeps the line-following loop responsive while adding a friendly web interface.

### ROS 2 Mobile Robot With Arduino Motor Control

Architecture:

```text
Camera / LiDAR
 ↓
Raspberry Pi or Jetson
 ↓ ROS 2
Navigation / Localization
 ↓
Motor bridge node
 ↓ USB serial / CAN
Arduino
 ↓
Encoder PID
 ↓
Motor driver
``

This is a strong path for learners moving from basic [robotics](https://roboticcoding.com/category/robotics/) into navigation and [robotic simulations](https://roboticcoding.com/category/robotic-simulations/).

### Arduino-Based Robotic Arm With a Vision Computer

Arduino can control:

- Servo pulse timing
- Limit switches
- Gripper current sensing
- Joint calibration
- Emergency stop

Raspberry Pi or Jetson can handle:

- Object detection
- Inverse-kinematics planning
- User interface
- Camera calibration

Keep hard limits and emergency behavior local to the Arduino or dedicated safety controller.

### Bluetooth-Controled Arduino Rover

A simple Bluetooth rover needs:

- Arduino or ESP32
- Dual-channel motor driver
- Two or four DC motors
- Battery and regulator
- Bluetooth controller or phone app

Add a command timeout. If the phone walks out of range, the rover should stop—not continue its heroic expedition under the sofa.

### Multi-Arduino Quadruped or Humanoid Robot

Multiple controllers can distribute servo loads and sensor timing. Use:

- One coordinator
- Unique node IDs
- Heartbeats
- Synchronized motion commands
- Shared emergency-stop signal
- Defined startup order

A distributed robot should degrade safely when one node fails. “One leg stopped responding” should not translate into “the robot attempts an ambitious faceplant.”

## Benefits and Drawbacks of Arduino Robot Integration

### Why Arduino Is Excellent for Sensor and Motor Control

Arduino offers:

- Fast startup
- Predictable GPIO behavior
- Low power consumption
- Large educational ecosystem
- Extensive sensor support
- Easy USB programming
- Direct hardware access
- Low software overhead

For a motor-control board, these traits are more valuable than running a full desktop operating system.

### Where Arduino Falls Short

Arduino is not ideal for:

- High-resolution image processing
- Large neural networks
- Complex 3D mapping
- Heavy encryption workloads
- Large databases
- Multi-camera perception
- Sophisticated user interfaces

You can sometimes add a co-processor or wireless module, but eventually the architecture is telling you to use a companion computer.

### When a Single-Board Computer Is the Better Choice

Use a Raspberry Pi or Jetson alone when:

- Motor control is delegated to a smart driver.
- The robot is slow and timing requirements are modest.
- You need Linux applications immediately.
- The platform already has integrated motor electronics.
- You are protyping perception before optimizing low-level control.

### When an Industrial Controller or PLC Makes More Sense

Choose an industrial controller when:

- The system operates around workers.
- Safety certification is required.
- Uptime and diagnostics matter.
- Electrical noise is severe.
- The equipment must meet regulatory standards.
- Maintenance staff expect PLC tooling.

Arduino is brilliant for prototypes and educational machines. It is not a substitute for a certified safety architecture.

## Safety, Reliability, and Security Considerations

### Emergency Stops and Fail-Safe Motor Behavior

An emergency stop should interrupt actuator power or command a validated safe state. Software alone may not be sufficient.

Recommended layers:

- Physical emergency-stop circuit
- Motor-driver disable input
- Arduino watchdog
- Communication timeout
- Software state machine
- Current or thermal monitoring

### Preventing Runaway Robots and Communication Failures

Implement:

- Command expiry timestamps
- Maximum velocity limits
- Startup-disabled motor state
- Explicit enable command
- Battery-low shutdown
- Sensor plausibility checks
- Watchdog reset logging

A robot should not move simply because it rebooted and found an old command in memory.

### Battery, Thermal, and Mechanical Safety

Check:

- Battery chemistry
- Fuse rating
- Charger compatibility
- Cell polarity
- Motor stall current
- Regulator heat
- Wire gauge
- Connector ratings
- Chassis fasteners
- Exposed gears and pinch points

The OSOYOO documentation’s warning about correct 18650 polarity is especially relevant. Lithium-ion cells demand respect, not improvisation.

### Securing Wireless Robot Commands

For Wi-Fi or Bluetooth robots:

- Authenticate control clients.
- Avoid hard-coded public passwords.
- Use encrypted transport where practical.
- Separate firmware-update access from driving access.
- Reject malformed packets.
- Log command sources.
- Require a local enable before motion.

A robot that accepts unauthenticated drive commands is not a clever IoT device; it is a remotely steerable liability.

## Troubleshooting Arduino Multi-Platform Robotics

### Serial Communication Problems

Check:

- Baud rate
- TX-to-RX crossover
- Shared ground
- Line endings
- Voltage levels
- Port selection
- USB cable quality
- Message framing

Use a serial terminal before blaming ROS 2, the motor driver, the moon, or Mercury retrograde.

### Incompatible Voltage and Logic Levels

Typical hazards include:

- 5 V Arduino TX into 3.3 V Raspberry Pi RX
- 5 V sensor output into ESP32 GPIO
- 3.3 V signal not recognized by an older 5 V peripheral
- Servo power routed through a weak logic regulator

Use a bidirectional level shifter for buses such as I²C when required, and a suitable divider or translator for one-way signals.

### Motor Noise, Resets, and Brownouts

Symptoms:

- Arduino resets when motors start
- Raspberry Pi disconnects under acceleration
- Sensor readings become chaotic
- USB serial disappears
- Motors twitch during startup

Solutions:

- Separate motor and logic regulators.
- Add bulk capacitance.
- Improve grounding.
- Shorten high-current paths.
- Add suppression where appropriate.
- Use a regulator with adequate peak current.
- Measure voltage during motor startup.

### Latency, Packet Loss, and Synchronization

Measure rather than guess:

- Command-to-motion latency
- Telemetry frequency
- Packet loss
- Encoder update rate
- Control-loop jitter
- Wi-Fi reconnect time

A robot that feels “sluggish” may have a slow control loop, excessive filtering, a saturated motor driver, or a wireless protocol designed more for chat messages than motion control.

### Library Conflicts and Firmware Bugs

When a project breaks after adding a library:

1. Reproduce the issue with the smallest sketch.
2. Check timer conflicts.
3. Check interrupt usage.
4. Check memory consumption.
5. Confirm board architecture.
6. Inspect pin definitions.
7. Test the sensor independently.
8. Lock known-good library versions.

The [Arduino Language Reference](https://docs.arduino.cc/language-reference/) and official board documentation are more trustworthy than a copied code fragment with no provenance.

## Arduino Integration Comparison: Platforms, Protocols, and Use Cases

### Best Platform for Beginners

**Recommendation: Arduino UNO R3 or UNO R4 with a simple motor-driver chassis.**

A platform such as the [OSOYOO FlexiRover](https://osoyoo.com/2024/06/12/osoyoo-universal-robot-platform-for-uno/) makes wiring and mechanical expansion approachable. The [Polu Zumo](https://www.polu.com/product/2510) is better for compact, polished competition-style experiments.

### Best Platform for ROS-Based Research

**Recommendation: Raspberry Pi or Jetson plus an Arduino-compatible motor controller.**

This separates Linux and ROS 2 workloads from timing-critical motor control. Use micro-ROS when standard ROS 2 integration outweighs the additional setup.

### Best Platform for Computer Vision

**Recommendation: NVIDIA Jetson or Raspberry Pi 5 plus Arduino or ESP32.**

Jetson is the stronger choice for demanding AI workloads. Raspberry Pi is attractive for lighter vision, web control, and educational projects.

### Best Platform for Wireless Projects

**Recommendation: ESP32 or Arduino UNO R4 WiFi.**

The ESP32 offers substantial wireless flexibility, while UNO R4 WiFi provides a familiar Arduino development experience. Confirm logic voltage before attaching legacy shields.

### Best Platform for Industrial Robotics

**Recommendation: Certified industrial controllers, with Arduino limited to non-safety protyping or auxiliary monitoring.**

Arduino may be a useful test tool, but it should not replace validated safety hardware.

## Advanced Arduino Robotics Applications

### Autonomous Navigation and Sensor Fusion

Arduino can provide:

- Wheel encoder data
- IMU samples
- Bumper states
- Range sensor readings
- Battery telemetry

A companion computer can combine those inputs with LiDAR, camera, and map data. This is a natural bridge between embedded control and [robotic simulations](https://roboticcoding.com/category/robotic-simulations/).

### PID Motor Control and Trajectory Tracking

Closed-loop control improves:

- Straight-line driving
- Turning accuracy
- Speed consistency
- Repeatable trajectories
- Load compensation

Arduino is well suited to this because its control loop can run at a fixed interval with low jitter.

### Swarm Robotics and Inter-Robot Communication

Arduino-class nodes can support small robot swarms using:

- ESP-NOW
- 2.4 GHz radio modules
- Bluetooth mesh
- Wi-Fi UDP
- CAN for wired systems

Swarm algorithms require more than broadcasting “go left.” They need identity, timing, collision avoidance, and graceful loss of communication.

### Edge AI and Machine Learning Assistants

Classic UNO boards are not intended for substantial AI. However:

- ESP32 can perform modest edge inference.
- Arduino Nicla and Portenta families support more advanced embedded workloads.
- Raspberry Pi and Jetson can run heavier models.
- Arduino can execute the resulting actuator commands safely.

This layered approach lets [artificial intelligence](https://roboticcoding.com/category/artificial-intelligence/) influence behavior without giving a neural network unrestricted control over power electronics.

### Teleoperation, Digital Twins, and Remote Robotics

A companion computer can expose robot state to:

- A browser dashboard
- A simulation environment
- A remote operator
- A digital-twin model
- A logging service

Arduino provides trustworthy low-level telemetry while the high-level application visualizes and analyzes it. Keep motion limits and emergency stop local.

## Essential Tools and Components for Arduino Integration

### Logic-Level Converters and Communication Adapters

Useful components include:

- 5 V-to-3.3 V level shifters
- USB-to-UART adapters
- CAN transceivers
- RS-485 modules
- I²C isolators
- USB hubs
- JST, Dupont, and locking connectors

### Motor Drivers, Encoders, and Power Modules

Look for:

- Current-rated H-bridges
- Encoder-ready gearmotors
- Buck converters
- Battery-management modules
- Fuse holders
- Power distribution boards
- Emergency-stop switches

👉 **CHECK PRICE on:**

- **Motor-control hardware:** [Polu motor drivers on Amazon](https://www.amazon.com/s?k=Polu+motor+driver&tag=bestbrands0a9-20) | [Polu Official Website](https://www.polu.com/category/115/motor-controllers)
- **Arduino boards:** [Arduino UNO boards on Amazon](https://www.amazon.com/s?k=Arduino+UNO+R4&tag=bestbrands0a9-20) | [Arduino Official Store](https://store.arduino.cc/)
- **ESP32 boards:** [ESP32 development boards on Amazon](https://www.amazon.com/s?k=ESP32+development+board&tag=bestbrands0a9-20&tag=bestbrands0a9-20) | [Espressif Official Website](https://www.espressif.com/en/products/socs/esp32)
- **Raspberry Pi computers:** [Raspberry Pi boards on Amazon](https://www.amazon.com/s?k=Raspberry+Pi+5&tag=bestbrands0a9-20&tag=bestbrands0a9-20) | [Raspberry Pi Official Website](https://www.raspberrypi.com/products/raspberry-pi-5/)

### Debuging Tools, Multimeters, and Logic Analyzers

Our minimum debugging kit includes:

- Digital multimeter
- USB power meter
- Logic analyzer
- Oscilloscope, if available
- Current meter
- Spare jumper wires
- Known-good USB cables
- Notebook for pin maps and measurements

A logic analyzer can reveal whether the Arduino is transmitting correctly, whether packets are malformed, and whether timing is drifting. It is often more revealing than staring at the robot while saying, “Come on, buddy.”

### Recommended Arduino-Compatible Robot Kits

- **Polu Zumo Robot for Arduino:** compact, documented, and excellent for line following and sumo.
- **OSOYOO FlexiRover:** roomy, modular, and suitable for UNO, Mega, Due, Raspberry Pi, and custom accessories.
- **Arduino Robot:** historically important two-controller design, useful for understanding separated control and motor boards.
- **DFRobot and SunFounder kits:** broad educational range with sensors and example projects.
- **Makeblock platforms:** modular mechanical systems with varied controller support.

## Learning Resources and Robotics Communities

### Official Arduino Documentation

Start with:

- [Arduino Documentation](https://docs.arduino.cc/)
- [Arduino Language Reference](https://docs.arduino.cc/language-reference/)
- [Arduino Hardware](https://docs.arduino.cc/hardware/)
- [Arduino Project Hub](https://projecthub.arduino.cc/)

These sources help distinguish official board behavior from assumptions repeated in forum posts.

### ROS 2, micro-ROS, and Open-Source Robotics Resources

Recommended references:

- [ROS 2 Documentation](https://docs.ros.org/)
- [ROS 2 Tutorials](https://docs.ros.org/en/jazy/Tutorials.html)
- [micro-ROS Documentation](https://micro.ros.org/docs/)
- [Nav2 Documentation](https://navigation.ros.org/)

Use official documentation for installation and compatibility details, then supplement it with community examples.

### Robot-Building Forums and Project Repositories

Useful communities include:

- [Arduino Forum](https://forum.arduino.cc/)
- [ROS Discourse](https://discourse.ros.org/)
- [Polu Forum](https://forum.polu.com/)
- [GitHub](https://github.com/)
- [r/robotics on Reddit](https://www.reddit.com/r/robotics/)

When evaluating a user review or forum recommendation, look for:

- Exact board revision
- Battery and motor specifications
- Firmware version
- Reproducible wiring
- Measurements rather than vague claims
- Clear limitations

That habit resolves many apparent conflicts between product pages. For example, one platform may advertise broad Arduino compatibility while its shield physically supports only UNO-style boards. Another may support Raspberry Pi mounting but still require a separate motor driver and power regulator. Both statements can be true because they describe different layers of integration.

## Conclusion

Arduino **can absolutely be integrated with other robotic platforms**, and the most reliable designs assign each controller a clear job.

Our recommendations are straightforward:

- Choose an **Arduino UNO or UNO R4** for beginner motor-and-sensor projects.
- Choose an **Arduino Mega** when servo and I/O count grows.
- Choose an **ESP32** when Wi-Fi, Bluetooth, or ESP-NOW matters.
- Pair Arduino with a **Raspberry Pi** for ROS 2, web control, and lighter computer vision.
- Pair Arduino with an **NVIDIA Jetson** for demanding visual AI.
- Use **Polu Zumo** for a compact, well-documented robot.
- Use **OSOYOO FlexiRover** for a larger, expandable chassis with UNO, Mega, Due, and Raspberry Pi mounting options.
- Use certified industrial controllers whenever safety, uptime, or regulatory compliance is involved.

The biggest positive is Arduino’s **clarity**: signals, sensors, motors, and firmware remain accessible. The biggest negative is that integration exposes every weak assumption about voltage, timing, power, and message ownership.

The unresolved robot argument from earlier has a clean answer: **one controller should own each actuator, commands need explicit priority, and every wireless or serial command needs a timeout**. Once those rules are in place, Arduino stops being “just a beginner board” and becomes a dependable embedded component inside far more capable robotic systems.

## Recommended Links

👉 **Shop Arduino and robotic platforms:**

- **Arduino UNO R4 WiFi:** [Amazon](https://www.amazon.com/s?k=Arduino+UNO+R4&tag=bestbrands0a9-20+WiFi) | [Arduino Official Store](https://store.arduino.cc/products/uno-r4-wifi)
- **Arduino Mega 2560:** [Amazon](https://www.amazon.com/s?k=Arduino+Mega+2560&tag=bestbrands0a9-20) | [Arduino Official Store](https://store.arduino.cc/products/arduino-mega-2560-rev3)
- **ESP32 development boards:** [Amazon](https://www.amazon.com/s?k=ESP32+development+board&tag=bestbrands0a9-20&tag=bestbrands0a9-20) | [Espressif Official Website](https://www.espressif.com/en/products/socs/esp32)
- **Raspberry Pi 5:** [Amazon](https://www.amazon.com/s?k=Raspberry+Pi+5&tag=bestbrands0a9-20&tag=bestbrands0a9-20) | [Raspberry Pi Official Website](https://www.raspberrypi.com/products/raspberry-pi-5/)
- **NVIDIA Jetson developer kits:** [NVIDIA Official Website](https://developer.nvidia.com/embedded/learn/getting-started-jetson-developer-kits)
- **Polu Zumo Robot for Arduino:** [Polu Official Website](https://www.polu.com/product/2510) | [Amazon search](https://www.amazon.com/s?k=Polu+Zumo+Robot+Arduino&tag=bestbrands0a9-20)
- **OSOYOO FlexiRover Basic Robot Platform:** [OSOYOO Official Website](https://osoyoo.com/2024/06/12/osoyoo-universal-robot-platform-for-uno/) | [Amazon search](https://www.amazon.com/s?k=OSOYOO+FlexiRover+Arduino&tag=bestbrands0a9-20)
- **Makeblock mBot:** [Makeblock Official Website](https://www.makeblock.com/pages/mbot-robot-kit-robot-kit) | [Amazon search](https://www.amazon.com/s?k=Makeblock+mBot&tag=bestbrands0a9-20)
- **DFRobot robot kits:** [DFRobot Official Website](https://www.dfrobot.com/) | [Amazon search](https://www.amazon.com/s?k=DFRobot+Arduino+robot+kit&tag=bestbrands0a9-20)
- **SunFounder robot kits:** [SunFounder Official Website](https://www.sunfounder.com/) | [Amazon search](https://www.amazon.com/s?k=SunFounder+Arduino+robot+kit&tag=bestbrands0a9-20)

**Recommended robotics books:**

- [Arduino Robotics by John-David Warren on Amazon](https://www.amazon.com/s?k=Arduino+robotics+book+John-David+Warren&tag=bestbrands0a9-20)
- [Robot Building for Beginners on Amazon](https://www.amazon.com/s?k=Robot+Building+for+Beginners+book&tag=bestbrands0a9-20)
- [Programming Robots with ROS on Amazon](https://www.amazon.com/s?k=Programming+Robots+with+ROS+book&tag=bestbrands0a9-20)
- [Learning Robotics Using Python on Amazon](https://www.amazon.com/s?k=Learning+Robotics+Using+Python+book&tag=bestbrands0a9-20)

## FAQ

### How can Arduino be integrated with robotic platforms like Raspberry Pi and ROS?

Arduino can connect to Raspberry Pi or a ROS 2 computer through **USB serial, UART, I²C, SPI, CAN, Bluetooth, or Wi-Fi**.

A common architecture assigns:

- Raspberry Pi or Jetson: navigation, camera processing, ROS 2, mapping, and user interfaces.
- Arduino: motor PWM, encoder processing, sensor timing, watchdogs, and actuator safety.

ROS 2 can communicate with Arduino through a custom serial bridge or through [micro-ROS](https://micro.ros.org/). The best option depends on system complexity, board memory, timing needs, and how tightly the microcontroller must participate in the ROS graph.

#### What does a serial bridge do?

A serial bridge converts ROS 2 messages into a compact protocol that Arduino understands. For example, a ROS 2 node might send target wheel speeds, while Arduino returns encoder counts and measured velocity.

#### Is micro-ROS always necessary?

No. A serial bridge is often easier for a first project. micro-ROS becomes attractive when you need standardized ROS 2 topics, services, multiple embedded nodes, or deeper middleware integration.

### What robotic platforms are compatible with Arduino?

Compatible examples include:

- [Polu Zumo Robot for Arduino](https://www.polu.com/product/2510)
- [OSOYOO FlexiRover](https://osoyoo.com/2024/06/12/osoyoo-universal-robot-platform-for-uno/)
- Arduino Robot-style two-controller platforms
- Many DFRobot and SunFounder kits
- Selected Makeblock platforms
- Custom Raspberry Pi robots using Arduino as a motor controller
- Custom ROS 2 mobile bases using Arduino-compatible embedded controllers

Compatibility must be checked at three levels:

1. **Mechanical:** Does the board physically mount?
2. **Electrical:** Are voltage, current, connectors, and pin functions compatible?
3. **Software:** Do libraries, board definitions, and protocols support the combination?

### Can Arduino control motors and sensors in advanced robotic systems?

Yes. Arduino is particularly effective for **low-level motor and sensor control**.

It can control:

- DC motors through H-bridges
- Steper motors through dedicated drivers
- Hobby servos
- Encoders
- IMUs
- Reflectance sensors
- Ultrasonic sensors
- Limit switches
- Battery monitors
- Relays and solenoids through suitable drivers

For advanced systems, Arduino usually works alongside a more powerful computer rather than replacing it. The Arduino handles deterministic I/O; the companion computer handles planning, vision, AI, or ROS 2.

### How do you connect an Arduino to a robot operating system?

Use one of these methods:

1. **USB serial:** Connect Arduino to a Raspberry Pi or PC and write a ROS 2 serial node.
2. **UART:** Wire the Arduino to a companion computer with correct voltage conversion.
3. **CAN:** Use CAN-capable hardware for distributed motor or sensor nodes.
4. **micro-ROS:** Install a micro-ROS client on a supported microcontroller and run the agent on the companion computer.

Define topics, units, update rates, timeouts, and safety behavior before writing the bridge.

### Can Arduino and Raspberry Pi work together in a robotics project?

Yes. This is one of the most practical mixed-controller designs.

A Raspberry Pi can run:

- ROS 2
- Camera applications
- Web dashboards
- Object detection
- Logging
- Mapping

Arduino can run:

- Motor control
- Encoder loops
- Servos
- Bumpers
- Battery monitoring
- Safety timeouts

Use USB serial for the easiest initial connection. Remember that Raspberry Pi GPIO uses 3.3 V logic, so direct connection to a 5 V Arduino signal may damage the Pi.

### What are the benefits of using Arduino in robotic coding?

The major benefits are:

- **Fast hardware access**
- **Predictable timing**
- **Low power consumption**
- **Large library ecosystem**
- **Simple USB programming**
- **Affordable expansion hardware**
- **Excellent educational value**
- **Strong community support**

Arduino also makes the relationship between code and physical behavior visible. Change a PWM value, and the motor responds. Change a sensor threshold, and the robot changes direction. That feedback loop is invaluable when learning [coding languages](https://roboticcoding.com/category/coding-languages/) and embedded systems.

### How can beginners program Arduino for different robotic platforms?

Start with a controlled progression:

1. Install the [Arduino IDE](https://www.arduino.cc/en/software/).
2. Select the correct board and port.
3. Upload Blink.
4. Read one sensor.
5. Control one LED or servo.
6. Test the motor driver with wheels lifted.
7. Add one motor.
8. Add both motors.
9. Add a communication link.
10. Implement a timeout and emergency stop.
11. Add autonomous behavior.
12. Log and tune performance.

Use official examples first, then modify one variable at a time. Keep a pin map and wiring diagram. Do not install five libraries and rewrite the entire robot in one heroic evening; that is how debugging becomes folklore.

### Is Arduino suitable for autonomous navigation?

Arduino is suitable for **low-level navigation support**, such as encoder processing, IMU sampling, line following, and obstacle triggers. It is generally not suitable by itself for advanced SLAM, camera-based navigation, or large path-planning workloads.

For autonomous navigation, pair Arduino with Raspberry Pi, Jetson, or another capable computer running a robotics framework.

### What is the best communication protocol for Arduino robotics?

There is no universal winner:

| Requirement | Strong choice |
|---|---|
| Easy beginner connection | USB serial |
| Short sensor bus | I²C |
| High-speed peripherals | SPI |
| Wireless phone control | Bluetooth |
| Wireless robot telemetry | Wi-Fi |
| Low-power ESP32 links | ESP-NOW |
| Distributed noisy hardware | CAN |
| Longer industrial wiring | RS-485 |

Choose based on distance, speed, noise, power, topology, voltage, and safety requirements.

### Can Arduino control a robotic arm?

Yes. Arduino can control servos, steper drivers, limit switches, encoders, and grippers. For vision-guided or complex multi-axis arms, use a Raspberry Pi or Jetson for perception and planning while Arduino handles joint-level actuation and safety limits.

### What should happen if the Arduino loses communication with the main computer?

The Arduino should enter a **safe state**, usually stopping or braking the motors. Implement:

- A command timeout
- A watchdog
- A startup-disabled state
- Maximum speed limits
- Local emergency-stop input
- Diagnostic reporting after recovery

Never let a robot continue indefinitely using its last valid motion command.

## Reference Links

- [Arduino Official Documentation](https://docs.arduino.cc/)
- [Arduino Hardware Documentation](https://docs.arduino.cc/hardware/)
- [Arduino Language Reference](https://docs.arduino.cc/language-reference/)
- [Arduino Open-Source Hardware](https://www.arduino.cc/en/hardware/)
- [Arduino Project Hub](https://projecthub.arduino.cc/)
- [Arduino Official Store](https://store.arduino.cc/)
- [Raspberry Pi Official Documentation](https://www.raspberrypi.com/documentation/)
- [Raspberry Pi 5](https://www.raspberrypi.com/products/raspberry-pi-5/)
- [ROS 2 Documentation](https://docs.ros.org/)
- [ROS 2 Tutorials](https://docs.ros.org/en/jazy/Tutorials.html)
- [micro-ROS Documentation](https://micro.ros.org/docs/)
- [Nav2 Documentation](https://navigation.ros.org/)
- [NVIDIA Jetson Developer Resources](https://developer.nvidia.com/embedded/learn/getting-started-jetson)
- [Espressif ESP32 Documentation](https://docs.espressif.com/projects/esp-idf/en/latest/esp32/)
- [Polu Arduino Robot Platform](https://www.polu.com/product/2473)
- [Polu Zumo Robot for Arduino](https://www.polu.com/product/2510)
- [Polu Motor Controllers](https://www.polu.com/category/115/motor-controllers)
- [Polu Electronics Application Notes](https://www.polu.com/docs/0J15)
- [OSOYOO FlexiRover Basic Robot Platform for Arduino UNO](https://osoyoo.com/2024/06/12/osoyoo-universal-robot-platform-for-uno/)
- [Makeblock mBot](https://www.makeblock.com/pages/mbot-robot-kit-robot-kit)
- [DFRobot](https://www.dfrobot.com/)
- [SunFounder](https://www.sunfounder.com/)
- [TurtleBot](https://www.turtlebot.com/)
- [VEX Robotics](https://www.vexrobotics.com/)
- [NXP I²C-Bus Specification](https://www.nxp.com/docs/en/user-guide/UM10204.pdf)
- [Bosch CAN Technology](https://www.bosch-semiconductors.com/products/ip-modules/can-ip-modules/)
- [Adafruit Learning System](https://learn.adafruit.com/)
- [SparkFun Learn](https://learn.sparkfun.com/)
- [Arduino Forum](https://forum.arduino.cc/)
- [ROS Discourse](https://discourse.ros.org/)
- [Polu Forum](https://forum.polu.com/)
- [GitHub Robotics Projects](https://github.com/topics/robotics)