
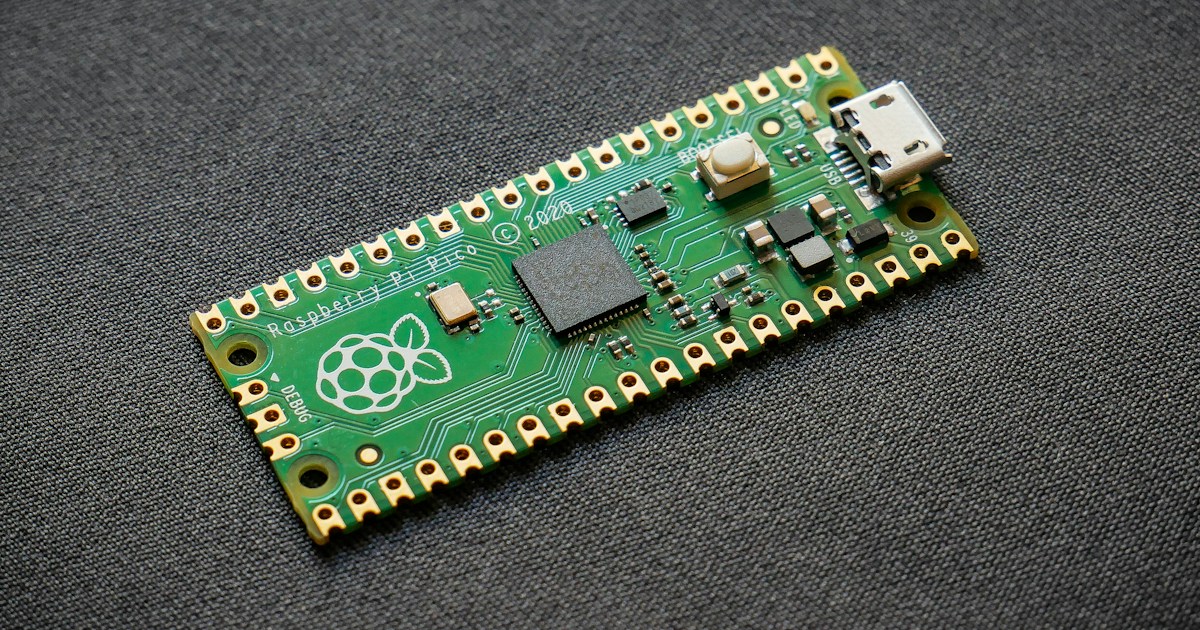
The best DIY robotic kits using Raspberry Pico let you build a two-wheel robot first, then add sensors and smarter behaviors as your skills grow. For most beginners, a Pico-compatible chassis, dual motor driver, and MicroPython are the clearest path from loose parts to a rover that actually moves.
At Robotic Coding™, we’ve found that the first successful robot doesn’t need a camera, a gripper, or a heroic amount of wiring. A simple car that drives straight, turns on command, and stops when an obstacle appears teaches the fundamentals that make more ambitious builds possible.
The fun twist? The Pico is a microcontroller, not a tiny desktop computer, so it excels at fast, direct control of motors and sensors. Pick the right driver and keep motor power separate from the Pico’s logic supply, and a modest build can follow lines, dodge obstacles, or respond to remote commands without turning your desk into a spaghetti-powered science fair. 🛠️
Key Takeaways
- Start with a two-wheel robot car kit that includes a chassis, geared motors, wheels, and a motor driver.
- Use a Raspberry Pico for straightforward, responsive control; choose a Pico W when your project needs built-in wireless networking.
- Never connect motors directly to Pico GPIO pins. Use a suitable motor driver and check voltage levels before wiring sensors.
- MicroPython is a practical starting language for reading sensors, setting motor speed with PWM, and experimenting with robot behavior.
- Build in stages: make the motors work, add one sensor, then tune and expand. Line-following and obstacle avoidance are excellent next steps.
- Check kit compatibility carefully: a kit advertised for Raspberry Pi may target a full-size computer rather than the Pico.
- Plan power and safety before testing. Motors can draw more current than the Pico’s pins can supply, and a shared ground is usually needed between the Pico and motor driver.
Table of Contents
- ⚡️ Quick Tips and Facts: DIY Robotic Kits Using Raspberry Pico
- 🤖 What Makes the Raspberry Pico a Great Robot Controller?
- 📚 Raspberry Pico Robotics: Background and Microcontroller Basics
- 🧰 Choosing a Raspberry Pico Robot Kit and Essential Parts
- Raspberry Pico vs. Pico W: Which Board Should You Use?
- Motors, Motor Drivers, Wheels, and Robot Chassis
- Sensors, Batteries, Wiring, and Tools
- Compatibility and Safety Checks Before You Build
- 🛠️ 10 DIY Raspberry Pico Robot Projects to Build
- 1. Two-Wheel Drive Robot Car
- 2. Ultrasonic Obstacle-Avoiding Robot
- 3. Infrared Line-Following Robot
- 4. Bluetooth-Controled Pico Robot
- 5. Wi-Fi Remote-Controled Pico W Rover
- 6. Mini Sumo Robot
- 7. Servo-Powered Robotic Arm
- 8. Walking Robot or Biped
- 9. Sensor-Driven Maze-Solving Robot
- 10. Programmable STEM Robot for Beginners
- 🚗 Building a Raspberry Pico Robot Car: Step by Step
- Plan the Build and Check Your Parts
- Asemble the Chassis, Wheels, and Motors
- Mount the Pico, Motor Driver, and Sensors
- 🔌 Raspberry Pico Robot Wiring and Component Connections
- Motor Driver Wiring and GPIO Pin Selection
- Connecting Ultrasonic, Infrared, and Line Sensors
- Powering Motors and the Pico Safely
- Wiring Checklist and Common Pinout Mistakes
- 💻 Programming a Raspberry Pico Robot with MicroPython
- Install MicroPython and Set Up Thony
- Control DC Motors with GPIO and PWM
- Read Distance and Line-Following Sensors
- Add Robot Behaviors, Timing, and Safety Stops
- 🧾 Complete Raspberry Pico Robot Code Listing
- MicroPython Code for a Sensor-Aware Robot Car
- How to Upload, Run, and Modify the Program
- 🔧 Testing, Calibration, and Robot Tuning
- Test Motor Direction and Speed
- Calibrate Sensors for Your Floor and Track
- Improve Battery Life, Traction, and Reliability
- 🧯 Troubleshooting Raspberry Pico Robot Kits
- Robot Does Not Power On or Connect
- Motors Buzz, Stall, or Spin the Wrong Way
- Sensors Give Unreliable Readings
- MicroPython Errors and GPIO Problems
- 🛒 Raspberry Pico Robotics Kits: What to Look For
- Kit Features That Make Building Easier
- When to Buy a Kit and When to Build from Separate Parts
- Beginer, Classroom, and Advanced Kit Considerations
- 🌱 Upgrades and Next Steps for Your Pico Robot
- Add Wireless Control, Encoders, or More Sensors
- Explore Pico W, CircuitPython, and Robotics Projects
- Make Your Robot More Accessible and Classroom-Friendly
- ✅ Conclusion
- 🔗 Recommended Links
- ❓ FAQ
- Can you build a robot with a Raspberry Pico?
- Is the Raspberry Pico or Pico W better for robotics?
- Can a Raspberry Pico control DC motors directly?
- Which programming language is best for Pico robotics?
- What parts do you need to make a Pico robot car?
- How do you power a Raspberry Pico robot safely?
- Can a Raspberry Pico robot follow a line or avoid obstacles?
- Are Raspberry Pico robot kits suitable for beginners?
- 📖 Reference Links
Table of Contents
- ⚡️ Quick Tips and Facts: DIY Robotic Kits Using Raspberry Pico
- 🤖 What Makes the Raspberry Pico a Great Robot Controller?
- 📚 Raspberry Pico Robotics: Background and Microcontroller Basics
- 🧰 Choosing a Raspberry Pico Robot Kit and Essential Parts
- Raspberry Pico vs. Pico W: Which Board Should You Use?
- Motors, Motor Drivers, Wheels, and Robot Chassis
- Sensors, Batteries, Wiring, and Tools
- Compatibility and Safety Checks Before You Build
- 🛠️ 10 DIY Raspberry Pico Robot Projects to Build
- 1. Two-Wheel Drive Robot Car
- 2. Ultrasonic Obstacle-Avoiding Robot
- 3. Infrared Line-Following Robot
- 4. Bluetooth-Controled Pico Robot
- 5. Wi-Fi Remote-Controled Pico W Rover
- 6. Mini Sumo Robot
- 7. Servo-Powered Robotic Arm
- 8. Walking Robot or Biped
- 9. Sensor-Driven Maze-Solving Robot
- 10. Programmable STEM Robot for Beginners
- 🚗 Building a Raspberry Pico Robot Car: Step by Step
- Plan the Build and Check Your Parts
- Asemble the Chassis, Wheels, and Motors
- Mount the Pico, Motor Driver, and Sensors
- 🔌 Raspberry Pico Robot Wiring and Component Connections
- Motor Driver Wiring and GPIO Pin Selection
- Connecting Ultrasonic, Infrared, and Line Sensors
- Powering Motors and the Pico Safely
- Wiring Checklist and Common Pinout Mistakes
- 💻 Programming a Raspberry Pico Robot with MicroPython
- Install MicroPython and Set Up Thony
- Control DC Motors with GPIO and PWM
- Read Distance and Line-Following Sensors
- Add Robot Behaviors, Timing, and Safety Stops
- 🧾 Complete Raspberry Pico Robot Code Listing
- MicroPython Code for a Sensor-Aware Robot Car
- How to Upload, Run, and Modify the Program
- 🔧 Testing, Calibration, and Robot Tuning
- Test Motor Direction and Speed
- Calibrate Sensors for Your Floor and Track
- Improve Battery Life, Traction, and Reliability
- 🧯 Troubleshooting Raspberry Pico Robot Kits
- Robot Does Not Power On or Connect
- Motors Buzz, Stall, or Spin the Wrong Way
- Sensors Give Unreliable Readings
- MicroPython Errors and GPIO Problems
- 🛒 Raspberry Pico Robotics Kits: What to Look For
- Kit Features That Make Building Easier
- When to Buy a Kit and When to Build from Separate Parts
- Beginer, Classroom, and Advanced Kit Considerations
- 🌱 Upgrades and Next Steps for Your Pico Robot
- Add Wireless Control, Encoders, or More Sensors
- Explore Pico W, CircuitPython, and Robotics Projects
- Make Your Robot More Accessible and Classroom-Friendly
- ✅ Conclusion
- 🔗 Recommended Links
- ❓ FAQ
- Can Raspberry Pico handle complex robotic tasks and automation?
- What tutorials are available for coding robots with Raspberry Pico?
- How do I integrate motors and servos with Raspberry Pico in robotics?
- Are there affordable robotic kits compatible with Raspberry Pico?
- How can I build a robot using Raspberry Pico and sensors?
- What are the best DIY robotic kits using Raspberry Pico for beginners?
- Can I build an autonomous robot using Raspberry Pico DIY kits?
- What sensors and modules work well with Raspberry Pico for robotics?
- What programming languages are used for Raspberry Pico robotic projects?
- How can I start building a robot using Raspberry Pico?
- What should I check before buying a Pico robot kit?
- Can a Pico robot use a camera or ROS 2?
- 📖 Reference Links