
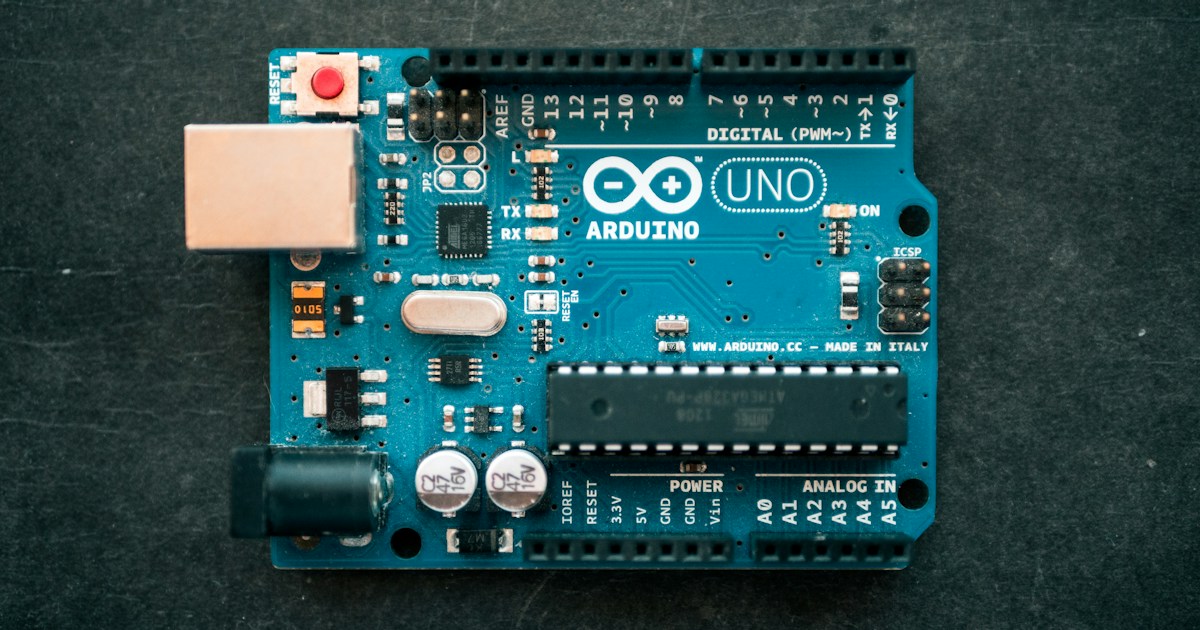
Your World, Sensed! 🤖
Unleash your inner inventor:
Arduino sensors are the indispensable tools that bridge your digital projects to the physical world, transforming raw data into intelligent action. At Robotic Coding™, we’ve seen firsthand how these tiny marvels empower everything from smart home automation to complex robotic navigation
. They are, quite simply, the senses of your Arduino, allowing it to perceive temperature, light, motion, and so much more.
I still remember my first “aha!” moment with an Arduino and a simple light sensor. I was
trying to build an automatic night light for my desk – a project that felt like pure magic at the time. The idea was simple: when the room got dark, the light would turn on. But seeing that tiny photoresistor actually *react
- to the changing ambient light, and then watching my Arduino seamlessly switch on an LED, was a revelation. It wasn’t just code; it was a tangible interaction with reality.
That experience solidified a core truth for us: understanding
and utilizing Arduino sensors is the gateway to truly interactive and responsive projects. Whether you’re a seasoned engineer or just dipping your toes into the exciting waters of electronics, mastering these components will elevate your creations from static circuits to dynamic, intelligent systems. Get
ready to give your Arduino the power to see, hear, and feel!
Key Takeaways
- Arduino sensors are crucial for enabling microcontrollers to interact with the physical environment, acting as the “senses” of your
projects. - They convert physical phenomena (like temperature, light, motion) into electrical signals that your Arduino can read and interpret.
- Understanding the difference between analog and digital sensors is fundamental for proper wiring and
coding. - The modular design of many sensors simplifies integration, making them accessible for all skill levels.
- From basic temperature readings to complex environmental monitoring, sensors are the backbone of interactive Arduino projects.
Table of Contents
-
🕰️ The Genesis of Sensing: A Brief History of Arduino and Sensor Integration
-
🤔 What Exactly Are Arduino Sensors? Your Gateway to the Physical World
-
📊 Analog vs. Digital Sensors: Decoding the Data Stream for Your Arduino
-
✨ How Arduino Reads Sensor Data: The Magic Behind the Code and Circuits
-
🔌 Essential Sensor Types for Arduino Projects: A Comprehensive Deep Dive
-
1. Temperature & Humidity Sensors: Feeling the World Around You 🌡️💧
-
2. Motion & Proximity Sensors: Detecting Movement and Presence 🚶 ♀️🚧
-
3. Light & Color Sensors: Illuminating Your Arduino Creations 💡🌈
-
4. Environmental Gas & Air Quality Sensors: Sniffing Out the Invisible 💨🌬️
-
5. Soil & Moisture Sensors: Nurturing Your Green Thumb with Arduino 🌱💦
-
6. Sound & Vibration Sensors: Listening to the World’s Rhythms 🔊🎶
-
7. Pressure & Barometric Sensors: Measuring the Unseen Forces ⛰️🌬️
-
8. pH & Water Quality Sensors: Diving Deep into Liquid Analysis 🧪💧
-
9. Position, Orientation & Force Sensors: Navigating Space and Strength 🧭💪
-
10. Touch & Haptic Sensors: Adding a Human Touch to Your Projects 👋
-
11. RFID/NFC Sensors: Tagging, Tracking, and Contactless Interactions 🏷️
-
12. Dust & Particle Sensors: Monitoring Air Purity with Precision 🌬️🔬
- 14. Current & Voltage Sensors: Keeping an Eye on Your Power Flow ⚡️
- ✅ Choosing the Right Sensor for Your Arduino Project: A Decision-Making Guide
- 🛠️ Wiring Up Your Sensors: A Step-by-Step Hookup Guide for Arduino Beginners
- 💻 Coding for Sensors: Essential Arduino Libraries and Practical Examples
- 🎯 Calibration and Accuracy: Making Your Arduino Sensor Data Reliable and True
- ❌ Common Pitfalls and Troubleshooting Sensor Issues: Don’t Let Them Stop You!
- 🔋 Powering Your Sensors: Voltage, Current, and Stability Considerations for Arduino
- 📈 Data Logging and Visualization with Arduino Sensors: From Raw Data to Insight
- 📡 Wireless Sensor Networks with Arduino: Bluetooth, Wi-Fi, and LoRa for Remote Sensing
- 🏡🏭 Real-World Arduino Sensor Applications: From Smart Homes to Industrial IoT Solutions
- 💡 DIY Sensor Projects: Inspiring Your Next Arduino Creation and Beyond
- 📦 Top Arduino Sensor Kits and Starter Packs for Beginners and Pros
- 🛒 Recommended Brands and Where to Buy Your Sensors: Beyond the Usual Suspects
- 🤝 Community Resources and Online Forums for Arduino Sensor Enthusiasts
- 🚀 Conclusion: The Future is Sensing! Your Arduino Journey Continues
- 🔗 Recommended Links
- 📚 Reference Links
<
a id=”quick-tips-and-facts-about-arduino-sensors
“>⚡️ Quick Tips and Facts About Arduino Sensors
Welcome, fellow innovators and aspiring roboticists! At Robotic Coding™, we live and breathe the magic of making things sense the world around them. And when it comes to bringing
your electronic creations to life, Arduino sensors are your absolute best friends. They’re the eyes, ears, and even the skin of your projects, allowing your Arduino microcontroller to interact with the physical environment in truly remarkable ways. Think
of them as tiny data collectors, translating real-world phenomena into digital signals your Arduino can understand and act upon.
Here are some quick, juicy facts to get your gears turning:
Arduino is a Gateway Drug (in the best way!): It’s an open-source platform that has democratized electronics and coding, making it incredibly accessible for beginners, hobbyists, and even seasoned engineers.
- Sensors are the Bridge to Reality: Without sensors, your Arduino is just a fancy calculator. Sensors enable it to measure temperature, detect motion, monitor light, and automate your home,
making projects interactive and powerful. - Module Magic: Many Arduino sensors come as ready-made modules, simplifying your projects by including necessary components like resistors and potentiometers. This means
less breadboarding and more building! - Analog vs. Digital: Sensors primarily output either analog (a continuous range of values) or digital (discrete HIGH/LOW signals) data. Understanding this distinction is crucial
for proper wiring and coding. - Beginner-Friendly Choices: If you’re just starting, grab an HC-SR04 Ultrasonic Sensor, a P
IR Motion Sensor, or a DHT11 Temperature & Humidity Sensor. They’re affordable, easy to interface, and perfect for learning the ropes. - Beyond the Basics: The
world of Arduino sensors is vast! You can find sensors for everything from gas detection and soil moisture to complex motion tracking and RFID interactions. - Real-World
Impact: Arduino sensors are powering smart home automation, environmental monitoring, smart agriculture, and even educational tools.
Ready to turn your Arduino into a sensory superstar? Let’s dive deeper
!
🕰️ The Genesis of Sensing: A Brief History of Arduino and Sensor Integration
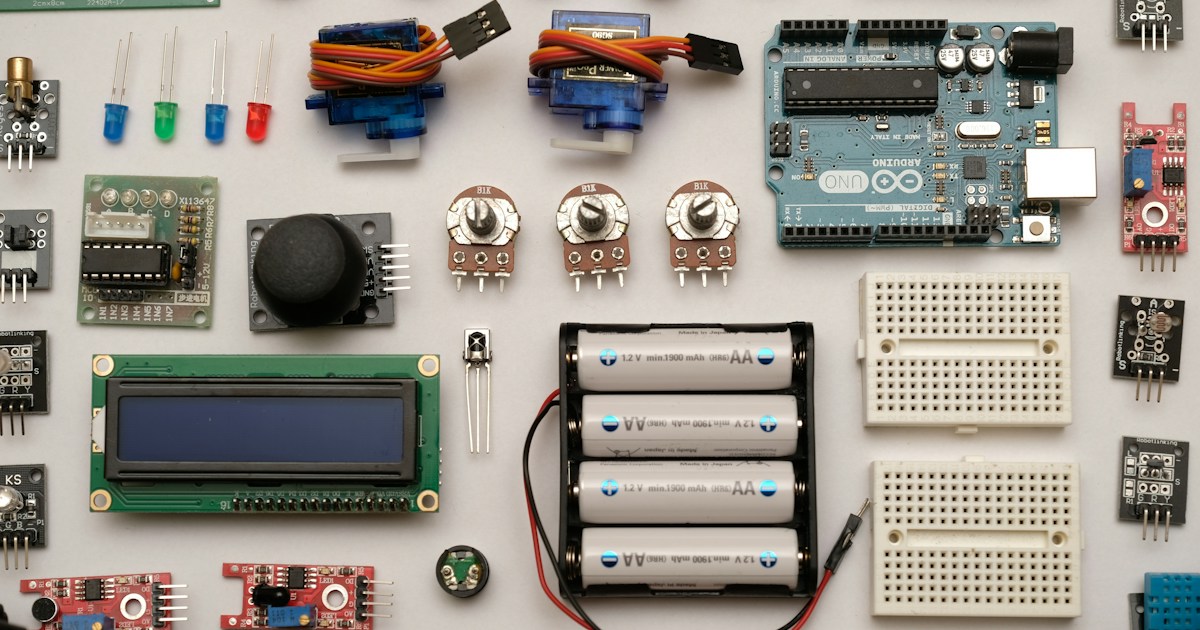
Before Arduino became the global phenomenon it is today, interacting with microcontrollers was often a more daunting task. You typically needed specialized hardware to upload code, and the learning curve was steep. But around the early 2000s, a
group of brilliant Italian postgraduates and a lecturer at the Interaction Design Institute in Ivrea had a vision: to create an affordable, accessible, and open-source platform for rapid prototyping. And thus, Arduino was born, named after an
11th-century Italian king, Arduin of Ivrea.
The open-source nature of Arduino was a true game-changer. It meant that anyone, from artists and designers
to students and hobbyists, could easily get their hands on a microcontroller board and start bringing their ideas to life. This accessibility quickly led to a burgeoning community and, crucially, a massive ecosystem of compatible hardware – including an explosion of Arduino-
compatible sensors.
Early on, integrating sensors with microcontrollers often involved complex circuit designs and deep electrical engineering knowledge. But with Arduino, the focus shifted to ease of use. Manufacturers began producing sensors in convenient
module form factors, often including necessary resistors, terminal posts, and potentiometers directly on the board. This simplified the wiring process immensely, allowing makers to focus more on the creative and programming aspects of their projects rather
than getting bogged down in intricate circuit details.
The ability to easily connect and program a wide array of sensors transformed Arduino into a powerful tool for interacting with the physical world. Suddenly, measuring temperature, detecting motion, or monitoring light levels became achievable
for almost anyone with a curious mind and a soldering iron (or even just jumper wires!). This seamless integration of sensors is a cornerstone of Arduino’s success, enabling countless innovations in areas like robotics, home automation, and environmental monitoring. It
truly ushered in an era where “sensing” became a fundamental and approachable part of the DIY electronics landscape.
<a id=”what-exactly-are-arduino-sensors-your-gateway-to-the-physical-world
“>🤔 What Exactly Are Arduino Sensors? Your Gateway to the Physical World
So, you’re probably wondering, what are these magical little devices we keep talking about? Simply put, an Arduino sensor is a component
that detects a change in a physical parameter (like temperature, light, or motion) and converts that change into an electrical signal that your Arduino board can read and interpret. Think of your
Arduino as the brain, and the sensors as its senses. Without them, your projects would be blind, deaf, and utterly unaware of their surroundings!
These sensors act as transducers, transforming one form of energy (e.g., heat, light, pressure) into another (an electrical signal). This electrical signal is then fed into your Arduino’s input pins, allowing your code to process the information and make decisions. For instance, a temperature
sensor might convert a rise in ambient heat into a higher voltage, which your Arduino reads and then uses to decide whether to turn on a fan.
What makes Arduino sensors particularly appealing is their modular design. Many sensors come pre-mounted
on small circuit boards with all the necessary supporting components. This means you don’t have to worry about adding external pull-up resistors or complex voltage dividers for many common sensors. Just connect power, ground, and the signal pin, and you’re
often good to go! This “plug-and-play” approach significantly lowers the barrier to entry for electronics enthusiasts.
Whether you’re building a robot that avoids obstacles, a smart garden that waters itself, or a home security system that
detects intruders, Arduino sensors are the fundamental building blocks. They empower your microcontroller to gather crucial data, enabling it to respond intelligently and autonomously to the ever-changing physical environment. It’s truly your gateway to making your digital creations interact with the analog
world!
📊 Analog vs. Digital Sensors: Decoding the Data Stream for Your Arduino
When
you start exploring the vast world of Arduino sensors, you’ll quickly encounter two fundamental categories: analog sensors and digital sensors. Understanding the difference between them is absolutely crucial, as it dictates how you’ll wire them up and,
more importantly, how you’ll write the code to interpret their data.
Analog Sensors: The Spectrum of Information 🌈
Imagine a dimmer switch for a light. It doesn’t just have an “on” or “off” state
; it allows for a continuous range of brightness levels. That’s essentially how an analog sensor works. Analog sensors provide a continuous range of values, typically as a varying voltage, that your Arduino reads.
- How they work: An analog sensor measures a physical quantity (like temperature, light intensity, or pressure) and outputs a voltage that is proportional to that quantity. The higher the temperature, for example, the higher
the voltage output from an analog temperature sensor. - Arduino’s Role: Your Arduino board has special Analog-to-Digital Converter (ADC) pins (usually labeled A0-A5 on an Arduino Uno). The ADC converts
this continuous analog voltage into a discrete digital number. For most Arduinos, this is a 10-bit ADC, meaning it maps input voltages between 0V and its operating voltage (typically 5V or 3.3V) into integer values ranging from 0 to 1023. This gives you 1024 possible steps of resolution. - Examples: Common analog sensors include:
LM35 Temperature Sensor: Provides an analog voltage output directly proportional to temperature in Celsius.
- Photoresistor (LDR): Its resistance changes with light intensity, which can be read
as an analog voltage using a voltage divider. - Soil Moisture Sensor (resistive type): Measures water content in soil by detecting changes in electrical resistance.
- Benefits: They offer fine-grained measurements and are great for detecting subtle changes in the environment.
- Drawbacks: The raw analog values often need conversion and calibration in your code to represent
meaningful physical units (like degrees Celsius or lux).
Digital Sensors: The On/Off World 🚦
Now, think of a simple light switch. It’s either “on” or “off” – no in-between.
Digital sensors operate on this binary principle, providing discrete values, typically a HIGH (1) or LOW (0) signal.
- How they work: A
digital sensor usually has an internal threshold. When the measured physical quantity crosses this threshold, the sensor’s output switches from LOW to HIGH, or vice versa. - Arduino’s Role: Digital sensors connect to your Arduino’s
digital input pins. You use thedigitalRead()function to check if the pin is HIGH or LOW. It’s straightforward:HIGHmeans “something detected,” andLOWmeans “nothing detected”
(or vice-versa, depending on the sensor’s logic). - Examples: Popular digital sensors include:
- PIR Motion Sensor (HC-SR501): Outputs HIGH when motion is
detected, LOW when no motion. - IR Obstacle Avoidance Module: Outputs HIGH/LOW depending on whether an object is within its detection range.
- KY-010 Light Barrier Module: Outputs a digital signal when a light beam is interrupted.
- KY-036 Metal
Touch Sensor: Provides a digital output when a metal object is touched. - Benefits: They are simple to use and require less
complex code for interpretation. They are ideal for event-driven applications (e.g., “if motion, then turn on light”). - Drawbacks: They provide less detailed information than analog sensors, only indicating whether a threshold
has been met, not the intensity of the measurement.
Choosing between analog and digital depends entirely on your project’s needs. Do you need to know how much of something is present, or simply if it’s present?
Once you’ve got this distinction down, you’re well on your way to becoming an Arduino sensing wizard!
<a id=”how-arduino-reads-sensor-data-the-magic-behind-the-code-
and-circuits”>✨ How Arduino Reads Sensor Data: The Magic Behind the Code and Circuits
Alright, we’ve talked about what sensors are and the difference between analog and digital. Now, let’s pull back the curtain and
peek into how your Arduino actually reads the data these sensors are diligently collecting. It’s not magic, but it certainly feels like it when your project springs to life!
At Robotic Coding™, we often explain it like this: imagine
your Arduino as a super-smart detective. The sensors are its informants, whispering clues about the physical world. But how does the detective understand these whispers?
For Digital Sensors: The Binary Buzz 🟢🔴
Reading digital sensors is like checking
if a light switch is on or off. It’s a straightforward “yes” or “no” answer.
- The Signal: A digital sensor outputs either a HIGH voltage (typically 5V or 3.3V, depending on your Arduino and sensor) or a LOW voltage (0V). This change in voltage is the “signal.”
- The Pin: You connect the sensor
‘s digital output pin to one of your Arduino’s digital input/output (I/O) pins (pins 2-13 on an Uno, for example). - **
The Code:** In your Arduino sketch, you use thepinMode()function to set the chosen pin as anINPUT. Then, in yourloop()function, you usedigitalRead(pinNumber)to check the state of that pin
.
 int sensorPin = 7; // Connect your digital sensor to pin 7
 int sensorState;

 void setup() {
 pinMode(sensorPin, INPUT); // Set the pin as an input
 Serial.begin(9600); // Start serial communication for debugging
 }

 void loop() {
 sensorState = digitalRead(sensorPin);
 // Read the digital state
 if (sensorState == HIGH) {
 Serial.println("Something detected!");
 } else {
 Serial.println("Nothing detected.");
 }
 delay(100); //
 Small delay to prevent rapid readings
 }
This simple code snippet tells your Arduino to constantly check the state of pin 7. If it’s HIGH, it prints “Something detected!”; otherwise, it prints “Nothing detected.”
Easy peasy!
For Analog Sensors: The Gradient Grabber 📈
Reading analog sensors is a bit more nuanced, like measuring the exact temperature on a thermometer rather than just knowing if it’s hot or cold.
The Analog Voltage: An analog sensor produces a varying voltage output that directly corresponds to the physical quantity it’s measuring. This voltage can be anywhere between 0V and the sensor’s maximum operating voltage (often 5V or 3.3V).
2. The ADC: Your Arduino doesn’t understand continuous voltages directly. This is where its Analog-to-Digital Converter (ADC) comes in. The ADC is
a special circuit that takes the analog voltage from an analog input pin (A0-A5 on an Uno) and converts it into a discrete digital number.
3. The Resolution: Most Arduino
boards, like the Uno, have a 10-bit ADC. This means it can represent the input voltage as one of 1024 possible values (from 0 to 1023). So, if your Arduino is running at 5V, 0V input would be read as 0, and 5V input would be read as 1023. A 2.5V input would be roughly
511.
4. The Code: You connect the sensor’s analog output to one of your Arduino’s analog input pins (e.g., A0). In your code, you use analogRead(pinNumber) to get this 0-1023 value.
 int analogSensorPin = A0; // Connect your analog sensor to analog pin A0
 int sensorValue
;

 void setup() {
 Serial.begin(9600); // Start serial communication
 }

 void loop() {
 sensorValue = analogRead(analogSensorPin); // Read the analog value (0-1023)
 Serial.print("Raw Sensor Value: ");
 Serial.println(sensorValue);

 // Often, you'll need to convert this raw value to a meaningful unit
 // For
 example, if it's a temperature sensor, you'd apply a conversion formula.
 // Let's pretend for a moment this is a simple 0-5V sensor mapping to 0-100%
 float
 percentage = map(sensorValue, 0, 1023, 0, 100);
 Serial.print("Converted Percentage: ");
 Serial.println(percentage);

 delay(500);

 }
The analogRead() function gives you the raw digital representation. The real “magic” often happens in the subsequent conversion, where you apply mathematical formulas (sometimes found in the sensor’s datasheet or library examples) to turn that 0-1023 number into something human-readable, like degrees Celsius, lux, or centimeters.
Understanding these fundamental ways Arduino interacts with sensors is your first step into a
world of incredible possibilities. It’s the core of Robotics and IoT projects, allowing your creations to truly perceive and react to their environment. Ready to make your Arduino truly aware?
<a id=”
essential-sensor-types-for-arduino-projects-a-comprehensive-deep-dive”>🔌 Essential Sensor Types for Arduino Projects: A Comprehensive Deep Dive
At Robotic Coding™, we’ve seen countless projects come to life,
from simple blinking LEDs to complex autonomous robots. What makes them tick? Often, it’s the clever integration of various Arduino sensor types. These tiny marvels are the backbone of any interactive project, allowing your microcontroller to gather data from
the physical world. Let’s embark on a comprehensive journey through the most essential and popular sensors you’ll encounter, complete with our expert insights and real-world applications.
<a id=”1-temperature–humidity-sensors-
feeling-the-world-around-you”>1. Temperature & Humidity Sensors: Feeling the World Around You 🌡️💧
Ever wanted to build your own weather station or a smart thermostat? These sensors are your starting point!
They allow your Arduino to literally “feel” the ambient conditions.
Key Features & Benefits:
- Environmental Monitoring: Essential for smart home systems, weather stations, and even monitoring conditions
in server rooms or greenhouses. - Comfort Control: Automate fans, heaters, or humidifiers based on real-time data.
- Data
Logging: Track environmental changes over time for analysis.
Popular Models & Insights:
DHT11 Temperature and Humidity Sensor
The DHT11 is a fantastic entry-level sensor for measuring both temperature and humidity
. It’s affordable and relatively easy to use, making it a favorite among beginners.
| Aspect | Rating (1-10) | Notes