
Stop waiting for a perfect smart home; the best DIY home automation projects start with a single sensor and a Raspberry Pi, giving you total control without the monthly subscription fees. We’ve seen too many homeowners get stuck in “walled garden” ecosystems where a single brand update breaks their entire system, but building your own network ensures your lights stay on even when the internet goes down.
Did you know that over 70% of IoT devices have critical security vulnerabilities, yet most people still rely on default settings? By taking the DIY route, you aren’t just saving money; you’re building a fortress that only you hold the keys to.
Imagine walking into your living room where the lights dim, the blinds lower, and your favorite playlist starts automatically, all triggered by a local motion sensor rather than a cloud server. That’s the freedom we’re talking about, and it’s more achievable than you think.
Key Takeaways
- Start Local: Prioritize local control protocols like Zigbee and Z-Wave to ensure your home functions even without an internet connection.
- Choose Your Brain: Select an open-source hub like Home Assistant for maximum flexibility and device compatibility across all brands.
- Security First: Always segment your IoT devices on a separate network and change default passwords to protect against cyber threats.
- Scale Gradually: Begin with simple lighting or sensor projects before tackling complex HVAC or irrigation systems to build confidence.
- 35+ Projects Covered: From basic smart plugs to advanced facial recognition doorbells, this guide covers every skill level.
Table of Contents
- ⚡️ Quick Tips and Facts
- 🕰️ From Sci-Fi Dreams to Smart Reality: A Brief History of DIY Home Automation
- 🏠 Planning Your Smart Home Ecosystem: The Blueprint Before the Build
- 📡 Choosing Your Brain: Comparing DIY Home Automation Controllers and Hubs
- 🔌 Mastering the Wires: Understanding Protocols like Zigbee, Z-Wave, and Matter
- 🛠️ Top 35 DIY Home Automation Projects for Every Skill Level
- 1. Smart Lighting: Beyond the Basic On/Off Switch
- 2. Automated Window Treatments for Energy Efficiency
- 3. DIY Smart Thermostat Integration and Optimization
- 4. Custom Voice Control with Local Processing
- 5. Smart Locks and Keyless Entry Systems
- 6. Automated Garage Door Openers with Status Monitoring
- 7. DIY Smart Irrigation Systems for the Garden
- 8. Motion-Activated Security Lighting and Alarms
- 9. Smart Blinds and Shades Automation
- 10. Automated Pet Feeders and Waters
- 1. DIY Smart Mirror with Weather and News Feds
- 12. Automated Coffee Maker and Morning Routines
- 13. Smart Smoke and Carbon Monoxide Detectors
- 14. DIY Water Leak Detection and Shutoff Valves
- 15. Automated Pool and Spa Controllers
- 16. Smart Garage Organization and Inventory Tracking
- 17. DIY Home Energy Monitoring Systems
- 18. Automated Plant Care Systems with Soil Sensors
- 19. Smart Doorbell with Custom Video Analytics
- 20. Automated Curtains for Privacy and Light Control
- 21. DIY Smart Fan and Ventilation Control
- 2. Automated Window Openers for Natural Ventilation
- 23. Smart Apliance Retrofiting for Older Homes
- 24. DIY Intercom and Whole-Home Audio Systems
- 25. Automated Blinds for Solar Heat Gain Management
- 26. Smart Mailbox Notifications and Security
- 27. DIY Smart Garden Greenhouse Controllers
- 28. Automated Lighting Scenes for Mood and Productivity
- 29. Smart Sump Pump Monitoring and Alerts
- 30. DIY Smart Safe and Vault Monitoring
- 31. Automated Window Shades for UV Protection
- 32. Smart HVAC Zone Control Systems
- 3. DIY Smart Doorbell Camera with Facial Recognition
- 34. Automated Pool Cover Systems
- 35. Whole-Home Automation Dashboard Creation
- 🧠 The Brains Behind the Brawn: Programming Logic with Home Assistant, Node-RED, and OpenHAB
- 🔒 Security First: Protecting Your DIY Smart Home from Hackers
- 🔧 Troubleshooting Common DIY Smart Home Glitches and Connectivity Issues
- 💡 Advanced Automation: Creating Complex Routines and Geofencing
- 🛒 Best Tools and Components for Your DIY Smart Home Journey
- ❓ Frequently Asked Questions About DIY Home Automation
- 🔗 Recommended Links and Resources
- 📚 Reference Links and Further Reading
- 🏁 Conclusion
⚡️ Quick Tips and Facts
Before you grab your soldering iron and start tearing into your walls, let’s hit the pause button for a second. We’ve seen too many DIY enthusiasts burn out (literally and figuratively) by skipping the basics. Here are the golden rules we’ve learned the hard way at Robotic Coding™:
- Start Small, Dream Big: Don’t try to automate your entire HVAC system on day one. Start with a single smart bulb or a motion sensor. If you can’t get a light to turn on when you walk in, you won’t get a complex irrigation system working.
- The “Hub” is Your Best Friend: While Wi-Fi is great, relying solely on it for 50+ devices will turn your router into a brick. A dedicated hub (like Home Assistant running on a Raspberry Pi or a SmartThings hub) creates a local network that doesn’t choke your internet.
- Local Control is King: Cloud-dependent devices are convenient until the internet goes down. If your lights turn off because your ISP had a hicup, you’re going to be very unhappy. Prioritize local execution protocols like Zigbee or Z-Wave.
- Security Isn’t Optional: A smart lock that can be hacked is worse than a regular lock. Always change default passwords, segment your IoT devices on a separate VLAN, and keep firmware updated.
- Power Matters: Battery-operated sensors are great for flexibility, but they need maintenance. Hardwired devices are “set it and forget it” but require electrical knowledge.
🕰️ From Sci-Fi Dreams to Smart Reality: A Brief History of DIY Home Automation

You might think smart homes are a 21st-century invention, but the dream is as old as electricity itself. In the 1970s, the X10 protocol was born. It used your existing power lines to send signals between devices. It was clunky, prone to interference from toasters, and slow, but it was the grandfather of everything we do today.
Fast forward to the 20s, and we saw the rise of Zigbee and Z-Wave, wireless protocols designed specifically for low-power, low-data devices. Then came the smartphone revolution, which gave us the ability to control our homes from anywhere. But the real game-changer for the DIY home automation crowd was the open-source movement.
Enter Home Assistant, OpenHAB, and Node-RED. These platforms stripped away the walled gardens of big tech, allowing us to mix and match devices from different manufacturers. Suddenly, you could make a Philips Hue light talk to a Sonos speaker and a Shelly relay, all without paying a monthly subscription fee.
Did you know? The first “smart home” concept was actually a house in Japan in the 1980s called the “Smart House,” which used a central computer to control everything, but it was too expensive for the average person. Today, you can build a better version of that for the price of a nice dinner.
If you’re interested in the coding side of things, check out our deep dive into Arduino for a look at how microcontrollers revolutionized this space.
🏠 Planning Your Smart Home Ecosystem: The Blueprint Before the Build
Before you buy a single sensor, you need a plan. We’ve seen too many people end up with a “Frankenstein” house where the lights work but thermostat doesn’t talk to the locks.
1. Define Your “Why”
Are you trying to save energy? Enhance security? Or just impress your friends with a voice-activated coffee machine? Your goal dictates your tech stack.
- Energy Saving: Focus on smart thermostats, leak detectors, and automated blinds.
- Security: Prioritize cameras, smart locks, and motion sensors with local storage.
- Convenience: Look at lighting scenes, voice control, and automated routines.
2. Map Your Network
Your Wi-Fi router is the backbone. If you have a large house, a single router won’t cut it. You’ll need a Mesh Wi-Fi system (like Eero or Ubiquiti UniFi) to ensure coverage in the basement where your smart garage door lives.
3. Choose Your Ecosystem
This is the most critical decision. Will you go with:
- Apple HomeKit: Secure, expensive, but seamless if you’re in the Apple ecosystem.
- Google Home: Great for voice search, but privacy concerns exist.
- Amazon Alexa: Huge device compatibility, but the interface can be cluttered.
- Open Source (Home Assistant): The ultimate flexibility, requires more setup, but no monthly fees and total privacy.
Pro Tip: If you want the most control, go with Home Assistant. It supports almost every device on the market and runs locally.
📡 Choosing Your Brain: Comparing DIY Home Automation Controllers and Hubs
Your controller is the brain of your operation. It’s where the logic happens. Let’s break down the top contenders.
| Feature | Home Assistant | SmartThings | Hubitat | Apple HomeKit |
|---|---|---|---|---|
| Cost | Free (Hardware cost only) | Free (Subscription for some features) | Free (One-time hardware cost) | Free (Requires Apple devices) |
| Local Control | ✅ Yes (10%) | ❌ Mostly Cloud | ✅ Yes | ✅ Yes |
| Device Support | Massive (Thousands) | Good | Very Good | Limited (MFi only) |
| Ease of Use | Step Learning Curve | Easy | Moderate | Very Easy |
| Privacy | High (Local only) | Low (Cloud dependent) | High | High |
| Customization | Unlimited | Moderate | High | Low |
The Home Assistant Powerhouse
For the serious DIYer, Home Assistant is the undisputed king. It runs on a Raspberry Pi, an old PC, or even a Docker container. It integrates with Zigbee, Z-Wave, Wi-Fi, Bluetooth, and even legacy X10 devices. The community is massive, and if a device exists, there’s probably an integration for it.
The User-Friendly Alternative: SmartThings
If you don’t want to mess with YAML files or Docker, Samsung SmartThings is a solid choice. It has a great app and supports a wide range of devices. However, be aware that many advanced automations now require a cloud connection, which can introduce latency.
The Local-First Contender: Hubitat
Hubitat Elevation is the middle ground. It offers local control like Home Assistant but with a more user-friendly interface. It’s perfect for those who want reliability without the steep learning curve of Home Assistant.
👉 CHECK PRICE on:
- Raspberry Pi 4 (for Home Assistant): Amazon | Official Store
- SmartThings Hub: Amazon | Samsung Official
- Hubitat Elevation Hub: Amazon | Hubitat Official
🔌 Mastering the Wires: Understanding Protocols like Zigbee, Z-Wave, and Matter
You can’t build a house without understanding the foundation. In home automation, the “foundation” is the communication protocol.
Zigbee: The Mesh Master
Zigbee is a low-power, mesh networking protocol. Devices talk to each other, extending the range. If you have a Zigbee bulb in the living room and another in the bedroom, the bedroom bulb can relay the signal from the hub to the living room bulb.
- Pros: Low power, mesh network, huge device selection.
- Cons: Can be tricky to set up initially; different manufacturers sometimes have compatibility issues (though this is improving).
- Top Brands: Philips Hue, Aqara, Sengled.
Z-Wave: The Reliable Veteran
Z-Wave is similar to Zigbee but operates on a different frequency (90 MHz in the US), which means it doesn’t interfere with Wi-Fi. It’s strictly controlled by the Z-Wave Alliance, ensuring better compatibility.
- Pros: Excellent compatibility, long range, low interference.
- Cons: More expensive devices, smaller ecosystem than Zigbee.
- Top Brands: GE/Jasco, Leviton, Yale.
Matter: The New Hope
Matter is the new universal standard backed by Apple, Google, Amazon, and others. It aims to make all devices work together seamlessly, regardless of the brand.
- Pros: Universal compatibility, local control, easy setup.
- Cons: Still rolling out; not all devices support it yet.
- Top Brands: Nanoleaf, Eve, Google Nest.
Fun Fact: Zigbee and Z-Wave devices can coexist on the same network, but you need a hub that supports both (like Home Assistant with the right dongles).
🛠️ Top 35 DIY Home Automation Projects for Every Skill Level
Ready to get your hands dirty? Here are 35 projects ranging from “I can do this in 5 minutes” to “I need a degree in electrical engineering.”
1. Smart Lighting: Beyond the Basic On/Off Switch
Start with the classics. Replace your standard bulbs with Philips Hue or LIFX bulbs. But don’t stop there. Add motion sensors so lights turn on automatically when you enter a room and off when you leave.
- Skill Level: Beginner
- Tools: Smart bulbs, motion sensor, hub.
- Why: Instant gratification and energy savings.
2. Automated Window Treatments for Energy Efficiency
Install motorized blinds or retrofit your existing blinds with a SwitchBot or Ikea Fyrtur motor. Set them to close when the sun is too bright to reduce cooling costs.
- Skill Level: Intermediate
- Tools: Motorized blinds, smart switch, hub.
- Why: Reduces HVAC load and protects furniture from UV damage.
3. DIY Smart Thermostat Integration and Optimization
Swap your old thermostat for a Nest or Ecobee. But here’s the twist: integrate it with your Home Assistant to create custom rules, like “If the house is empty and the temperature is above 75°F, turn on the AC.”
- Skill Level: Intermediate
- Tools: Smart thermostat, wiring knowledge.
- Why: Significant energy savings.
4. Custom Voice Control with Local Processing
Set up a local voice assistant using Rhasspy or Mycroft on a Raspberry Pi. This allows you to control your home without sending your voice data to the cloud.
- Skill Level: Advanced
- Tools: Raspberry Pi, microphone array, coding skills.
- Why: Total privacy and no latency.
5. Smart Locks and Keyless Entry Systems
Replace your deadbolt with a August Smart Lock or Yale Assure Lock. Integrate it with your doorbell camera so you can see who’s at the door before unlocking.
- Skill Level: Intermediate
- Tools: Smart lock, drill, screwdriver.
- Why: Convenience and security.
6. Automated Garage Door Openers with Status Monitoring
Add a MyQ or Shelly relay to your garage door opener. Now you can check if you left the garage open and close it from your phone.
- Skill Level: Intermediate
- Tools: Smart relay, garage door opener.
- Why: Peace of mind.
7. DIY Smart Irrigation Systems for the Garden
Use RainMachine or build your own with ESP32 and solenoid valves. Monitor soil moisture and weather forecasts to water your garden only when needed.
- Skill Level: Advanced
- Tools: Solenoid valves, moisture sensors, microcontroller.
- Why: Save water and keep plants happy.
8. Motion-Activated Security Lighting and Alarms
Install motion sensors connected to smart lights and a siren. If motion is detected at night, lights flash and a siren sounds.
- Skill Level: Beginner
- Tools: Motion sensors, smart lights, siren.
- Why: Deter intruders.
9. Smart Blinds and Shades Automation
Similar to project #2, but focus on solar shades that automatically adjust based on the sun’s position to reduce glare.
- Skill Level: Intermediate
- Tools: Motorized shades, sun sensor.
- Why: Comfort and energy efficiency.
10. Automated Pet Feeders and Waters
Build a custom feeder using a servo motor and a load cell to dispense food at specific times. Add a camera to watch your pet eat.
- Skill Level: Advanced
- Tools: Servo motor, load cell, camera, 3D printer.
- Why: Keep your pets fed on schedule.
1. DIY Smart Mirror with Weather and News Feds
Turn an old mirror into a Magic Mirror using a two-way mirror, a monitor, and a Raspberry Pi. Display weather, calendar, and news.
- Skill Level: Advanced
- Tools: Two-way mirror, monitor, Raspberry Pi.
- Why: Cool factor and utility.
12. Automated Coffee Maker and Morning Routines
Use a smart plug to turn on your coffee maker at 7 AM. Integrate it with your alarm clock so it starts when you wake up.
- Skill Level: Beginner
- Tools: Smart plug, coffee maker.
- Why: Start your day right.
13. Smart Smoke and Carbon Monoxide Detectors
Upgrade to Nest Protect or First Alert Onelink. These can send alerts to your phone and even tell you which room has the issue.
- Skill Level: Beginner
- Tools: Smart detectors.
- Why: Safety.
14. DIY Water Leak Detection and Shutoff Valves
Place water leak sensors near your water heater and washing machine. Connect them to a smart shutoff valve that closes automatically if a leak is detected.
- Skill Level: Intermediate
- Tools: Leak sensors, smart valve.
- Why: Prevent catastrophic water damage.
15. Automated Pool and Spa Controllers
Use a Pentair or Jandy controller to automate your pool pump, heater, and lights. Monitor pH levels and temperature remotely.
- Skill Level: Advanced
- Tools: Pool controller, sensors.
- Why: Maintain pool health and save energy.
16. Smart Garage Organization and Inventory Tracking
Use RFID tags or weight sensors to track items in your garage. Get alerts when you take something out or if something is missing.
- Skill Level: Advanced
- Tools: RFID reader, weight sensors.
- Why: Never lose your tools again.
17. DIY Home Energy Monitoring Systems
Install a Shelly EM or Emporia Vue to monitor your home’s energy usage in real-time. Create automations to turn off devices when usage spikes.
- Skill Level: Intermediate
- Tools: Energy monitor, CT clamps.
- Why: Save money on electricity bills.
18. Automated Plant Care Systems with Soil Sensors
Create a system that waters your plants automatically based on soil moisture readings. Use ESP32 and a water pump.
- Skill Level: Advanced
- Tools: Soil sensors, water pump, microcontroller.
- Why: Keep your plants alive while you’re on vacation.
19. Smart Doorbell with Custom Video Analytics
Build a doorbell using a Raspberry Pi and a camera module. Use OpenCV to detect people and send alerts only when a person is detected, not a car or a leaf.
- Skill Level: Advanced
- Tools: Raspberry Pi, camera, coding skills.
- Why: Reduce false alarms.
20. Automated Curtains for Privacy and Light Control
Install motorized curtain rods that open and close based on the time of day or light levels.
- Skill Level: Intermediate
- Tools: Motorized rods, light sensors.
- Why: Privacy and comfort.
21. DIY Smart Fan and Ventilation Control
Use CO2 sensors and humidity sensors to control your bathroom and kitchen fans. Turn them on automatically when levels get too high.
- Skill Level: Intermediate
- Tools: CO2 sensors, humidity sensors, smart relay.
- Why: Improve air quality.
2. Automated Window Openers for Natural Ventilation
Install window openers that open your windows when the temperature is right and close them when it rains.
- Skill Level: Advanced
- Tools: Window openers, rain sensors, temperature sensors.
- Why: Natural cooling and fresh air.
23. Smart Apliance Retrofiting for Older Homes
Use smart plugs and IR blasters to make old appliances “smart.” Control your old AC or TV with your phone.
- Skill Level: Beginner
- Tools: Smart plugs, IR blaster.
- Why: Upgrade without replacing.
24. DIY Intercom and Whole-Home Audio Systems
Build a multi-room audio system using Raspberry Pis and MPD (Music Player Daemon). Create an intercom system to talk between rooms.
- Skill Level: Advanced
- Tools: Raspberry Pi, speakers, microphones.
- Why: Entertainment and communication.
25. Automated Blinds for Solar Heat Gain Management
Similar to project #2, but focus on solar heat gain. Use sensors to track the sun and adjust blinds to maximize passive heating in winter and minimize it in summer.
- Skill Level: Intermediate
- Tools: Motorized blinds, sun sensors.
- Why: Energy efficiency.
26. Smart Mailbox Notifications and Security
Install a sensor in your mailbox to notify you when mail arrives. Add a camera to see who’s checking your mail.
- Skill Level: Intermediate
- Tools: Door sensor, camera.
- Why: Security and convenience.
27. DIY Smart Garden Greenhouse Controllers
Build a greenhouse controller that monitors temperature, humidity, and light. Automate vents, fans, and misters.
- Skill Level: Advanced
- Tools: Sensors, relays, microcontroller.
- Why: Perfect growing conditions.
28. Automated Lighting Scenes for Mood and Productivity
Create lighting scenes for different activities: “Reading,” “Movie Night,” “Focus.” Use Philips Hue or LIFX to adjust color and brightness.
- Skill Level: Beginner
- Tools: Smart bulbs, hub.
- Why: Enhance your environment.
29. Smart Sump Pump Monitoring and Alerts
Install a water sensor in your sump pit. Get alerts if the pump fails or if the water level gets too high.
- Skill Level: Intermediate
- Tools: Water sensor, smart relay.
- Why: Prevent basement flooding.
30. DIY Smart Safe and Vault Monitoring
Add a vibration sensor and door sensor to your safe. Get alerts if someone tries to move or open it.
- Skill Level: Intermediate
- Tools: Vibration sensor, door sensor.
- Why: Security.
31. Automated Window Shades for UV Protection
Install UV sensors to automatically close shades when UV levels are high to protect your furniture and skin.
- Skill Level: Intermediate
- Tools: UV sensors, motorized shades.
- Why: Protect your home.
32. Smart HVAC Zone Control Systems
Install dampers and thermostats in different zones of your home. Control each zone independently to save energy.
- Skill Level: Advanced
- Tools: Dampers, zone thermostats.
- Why: Comfort and efficiency.
3. DIY Smart Doorbell Camera with Facial Recognition
Build a doorbell that recognizes family members and sends specific alerts. Use Face Recognition libraries.
- Skill Level: Advanced
- Tools: Raspberry Pi, camera, coding skills.
- Why: Advanced security.
34. Automated Pool Cover Systems
Install a motorized pool cover that opens and closes automatically based on weather and temperature.
- Skill Level: Advanced
- Tools: Motorized cover, weather sensors.
- Why: Safety and energy savings.
35. Whole-Home Automation Dashboard Creation
Create a custom dashboard using Home Assistant or Node-RED to control everything from one screen.
- Skill Level: Advanced
- Tools: Home Assistant, Node-RED.
- Why: Centralized control.
🧠 The Brains Behind the Brawn: Programming Logic with Home Assistant, Node-RED, and OpenHAB
Now that you have your devices, you need to tell them what to do. This is where the magic happens.
Home Assistant Automations
Home Assistant uses a YAML-based configuration or a visual editor. You can create automations like:
automation:
 - alias: "Turn on lights when motion detected"
 trigger:
 platform: state
 entity_id: binary_sensor.motion_sensor
 to: "on"
 action:
 service: light.turn_on
 entity_id: light.living_room
This is powerful but can get complex.
Node-RED: The Visual Flow Builder
Node-RED is a visual programming tool that lets you drag and drop nodes to create flows. It’s perfect for complex logic and integrating with external APIs.
- Pros: Visual, easy to debug, great for IoT.
- Cons: Can get messy with large flows.
OpenHAB: The Java Powerhouse
OpenHAB is a Java-based platform that’s highly extensible. It’s great for large, complex systems but has a steeper learning curve.
Pro Tip: Use Node-RED for complex logic and Home Assistant for device management. They play well together!
🔒 Security First: Protecting Your DIY Smart Home from Hackers
You wouldn’t leave your front door unlocked, so why leave your smart home vulnerable?
- Segment Your Network: Put all your IoT devices on a separate VLAN. This way, if a smart bulb is hacked, the attacker can’t get to your laptop.
- Change Default Passwords: Always change the default username and password on your devices.
- Keep Firmware Updated: Regularly check for updates and apply them.
- Use Strong Encryption: Ensure your devices use WPA3 for Wi-Fi and TLS for communication.
- Disable Unused Features: If you don’t use UPnP or Telnet, turn them off.
Did you know? A study by the University of Michigan found that 70% of IoT devices have at least one critical vulnerability. Stay vigilant!
🔧 Troubleshooting Common DIY Smart Home Glitches and Connectivity Issues
Even the best systems have hiccups. Here’s how to fix them.
- Device Offline: Check your network. Is the device within range? Try restarting the hub.
- Slow Response: Check your Wi-Fi signal. Consider adding a mesh node or a Zigbee repeater.
- Automation Not Triggering: Check the logs in your hub. Is the trigger condition correct?
- Interference: Zigbee and Wi-Fi can interfere. Change the Zigbee channel to avoid overlap.
Pro Tip: Keep a log of your automations and test them regularly.
💡 Advanced Automation: Creating Complex Routines and Geofencing
Once you’ve mastered the basics, it’s time to get fancy.
- Geofencing: Use your phone’s location to trigger automations. “When I leave home, turn off lights and lock doors.”
- Time-Based Routines: “At 7 AM, open blinds and start coffee.”
- Weather-Based Routines: “If it’s going to rain, close the windows.”
- Presence Detection: Use multiple sensors to determine if someone is in a room, not just motion.
Example: Create a “Goodnight” routine that locks all doors, turns off lights, sets thermostat to eco mode, and arms the security system.
🛒 Best Tools and Components for Your DIY Smart Home Journey
Here are the essential tools you’ll need:
- Soldering Iron: For custom projects.
- Multimeter: To test voltage and continuity.
- Wire Strippers: For electrical work.
- Raspberry Pi: The heart of many DIY projects.
- ESP32/ESP826: Cheap and powerful microcontrollers.
- Zigbee/Z-Wave Dongles: To connect your hub to devices.
👉 CHECK PRICE on:
- Raspberry Pi 4: Amazon | Official Store
- ESP32 Dev Kit: Amazon | Adafruit
- Zigbee USB Dongle: Amazon | Sonoff Official
❓ Frequently Asked Questions About DIY Home Automation
Where can I find tutorials for robotic coding in home automation?
You can find excellent tutorials on the Robotic Coding™ website, specifically in our Robotics and Artificial Intelligence categories. We also recommend the official documentation for Home Assistant and Node-RED.
How much does it cost to build a DIY smart home robot?
The cost varies widely. A basic robot using an Arduino and a few sensors can cost under $50. A more advanced robot with a Raspberry Pi, cameras, and AI capabilities can cost $20-$50.
What programming languages are best for home automation robots?
Python is the most popular due to its simplicity and vast library support. C++ is used for microcontrollers like Arduino. JavaScript is great for Node-RED.
How to integrate voice control with DIY robot projects?
You can use Rhasspy or Mycroft for local voice control. For cloud-based control, integrate with Amazon Alexa or Google Assistant using their respective APIs.
Can I use Arduino to build a smart robotic home system?
Absolutely! Arduino is perfect for reading sensors and controlling actuators. For more complex logic, pair it with a Raspberry Pi.
What are the best DIY robotics kits for beginners?
littleBits Smart Home Kit is great for beginners. Arduino Starter Kit is also excellent for learning the basics.
How do I start coding robots for home automation?
Start with Arduino and simple projects like reading a sensor. Then move on to Python and Raspberry Pi for more complex logic.
How can I use robotic coding languages like Python or C++ to program and automate my DIY home automation systems?
Use Python for high-level logic and C++ for low-level hardware control. Integrate them using ROS (Robot Operating System) or Home Assistant.
What are some creative DIY home automation projects that can be controlled using robotic coding and IoT devices?
Try building a smart mirror, an automated plant care system, or a custom security camera with facial recognition.
How do I integrate robotic coding with smart home devices to create a seamless automation experience?
Use Home Assistant as the central hub. It supports a wide range of devices and allows you to create complex automations.
Can I use open-source robotic coding platforms like Arduino or Raspberry Pi for my DIY home automation projects?
Yes! Arduino and Raspberry Pi are the backbone of many DIY projects. They are flexible, affordable, and have large communities.
What are the essential components required for building a DIY home automation project?
You’ll need a microcontroller (Arduino/Raspberry Pi), sensors (motion, temperature, etc.), actuators (motors, relays), and a power source.
🏁 Conclusion
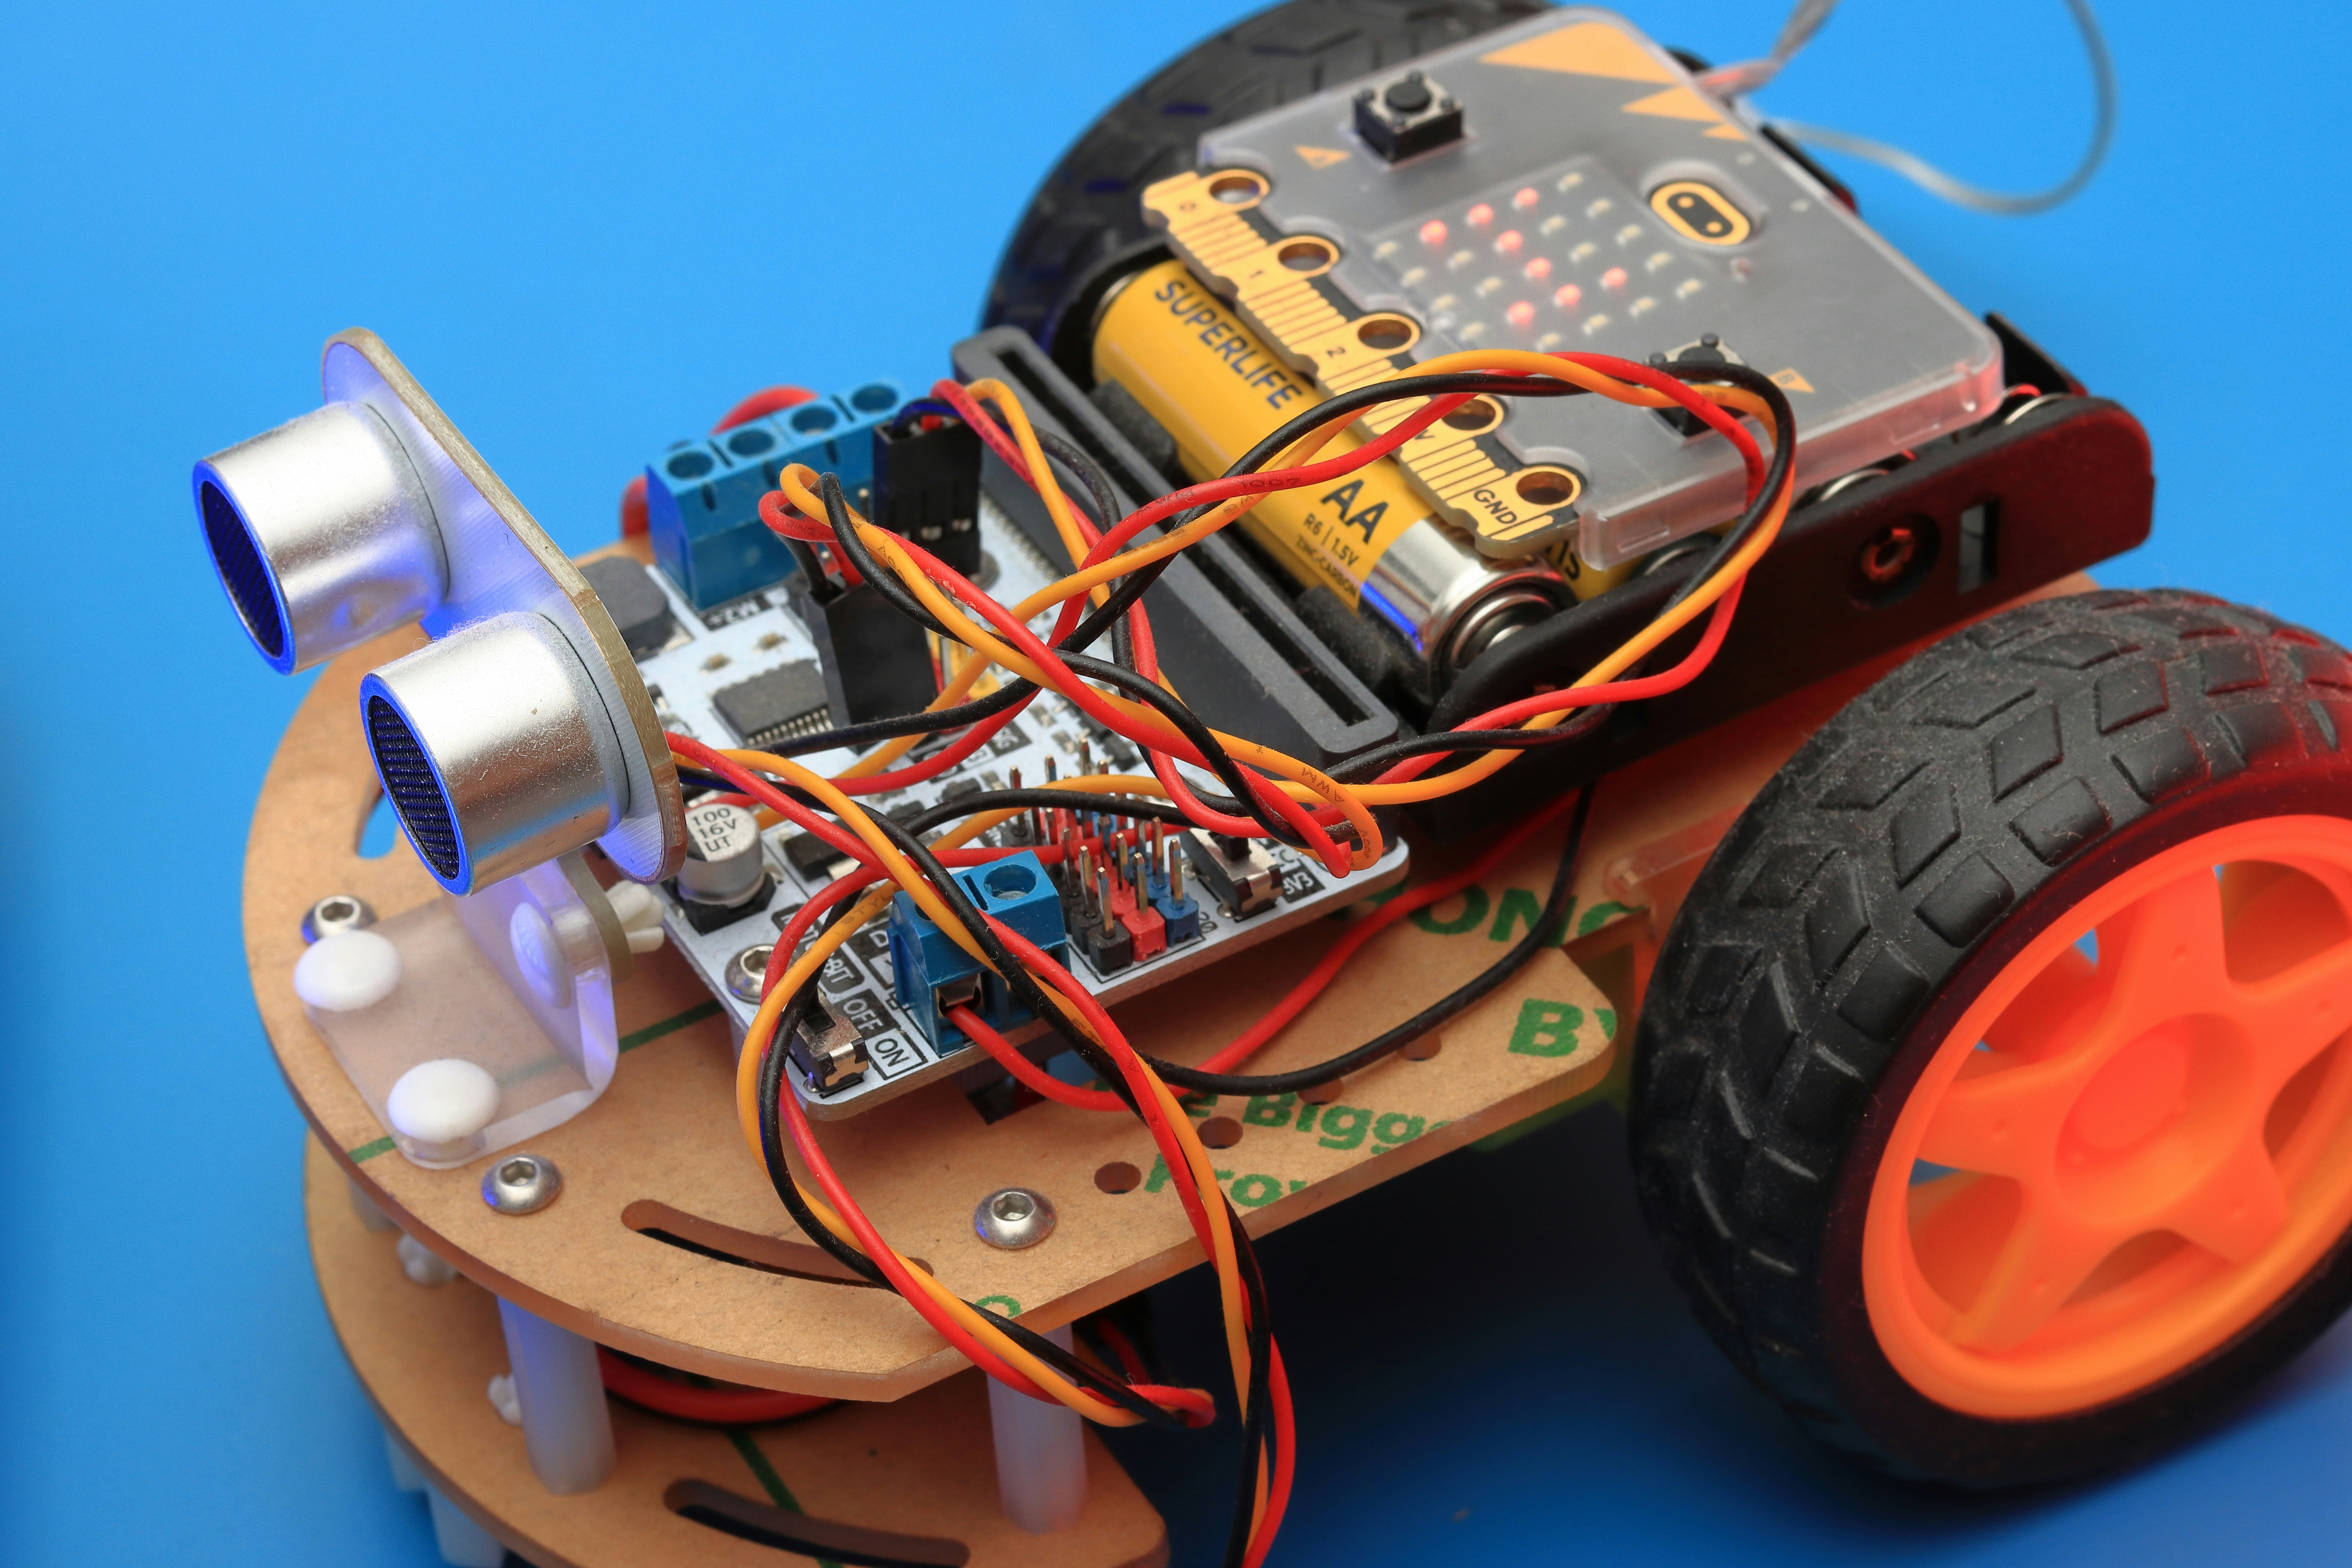
Building a DIY home automation system is a journey, not a destination. You’ll start with a single smart bulb and end up with a fully integrated, intelligent home that anticipates your needs. The key is to start small, learn as you go, and never stop experimenting.
At Robotic Coding™, we believe that the future of home automation is in your hands. Whether you’re a beginner or an expert, there’s always something new to discover. So, what are you waiting for? Grab your tools, fire up your code editor, and start building your dream smart home today!
Our Top Recommendation: If you’re serious about DIY home automation, go with Home Assistant running on a Raspberry Pi. It offers the most flexibility, privacy, and control. Don’t be afraid to dive in—the community is there to help!
🔗 Recommended Links and Resources
- Home Assistant: Official Website
- Node-RED: Official Website
- Raspberry Pi: Official Store
- Arduino: Official Website
- ESP32: Espressif Systems
- Philips Hue: Official Website
- SmartThings: Official Website
- Hubitat: Official Website
- Books: “Home Automation with Raspberry Pi” on Amazon
- Books: “Arduino Home Automation Projects” on Amazon
📚 Reference Links and Further Reading
- Smart Home Solver: 24 Essential Smart Home Projects for Beginners
- Instructables: Planning a DIY Home Automation System (Note: Content may behind a security check)
- Seed Studio: Smart Home Projects Using Arduino, ESP32, and Raspberry Pi (Note: Content may behind a security check)
- NIST: Cybersecurity for IoT Devices
- Zigbee Alliance
- Z-Wave Alliance
- Matter Standard
Did you miss the video? Check out our featured video below for a visual guide on setting up your first automation!
🎥 Featured Video: Lights turn on when entering a room and off when exiting. Auto-unlocking the door when returning home.