Arduino is an open-source electronics platform that acts as a universal translator, letting your code control the physical world by reading sensors and powering motors. To answer What is Arduino and how does it work? simply: it’s a tiny, affordable computer chip that executes your instructions in a continuous loop, turning digital logic into real-world actions.
Imagine trying to build a robot that avoids obstacles, but instead of writing complex low-level code for every sensor, you just tell it “stop if distance is less than 10cm.” That’s the magic of Arduino. It handles the heavy lifting of voltage regulation and signal processing so you can focus on creativity.
Did you know the first Arduino board was named after a local bar in Italy? It started as a teaching tool for design students and has since exploded into a global movement used by everyone from hobbyists to NASA engineers.
Key Takeaways
- Arduino is an ecosystem, not just a board, combining easy-to-use hardware, a simplified C++ language, and a massive library of pre-written code.
- The microcontroller executes a loop continuously, reading inputs (like buttons or sensors) and triggering outputs (like LEDs or motors) in real-time.
- Power matters: Understanding the difference between the Vin pin (requires 7-12V for the regulator) and the 5V pin (direct power) is crucial to avoiding hardware damage.
- It’s beginner-friendly yet powerful enough for complex robotics, IoT projects, and industrial protyping.
Table of Contents
- ⚡️ Quick Tips and Facts
- 🕰️ The Sparky History: How Arduino Revolutionized DIY Electronics
- 🧠 What is Arduino? Demystifying the Open-Source Microcontroller Platform
- ⚙️ Under the Hood: How Does Arduino Actually Work?
- 🔌 Anatomy of the Board: Pinout, Power, and Core Components Explained
- 🛠️ Top 7 Arduino Board Models Compared: From Uno to Mega and Beyond
- 💻 The Arduino IDE: Your Gateway to Coding and Uploading Sketches
- 📝 Writing Your First Sketch: C++ Basics for Beginners
- 🔧 Essential Sensors and Actuators: Bringing Your Projects to Life
- 🔌 Powering Up: Understanding Vin, 5V, 3.3V, and External Power Supplies
- 🚀 10 Cool Beginner Projects to Master Arduino Fundamentals
- 🛡️ Common Pitfalls: Troubleshooting Power Issues, Code Errors, and Hardware Hiccups
- 🌐 Expanding Horizons: Shields, Libraries, and Advanced Integration
- 💡 Why Arduino? The Unbeatable Ecosystem for Makers and Engineers
- 📚 Recommended Links: Where to Buy Genuine Boards and Get Help
- ❓ FAQ: Your Burning Questions About Arduino Answered
- 📖 Reference Links: Official Docs, Datasheets, and Community Resources
- 🏁 Conclusion: Your Journey from Blinking LED to Smart Home Hero
⚡️ Quick Tips and Facts
Before we dive into the nitty-gritty of microcontrollers and code, let’s hit the ground running with some hard-hitting truths about Arduino that every maker should know. We’ve seen too many beginners burn out their boards (literally!) because they missed these basics.
- It’s Not Just a Board: Arduino is an ecosystem. It’s the hardware, the software (IDE), the community, and the libraries all working in harmony. You can’t really separate them.
- Open Source is King: The schematics are free. The code is free. This means you can build your own version on a breadboard if you’re feeling adventurous, or buy a clone for half the price.
- The “Vin” Mystery: Many newbies ask, “Why does my Arduino Vin pin not work, but the 5V pin works?” We’ll solve this specific headache later in the article, but the short answer is: Vin goes through a voltage regulator, while 5V is often a direct output. If your input voltage is too low, the regulator shuts down, but the 5V pin might still be fed by USB.
- Speed Matters (Sort of): The classic Arduino Uno runs at 16 MHz. That’s fast enough to blink an LED a million times a second, but slow compared to a Raspberry Pi. Don’t try to run a Linux OS on it!
- Memory is Precious: The Uno has only 2KB of SRAM. If you try to store a massive text file or too many variables, your sketch will crash. We’ll show you how to manage this.
- Analog vs. Digital: Digital pins are like light switches (On/Off). Analog pins are like dimer switches (0 to 1023). Never connect 5V directly to analog input pin without a voltage divider, or you’ll fry the chip.
Pro Tip from the Lab: Always use a multimeter to check your voltage before plugging in sensors. We once fried a $40 sensor because we assumed the power supply was “close enough” to 5V. It was 5.8V. Oops.
🕰️ The Sparky History: How Arduino Revolutionized DIY Electronics
You might think microcontrollers have always been the domain of electrical engineers in lab coats, but the story of Arduino is actually a tale of student rebellion and design necessity.
Born in Ivrea
In 205, at the Interaction Design Institute Ivrea in Italy, a group of students and professors were frustrated. They wanted to build interactive physical projects, but the existing tools were either too expensive, too complex, or required proprietary hardware.
Enter Massimo Banzi and David Cuartieles. They wanted a tool that was:
- Cheap: Affordable for students.
- Easy: No PhD in electrical engineering required.
- Open: Everyone could learn from and improve it.
They based their hardware on the Wiring platform and the software on Processing. The result? The first Arduino board, named after a local bar, Bar di Re Arduino.
From Classroom to Global Phenomenon
What started as a teaching tool exploded into a global movement. By 2010, the Arduino Uno became the standard, replacing the older Duemilanove. Today, Arduino is used in everything from NASA’s Mars rovers (for protyping) to interactive art installations at the Maker Faire.
Did you know? The term “Maker Movement” owes a massive debt to Arduino. Before Arduino, building a robot that could follow a line cost hundreds of dollars and required weeks of coding. With Arduino, it cost $30 and a weekend.
For a deeper dive into how this history shaped modern robotics, check out our article on Arduino’s impact on the industry.
🧠 What is Arduino? Demystifying the Open-Source Microcontroller Platform
So, what exactly is this thing? Is it a computer? A robot brain? A magic wand?
Arduino is an open-source electronics platform based on easy-to-use hardware and software.
Think of it as a universal translator between the digital world (your code) and the physical world (lights, motors, sensors).
The Core Components
- The Microcontroller: This is the brain. On the classic Uno, it’s the ATmega328P. It’s a tiny computer on a chip that executes your instructions.
- The IDE (Integrated Development Environment): This is the software on your computer where you write code (called “Sketches”) and upload it to the board.
- The Ecosystem: Thousands of shields (add-on boards), sensors, and libraries that make complex tasks easy.
How It Differs from a Computer
A standard computer (like your laptop) runs an operating system (Windows, macOS) and does many things at once. An Arduino runs one program (your sketch) in an infinite loop. It doesn’t have a hard drive or an OS. It’s a microcontroller, not a microprocessor.
Why does this matter? Because it means Arduino is deterministic. If you tell it to turn on a light, it does it immediately. It doesn’t get distracted by background updates or antivirus scans. This makes it perfect for robotics and real-time control.
For more on the differences between microcontrollers and other coding languages, visit our Coding Languages category.
⚙️ Under the Hood: How Does Arduino Actually Work?
This is where the magic happens. You write code, hit “Upload,” and suddenly a motor spins. How?
The Workflow: From Sketch to Spark
- Writing the Code: You write a Sketch in the Arduino IDE. The code is written in a simplified version of C++.
- Compilation: When you click “Verify,” the IDE translates your human-readable code into machine code (binary) that the microcontroller understands.
- Upload: The USB cable sends this binary data to the board. A small program called the Bootloader (already on the chip) receives the data and writes it to the Flash Memory.
- Execution: Once powered, the microcontroller starts running your code from the beginning.
The Structure of a Sketch
Every Arduino program has two mandatory functions:
void setup(): Runs once when the board powers up. This is where you initialize pins, start serial communication, or set variables.void loop(): Runs repeatedly forever. This is where your main logic lives (reading sensors, turning things on/off).
void setup() {
 pinMode(13, OUTPUT); // Set pin 13 as output
}

void loop() {
 digitalWrite(13, HIGH); // Turn LED on
 delay(10); // Wait 1 second
 digitalWrite(13, LOW); // Turn LED off
 delay(10); // Wait 1 second
}
The “Loop” Logic
The loop() function is the heartbeat of your project. It executes as fast as the processor allows (16 million times a second on an Uno). If your code inside loop() takes 10 milliseconds to run, the loop repeats 10 times a second.
Wait, what about multitasking?
You might be wondering: “Can I run two things at once?”
Technically, no. The Arduino does one thing at a time. But we use non-blocking code (usingmillis()) to simulate multitasking. We’ll cover this in the “Common Pitfalls” section.
🔌 Anatomy of the Board: Pinout, Power, and Core Components Explained
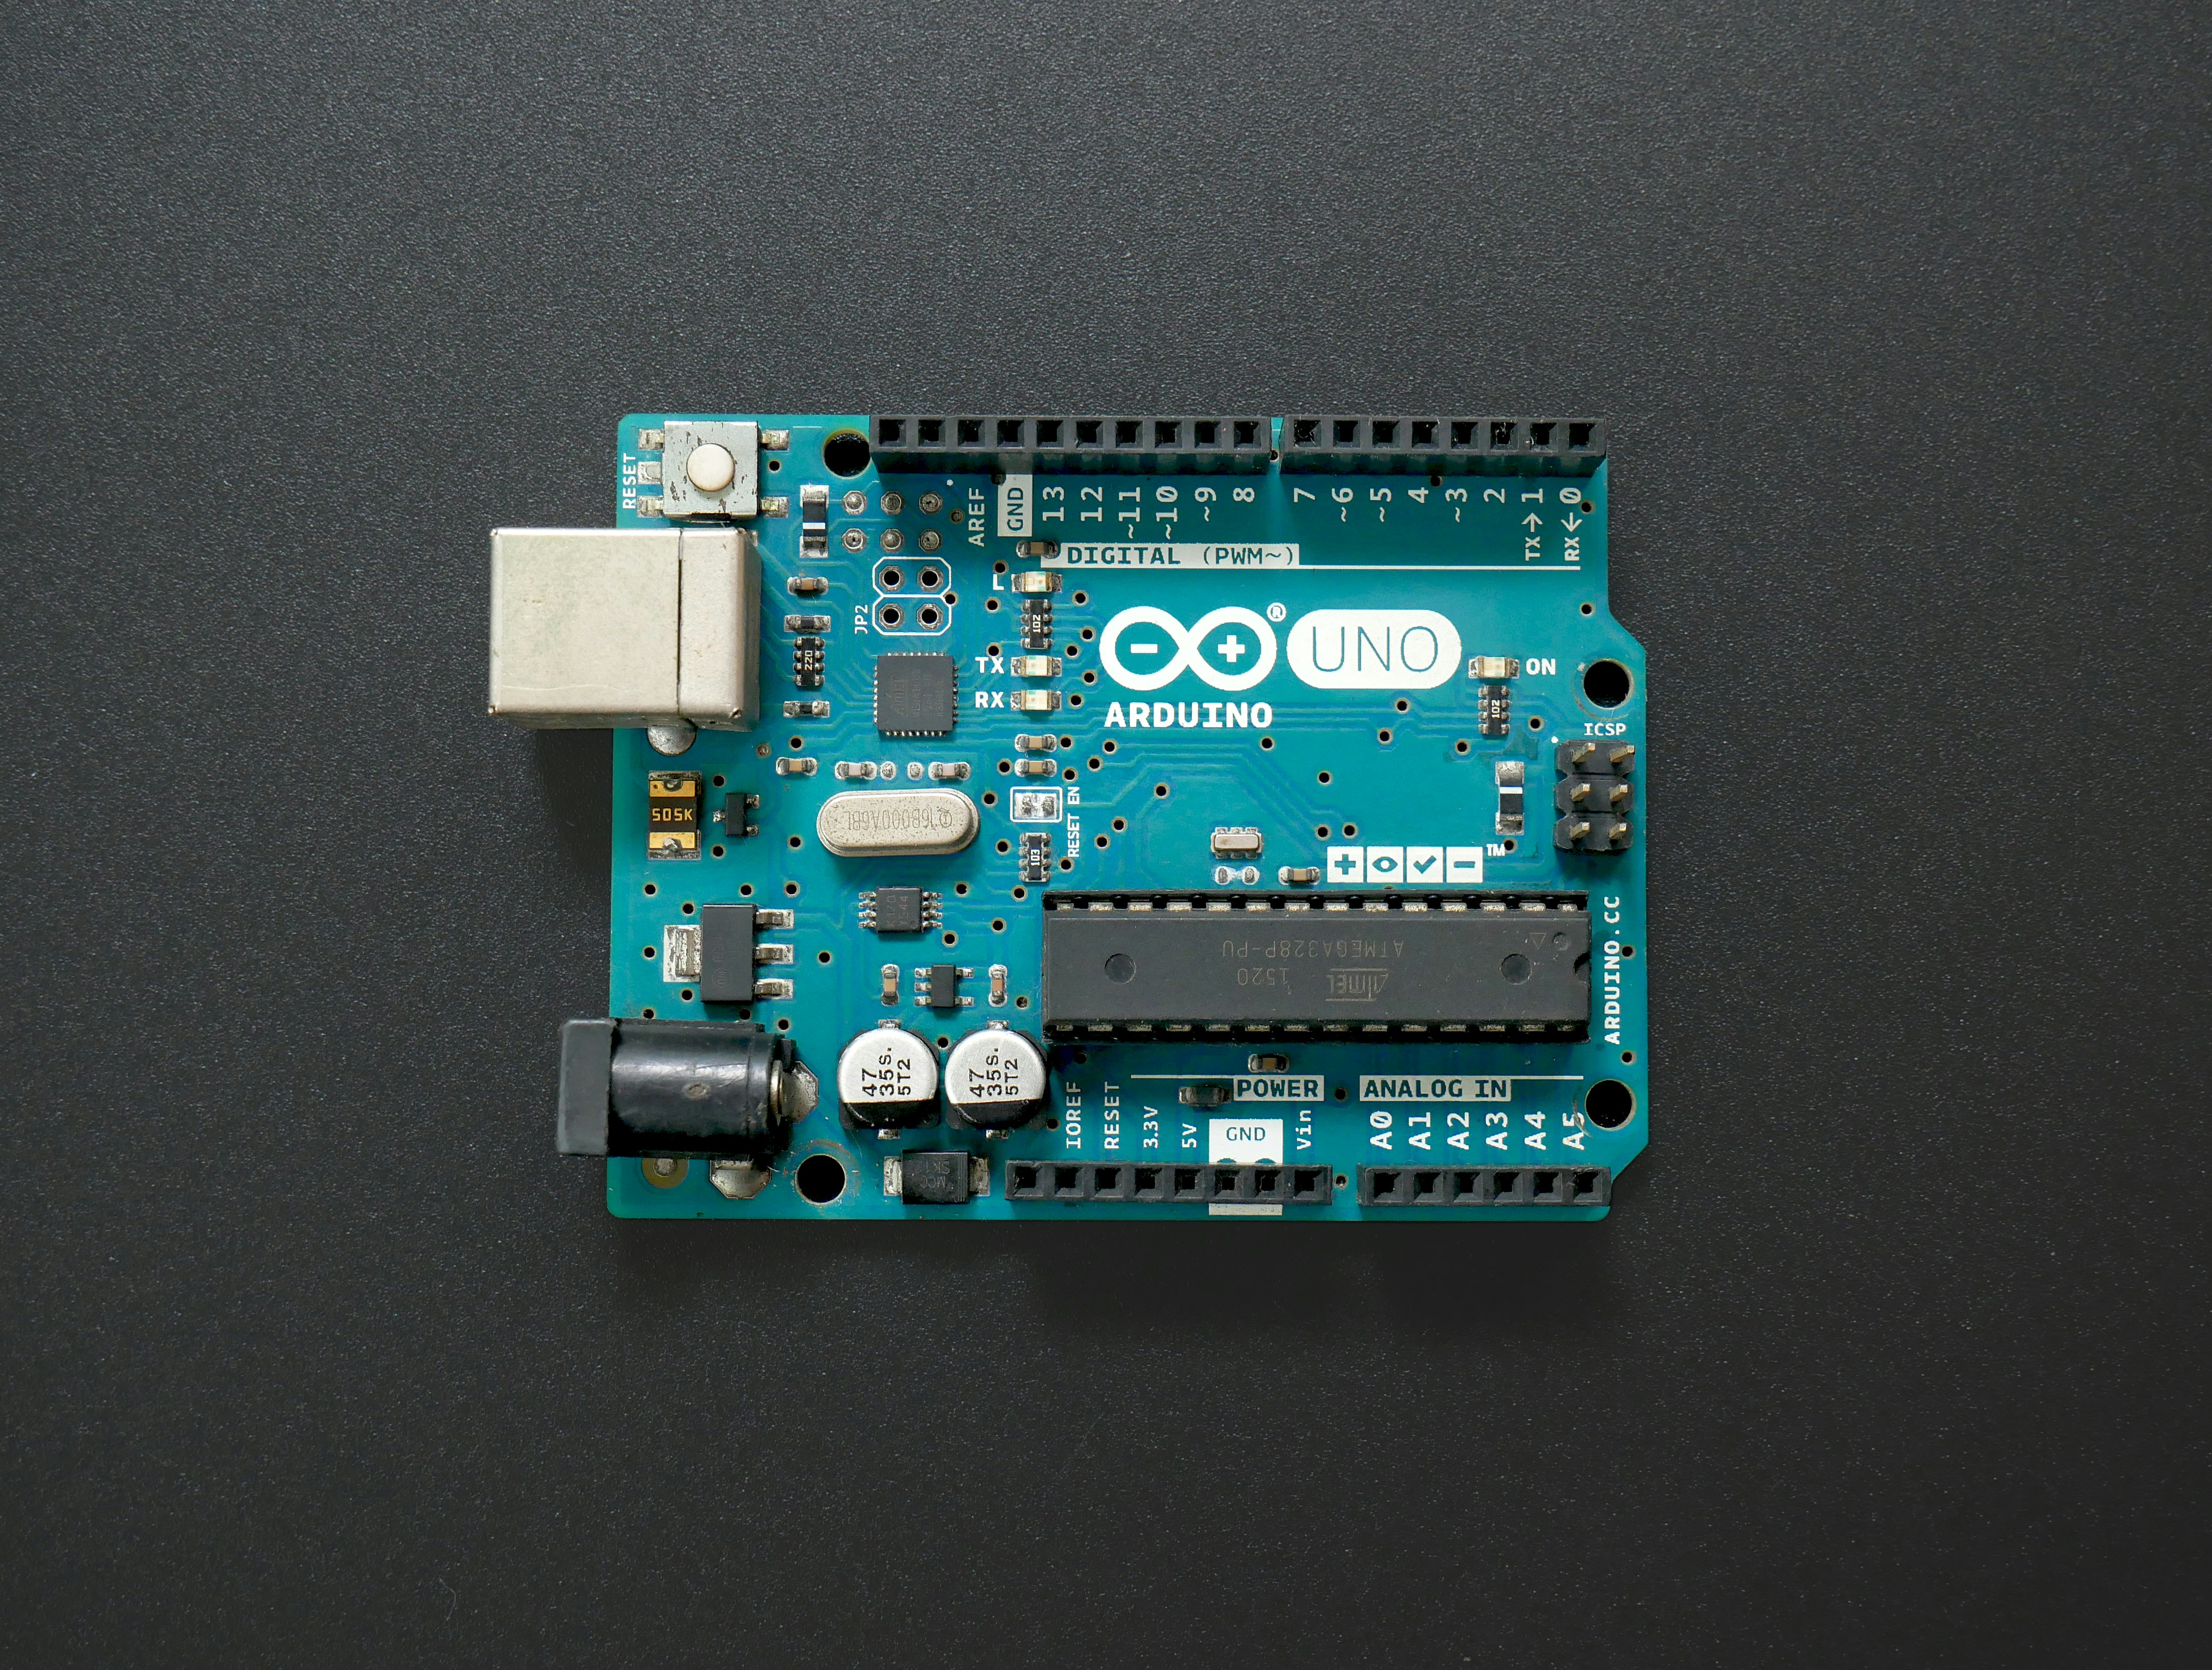
Let’s take a tour of the most famous board: the Arduino Uno R3. If you can understand this, you can understand almost any Arduino board.
The Power Section
- USB Port: Powers the board (5V) and uploads code.
- Barel Jack (Vin): Accepts 7-12V external power.
- 5V Pin: Regulated 5V output.
- 3.3V Pin: Regulated 3.3V output (max 50mA).
- GND: Ground (0V). You need this to complete the circuit.
- VIN Pin: The raw input voltage before regulation. Crucial: Do not connect 5V here if you are using the USB; it can backfeed and damage the regulator.
The Digital I/O Pins (0-13)
- Digital: Can be set to
INPUT(read a button) orOUTPUT(turn on an LED). - PWM Pins (~3, ~5, ~6, ~9, ~10, ~1): These can simulate analog output using Pulse Width Modulation. This is how you dim an LED or control motor speed.
- Special Pins:
0 (RX) & 1 (TX): Used for serial communication. Don’t use these if you are uploading code via USB at the same time.
13: Connected to the onboard LED. Great for testing.
The Analog Input Pins (A0-A5)
- These pins read voltage from 0V to 5V.
- The ADC (Analog-to-Digital Converter) converts this voltage into a number between 0 and 1023.
- 10-bit resolution means 1024 steps.
- Example: 2.5V = 512.
The Reset Button
Pressing this restarts the board, running your code from the top again.
The Crystal Oscillator
The silver can on the board. It provides the 16 MHz clock speed, acting as the metronome for the microcontroller.
🛠️ Top 7 Arduino Board Models Compared: From Uno to Mega and Beyond
Not all Arduinos are created equal. Choosing the right board is like choosing the right tool for a job. Here is our breakdown of the top contenders.
Comparison Table: Specs at a Glance
| Feature | Arduino Uno R3 | Arduino Nano | Arduino Mega 2560 | Arduino Leonardo | Arduino ESP32 (Compatible) | Arduino MKR10 |
|---|---|---|---|---|---|---|
| Microcontroller | ATmega328P | ATmega328P | ATmega2560 | ATmega32U4 | ESP32 | SAMD21 + ATECC608A |
| Clock Speed | 16 MHz | 16 MHz | 16 MHz | 16 MHz | 240 MHz | 48 MHz |
| Digital I/O Pins | 14 | 14 | 54 | 20 | 30+ | 14 |
| PWM Pins | 6 | 6 | 15 | 7 | 16 | 6 |
| Analog Inputs | 6 | 8 | 16 | 12 | 34 | 7 |
| SRAM | 2 KB | 2 KB | 8 KB | 2.5 KB | 520 KB | 32 KB |
| Flash Memory | 32 KB | 32 KB | 256 KB | 32 KB | 4 MB | 256 KB |
| USB Type | Type B | Mini-B | Type B | Micro-B | USB-C | Micro-B |
| Best For | Beginners, General | Small projects, Wearables | Complex projects, Many sensors | Native USB (Keyboard/Mouse) | IoT, Wi-Fi, Bluetooth | IoT, Wi-Fi |
Deep Dive into the Contenders
1. Arduino Uno R3: The Gold Standard
The Uno is the default choice for 90% of beginners. It has a massive community, endless tutorials, and a robust design. If you are just starting, start here.
- Pros: Huge library support, easy to find clones, standard form factor.
- Cons: Limited memory, no built-in Wi-Fi.
2. Arduino Nano: The Pocket Rocket
Same brain as the Uno, but tiny. It uses a Mini-USB port. Perfect for wearable tech or projects where space is tight.
- Pros: Compact, breadboard-friendly, cheap.
- Cons: Mini-USB is becoming obsolete, harder to solder for beginners.
3. Arduino Mega 2560: The Powerhouse
When the Uno runs out of pins, you upgrade to the Mega. It has 54 digital pins and 256KB of flash memory.
- Pros: Massive I/O, great for 3D printers and complex robots.
- Cons: Bulky, more expensive, overkill for simple projects.
4. Arduino Leonardo: The USB Master
Unlike the Uno, the Leonardo’s microcontroller (ATmega32U4) has native USB. This means it can act as a keyboard, mouse, or joystick without extra hardware.
- Pros: Great for HID (Human Interface Device) projects.
- Cons: Slightly different pinout, can be tricky to recover if the bootloader gets corrupted.
5. ESP32 (Third-Party but Essential): The IoT King
While not an official “Arduino” board, the ESP32 is compatible with the Arduino IDE and is a game-changer for IoT. It has built-in Wi-Fi and Bluetooth.
- Pros: Dual-core, 240 MHz, Wi-Fi/Bluetooth, cheap.
- Cons: 3.3V logic (be careful connecting 5V sensors), different pin mapping.
6. Arduino MKR10: The Professional IoT
Official Arduino board with Wi-Fi. More robust than the ESP32 for industrial use, but pricier.
- Pros: Secure, reliable, official support.
- Cons: Expensive, smaller community than ESP32.
7. Arduino Due: The 32-Bit Beast
Uses an ARM Cortex-M3 processor. It’s 32-bit, runs at 84 MHz, and has 512KB of Flash.
- Pros: Fast, lots of memory.
- Cons: 3.3V only (no 5V tolerance), complex for beginners, large.
Which one should you buy?
If you are a beginner, get an Uno. If you need Wi-Fi, get an ESP32. If you need 50+ pins, get a Mega.
👉 Shop Arduino Boards on:
- Amazon: Arduino Uno R3 | Arduino Nano | Arduino Mega 2560
- Official Store: Arduino Store
💻 The Arduino IDE: Your Gateway to Coding and Uploading Sketches
The Arduino IDE is the software you use to write your code. It’s free, open-source, and runs on Windows, Mac, and Linux.
Versions: 1.8.x vs. 2.0
- IDE 1.8.x: The classic version. Stable, simple, but lacks modern features.
- IDE 2.0: The new version. Features auto-completion, a built-in debugger, and a cleaner interface. We highly recommend upgrading to IDE 2.0 for a smoother experience.
How to Install Board Packages
By default, the IDE only knows about the Uno. To use other boards (like ESP32 or Nano), you need to install Board Managers.
- Go to File > Preferences.
- Add the URL for the board’s core (e.g., for ESP32:
https://espressif.github.io/arduino-esp32/package_esp32_index.json). - Go to Tools > Board > Boards Manager.
- Search for the board name and click Install.
The Serial Monitor
This is your window into the Arduino’s mind. You can print variables to it using Serial.println(). It’s essential for debuging.
Pro Tip: Always set the Baud Rate in your code (
Serial.begin(960)) to match the Serial Monitor setting. If they don’t match, you’ll see garbage text.
📝 Writing Your First Sketch: C++ Basics for Beginners
Don’t let the “C++” scare you. Arduino code is a simplified subset. You don’t need to know classes or pointers to get started.
Key Concepts
- Variables: Containers for data.
int myNumber = 5; - Functions: Blocks of code that do something.
digitalWrite(13, HIGH); - Lops:
for,while,do...while. - Conditionals:
if,else if,else.
Step-by-Step: The Blink Sketch
- Open the IDE.
- Go to File > Examples > 01.Basics > Blink.
- Click Verify (the checkmark). If it says “Done compiling,” you’re good.
- Select your board under Tools > Board.
- Select your port under Tools > Port.
- Click Upload (the arrow).
- Watch the LED on pin 13 blink!
Understanding the Code
void setup() {
 pinMode(LED_BUILTIN, OUTPUT); // Initialize the LED pin
}

void loop() {
 digitalWrite(LED_BUILTIN, HIGH); // Turn the LED on
 delay(10); // Wait for a second
 digitalWrite(LED_BUILTIN, LOW); // Turn the LED off
 delay(10); // Wait for a second
}
LED_BUILTINis a constant that points to pin 13 on most boards.delay()pauses the program. It’s simple but blocks other code from running.
🔧 Essential Sensors and Actuators: Bringing Your Projects to Life
A microcontroller without sensors is just a calculator. Here are the must-haves.
Input Devices (Sensors)
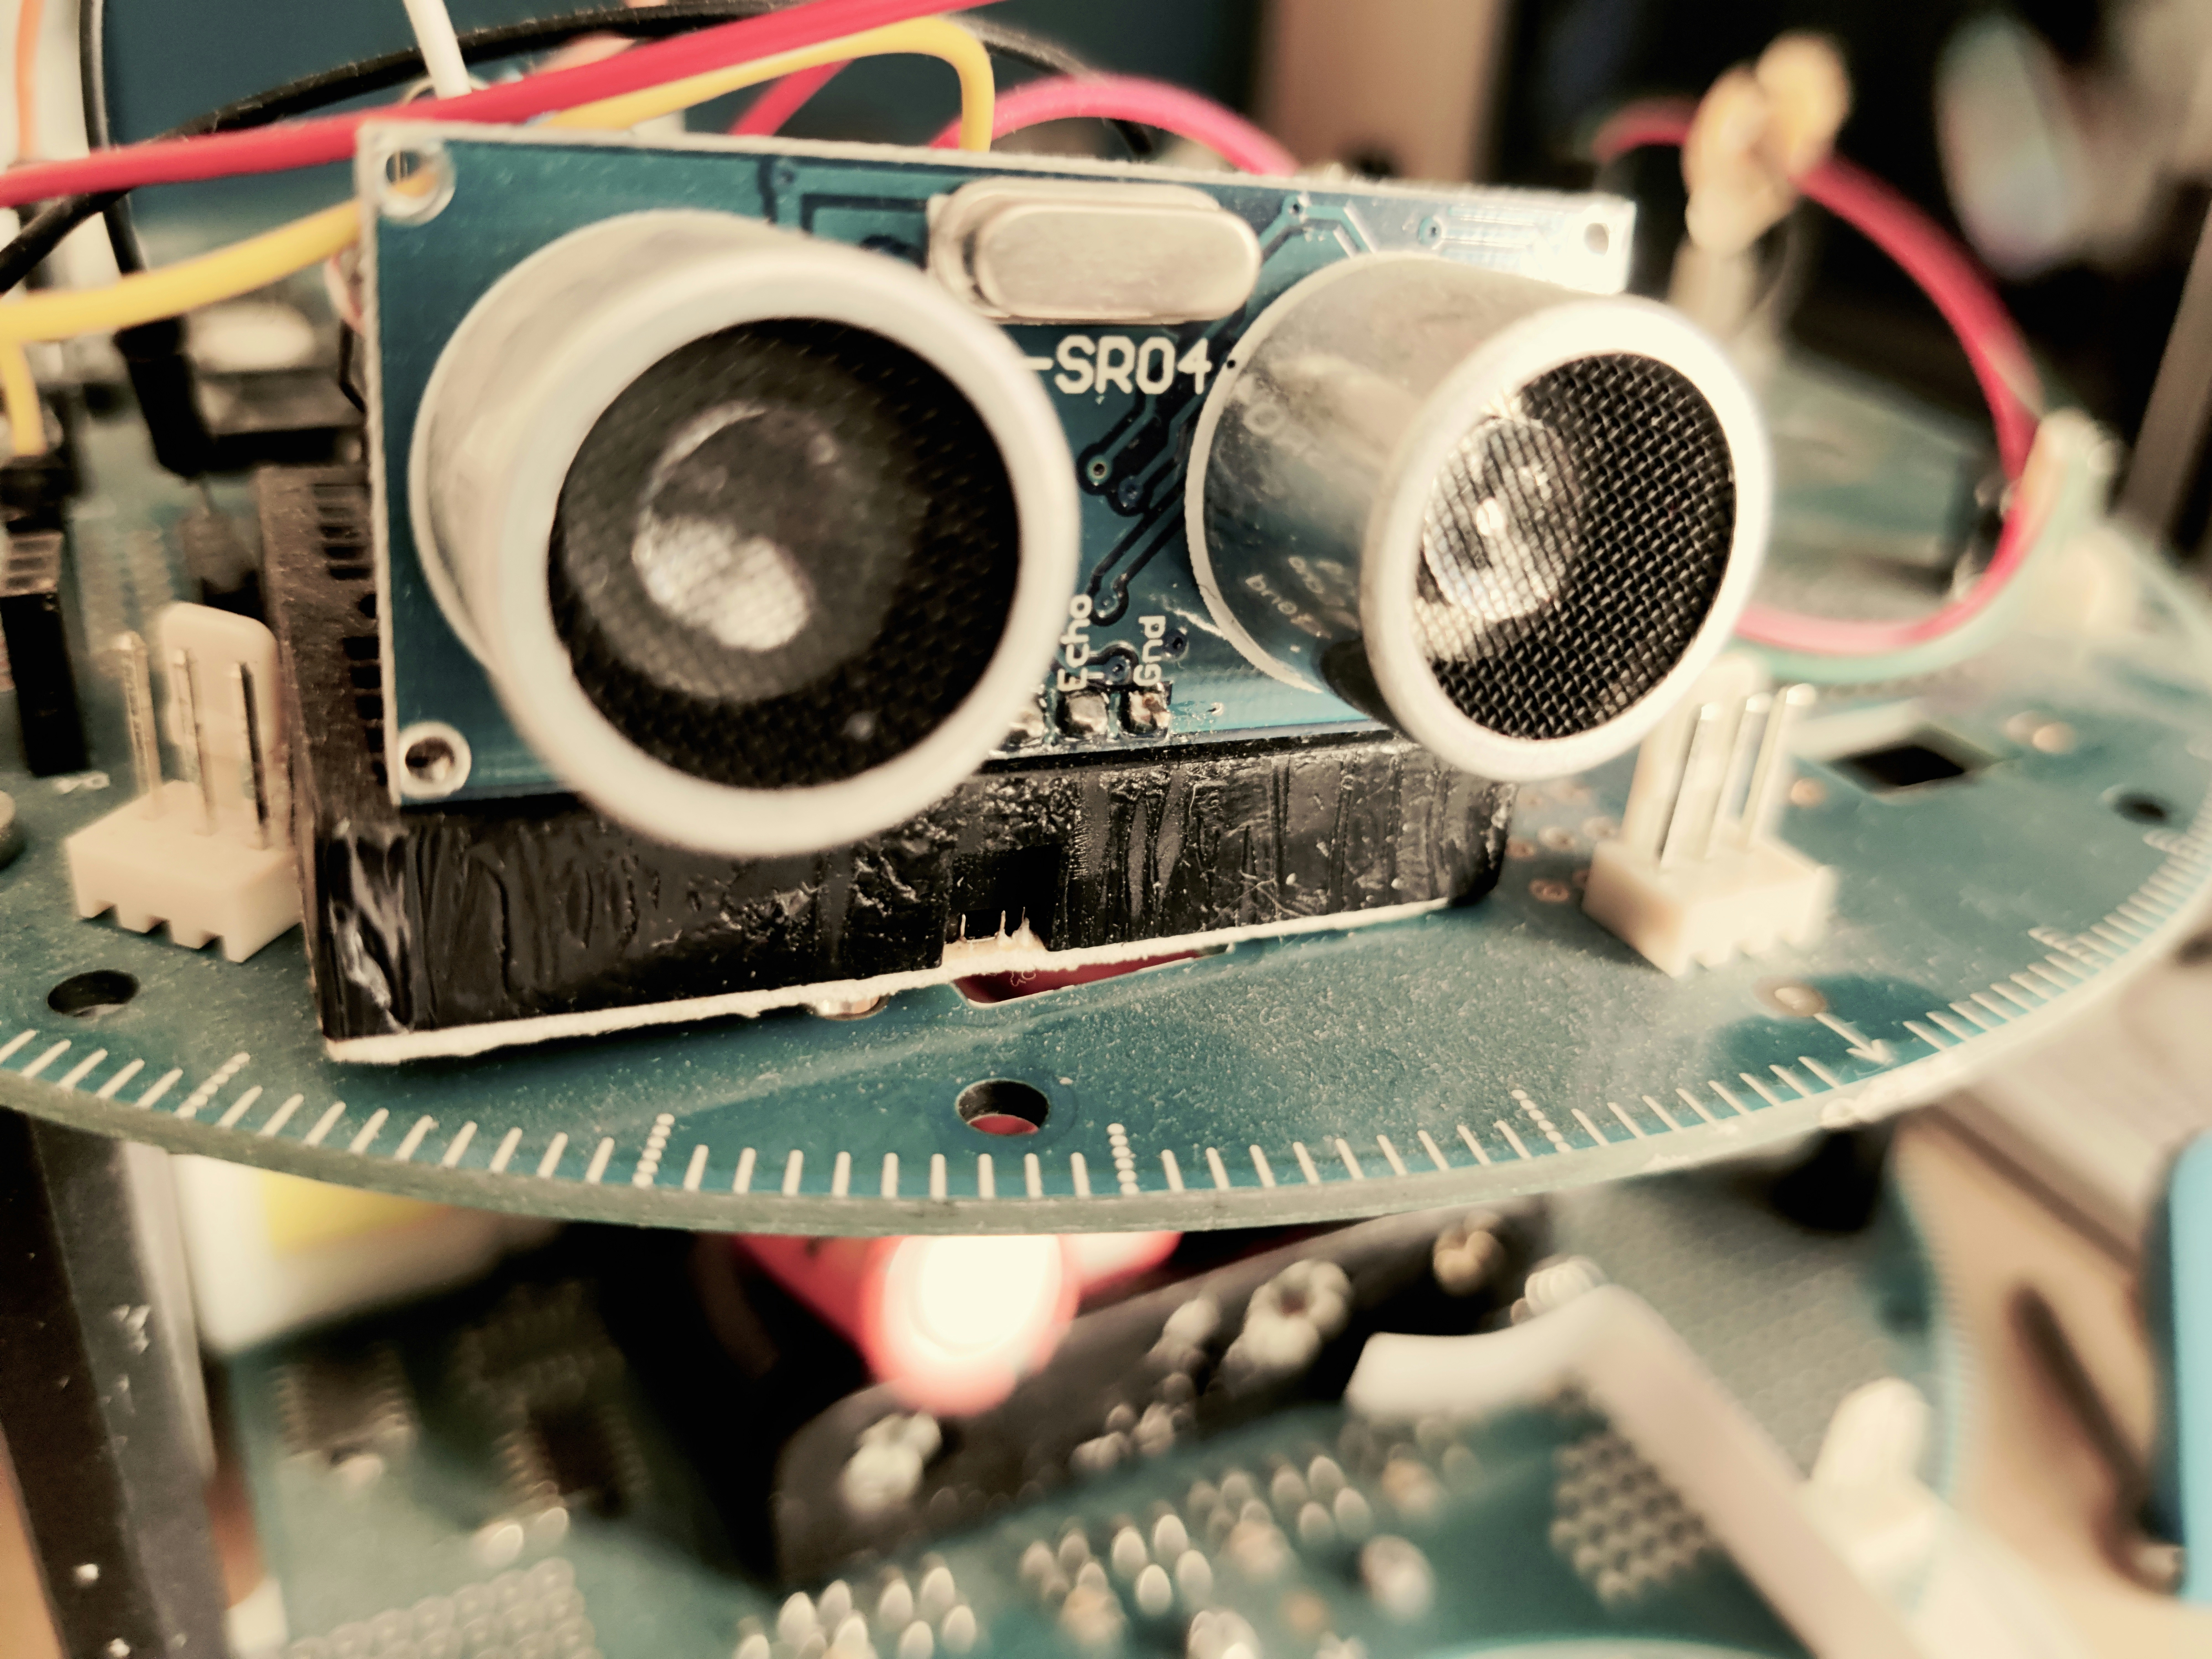
- Ultrasonic Sensor (HC-SR04): Measures distance using sound waves. Great for robot navigation.
- DHT1/DHT2: Measures temperature and humidity.
- Photoresistor (LDR): Detects light levels.
- Push Buttons: Simple on/off inputs.
- Potentiometer: A variable resistor used for volume knobs or speed control.
Output Devices (Actuators)
- LEDs: The classic output.
- Servo Motors: Rotate to a specific angle (0-180). Perfect for robot arms.
- DC Motors: Spin continuously. Need a motor driver.
- Buzzers: Make sound.
- Relays: Switch high-voltage devices (like lamps) on/off.
Warning: Never connect a motor directly to an Arduino pin. The current draw will fry the chip. Always use a motor driver (like the L298N) or a transistor.
🔌 Powering Up: Understanding Vin, 5V, 3.3V, and External Power Supplies
This is the section where most beginners get stuck. Let’s clear up the confusion once and for all.
The Power Hierarchy
- USB (5V): The easiest way to power the board. Limited to 50mA (0.5A) from a standard USB port.
- Vin (7-12V): The input for the voltage regulator. The regulator steps this down to 5V.
Why 7-12V? If you use 5V on Vin, the regulator might not work correctly because it needs a “headroom” of about 2V to function.
The Vin Problem: If you plug in 5V to Vin, the regulator shuts off, and the board might not power up. This is why the Vin pin “doesn’t work” with 5V. - 5V Pin: This is the output of the regulator. You can also feed 5V directly here if you are sure it’s stable, bypassing the regulator.
- 3.3V Pin: Regulated 3.3V output. Max 50mA. Do not exceed this!
External Power Supplies
For projects that draw more than 50mA (like motors), you need an external battery or power supply.
- Connect the positive to Vin (if 7-12V) or 5V (if exactly 5V).
- Connect the negative to GND.
- Crucial: Ensure the external power supply and the Arduino share a common GND.
The “Vin vs 5V” Mystery Solved:
If you connect 5V to the Vin pin, the onboard regulator (which needs ~7V to operate) fails to regulate, and the board may not turn on. However, if you connect 5V to the 5V pin, you are bypassing the regulator and feeding the board directly. That’s why the 5V pin works with 5V, but Vin doesn’t.
🚀 10 Cool Beginner Projects to Master Arduino Fundamentals
Ready to build? Here are 10 projects that scale in difficulty.
- Blinking LED: The “Hello World” of electronics.
- Traffic Light System: Use 3 LEDs and a button to simulate a traffic light.
- Temperature Monitor: Read a DHT1 and display the temp on the Serial Monitor.
- Light-Activated Night Light: Turn on an LED when it gets dark (using an LDR).
- Ultrasonic Distance Meter: Measure distance and beep faster as you get closer.
- Servo Control: Use a potentiometer to control the angle of a servo motor.
- Reaction Time Game: Press a button as fast as you can when an LED lights up.
- Digital Thermometer: Display temperature on an LCD screen (16×2).
- Simple Robot Car: Use 2 DC motors and an ultrasonic sensor to avoid obstacles.
- Smart Home Switch: Control a lamp via Wi-Fi (using ESP32).
Need a video guide?
Check out the “Robonyx Academy” starter course mentioned in the first video summary for step-by-step walkthroughs of these exact projects.
🛡️ Common Pitfalls: Troubleshooting Power Issues, Code Errors, and Hardware Hiccups
Even experts make mistakes. Here are the most common ones and how to fix them.
Power Issues
- Symptom: Board resets randomly.
Cause: Insufficient power. Motors draw too much current.
Fix: Use an external power supply for motors. - Symptom: Board doesn’t turn on when plugged into Vin.
Cause: Voltage too low (below 7V).
Fix: Use a 9V battery or a 5V supply on the 5V pin.
Code Errors
- Symptom: “Compilation Error: ‘Serial’ was not declared”.
Cause: Missing#include <SoftwareSerial.h>or wrong board selected.
Fix: Check your board selection and include necessary libraries. - Symptom: Code compiles but nothing happens.
Cause: Logic error (e.g.,if (x == 5)instead ofif (x = 5)).
Fix: Use the Serial Monitor to print variable values and debug.
Hardware Hiccups
- Symptom: Sensor gives weird values.
Cause: Loose connections or wrong wiring.
Fix: Check your breadboard connections. Use a multimeter. - Symptom: Board gets hot.
Cause: Short circuit.
Fix: Unplug immediately! Check for wires touching where they shouldn’t.
🌐 Expanding Horizons: Shields, Libraries, and Advanced Integration
Once you master the basics, it’s time to level up.
Shields
Shields are add-on boards that stack on top of your Arduino.
- Motor Shield: Easy motor control.
- Ethernet/Wi-Fi Shield: Connect to the internet.
- LCD Shield: Display text without wiring.
- GPS Shield: Track location.
Libraries
Libraries are pre-written code that make complex tasks easy.
- Servo Library:
#include <Servo.h> - LiquidCrystal Library: For LCD screens.
- Adafruit Libraries: High-quality drivers for many sensors.
Advanced Integration
- I²C Protocol: Connect multiple devices with just 2 wires (SDA, SCL).
- SPI Protocol: Faster communication for SD cards and displays.
- RTOS (Real-Time Operating System): Run multiple tasks simultaneously on powerful boards like the ESP32.
💡 Why Arduino? The Unbeatable Ecosystem for Makers and Engineers
Why stick with Arduino when there are faster, cheaper microcontrollers out there?
- Community: If you have a problem, someone has already solved it. The Arduino Forum and Stack Exchange are goldmines.
- Libraries: Thousands of libraries mean you don’t have to write code from scratch.
- Hardware Compatibility: Standard pinouts make it easy to swap components.
- Educational Value: It’s the best way to learn embedded systems and robotics.
- Cost: Boards are cheap, and clones are even cheaper.
Is it still relevant?
Absolutely. While the ESP32 is faster, the simplicity of the Arduino ecosystem makes it the undisputed king of education and protyping.
For more on how Arduino fits into the broader world of Artificial Intelligence and Robotic Simulations, explore our AI and Simulations categories.
📚 Recommended Links: Where to Buy Genuine Boards and Get Help
- Official Arduino Store: Arduino.cc Store
- Amazon: Arduino Uno R3 | Arduino Starter Kit
- Adafruit: Adafruit Arduino Learning
- SparkFun: SparkFun Arduino Tutorials
- Books: Arduino Cookbook by Michael Margolis
❓ FAQ: Your Burning Questions About Arduino Answered
How does Arduino help in building robotic projects?
Arduino acts as the central brain of a robot. It reads data from sensors (like ultrasonic or IR) to understand the environment and sends commands to actuators (motors, servos) to move. Its real-time capabilities and vast library support make it ideal for robotics protyping.
Read more about “🏠 35 Epic DIY Home Automation Projects to Transform Your Home (2026)”
What are the best Arduino boards for robotics beginners?
The Arduino Uno R3 is the best starting point due to its simplicity and community support. For more advanced robotics requiring Wi-Fi or Bluetooth, the ESP32 is a fantastic choice. If you need many motors and sensors, the Arduino Mega 2560 is the way to go.
Read more about “🤖 Python for Robotics Beginner: Your 2026 Roadmap to Building Robots”
Can I use Arduino to control robotic motors?
Yes, but not directly. You must use a motor driver (like the L298N or TB612) to handle the high current required by motors. The Arduino sends low-power control signals to the driver, which then powers the motors.
Read more about “🤖 7 Arduino Robotics Projects to Master Coding Skills (2026)”
What programming language is used for Arduino in robotics?
Arduino uses a simplified version of C++. The code is structured with setup() and loop() functions. While it looks like C++, it includes many hardware-specific libraries that make it easier to control electronics.
Read more about “🐍 Embeding Python in Robotics Systems: The 2026 Hybrid Blueprint”
How do I connect sensors to Arduino for robot navigation?
Connect the sensor’s VCC to 5V (or 3.3V), GND to GND, and the Signal pin to a digital or analog input pin on the Arduino. For navigation, common sensors include ultrasonic sensors (HC-SR04) for distance and IR sensors for line following.
Read more about “🤖 Can Arduino Control Complex Robots? The 2026 Reality Check”
What is the difference between Arduino and Raspberry Pi for robotics?
Arduino is a microcontroller: it runs one program, is real-time, and handles low-level hardware control. Raspberry Pi is a microcomputer: it runs an OS (Linux), is slower for real-time tasks, but can handle complex tasks like image processing and AI. Many robots use both: Arduino for motor control and Pi for “thinking.”
Read more about “🤖 How to Start Programming Arduino for Your First Robot (2026)”
How much does it cost to start an Arduino robotics project?
You can start with a basic Arduino Uno and a few sensors for under $30-$40. A full starter kit with motors, sensors, and a chassis usually costs between $50 and $10.
Read more about “🤖 Best Robotics Boards: CircuitPython vs. MicroPython (2026)”
Why does the Vin pin not work with 5V?
The Vin pin feeds into a voltage regulator that requires an input voltage of at least 7V to function correctly. If you supply 5V to Vin, the regulator cannot step it down to 5V, and the board may not power up. However, the 5V pin bypasses the regulator, so it works with a direct 5V supply.
📖 Reference Links: Official Docs, Datasheets, and Community Resources
- Arduino Official Documentation: docs.arduino.cc
- Arduino Forum: forum.arduino.cc
- Arduino Stack Exchange: arduino.stackexchange.com
- ATmega328P Datasheet: Microchip ATmega328P
- Vin Pin Issue Discussion: Arduino Stack Exchange: Vin pin does not work
- Arduino Project Hub: create.arduino.cc/projecthub
🏁 Conclusion: Your Journey from Blinking LED to Smart Home Hero
So, there you have it. We’ve taken you from the sparky history of Ivrea to the nitty-gritty of voltage regulators and C++ sketches.
Remember the question we posed at the start: “Why does the Vin pin not work, but the 5V pin does?” Now you know: Vin needs 7V+ to run the regulator, while 5V is a direct feed. It’s a small detail, but one that saves many a burnt board.
Arduino isn’t just a board; it’s a gateway. Whether you want to build a robot that navigates your living room, a smart home system that adjusts your lights, or just understand how the digital world interacts with the physical one, Arduino is your starting point.
Our Recommendation:
If you are new to this, grab an Arduino Uno R3 Starter Kit. It has everything you need to learn the basics without the headache of sourcing individual components. Don’t be afraid to make mistakes—burning a component is just part of the learning process (we’ve all been there!).
The world of robotics and embedded systems is vast, but it starts with a single digitalWrite. So, what are you waiting for? Plug in that USB cable, write your first sketch, and let the magic begin.
Final Thought: The only limit is your imagination. And maybe your 2KB of SRAM. But even that can be managed with good code!
Happy Coding! 🤖💻✨