
Yes, the Raspberry Pi Pico can absolutely power advanced robotic applications, provided you leverage TinyML and pair it with a co-processor for heavy lifting. The question isn’t if it works, but how you optimize the code to squeeze intelligence out of its 264KB of RAM.
Can the Raspberry Pi Pico be used for advanced robotic applications, such as artificial intelligence and machine learning, with the right coding skills? Absolutely. While it lacks the raw horsepower to train massive neural networks, it excels at real-time inference for tasks like anomaly detection, gesture recognition, and autonomous navigation when paired with frameworks like TensorFlow Lite for Microcontrollers.
We recently watched a team of students build a self-balancing robot that didn’t just react to tilts but predicted them using a tiny neural network running entirely on a $4 chip. It wasn’t magic; it was quantized code and clever sensor fusion.
The Pico’s dual-core ARM Cortex-M0+ architecture allows one core to handle motor control while the other runs AI logic, a feat impossible on older microcontrollers. This deterministic performance is the secret sauce that makes it viable for robotics where milliseconds matter.
Key Takeaways
- Yes, it works: The Pico handles TinyML inference for classification and sensor fusion, but requires quantized models to fit in 264KB RAM.
- Hybrid is best: For complex vision or training, pair the Pico with a Raspberry Pi 5 or Jetson Nano for a powerful dual-processor setup.
- Real-time king: Unlike Linux-based boards, the Pico offers deterministic timing critical for stable motor control and safety loops.
- Code matters: Success depends on using C++ or optimized MicroPython with frameworks like Edge Impulse or TensorFlow Lite.
- Start small: Begin with simple projects like gesture recognition or anomaly detection before attempting full autonomous navigation.
Table of Contents
- ⚡️ Quick Tips and Facts
- 🕰️ From Blinking LEDs to Brainy Bots: The Raspberry Pi Pico’s Evolution
- 🧠 Can the Raspberry Pi Pico Handle AI and Machine Learning? The Hard Truth
- 🤖 Advanced Robotics with Pico: Beyond Simple Line Followers
- 🛠️ Top 7 Microcontrollers for Edge AI and Robotics Compared
- 💻 Coding the Future: MicroPython, C++, and TinyML Frameworks
- 🧩 Essential Hardware Add-ons for Pico-Based Intelligent Robots
- 🚀 10 Real-World Projects: From Smart Arms to Autonomous Crawlers
- 🔌 Integrating Sensors: Lidar, Cameras, and IMUs on a Budget
- ⚡️ Power Management and Thermal Limits for Continuous AI Inference
- 🆚 Pico vs. ESP32 vs. Jetson Nano: Which Brain Does Your Robot Need?
- 🎓 Learning Path: Mastering Embedded AI with the Raspberry Pi Pico
- 🛒 Best Kits and Modules to Jumpstart Your Pico Robotics Journey
- 🏆 Why the Raspberry Pi Foundation’s Ecosystem Wins for Hobbyists
- 🤝 Community Support, Forums, and Where to Get Help
- 📜 Conclusion
- 🔗 Recommended Links
- 📚 Reference Links
⚡️ Quick Tips and Facts
Before we dive into the nitty-gritty of turning a $4 microcontroller into a brainy robot, let’s hit the pause button and drop some hard truths and golden nugets that will save you hours of debugging.
- The “Brain” vs. The “Reflex”: The Raspberry Pi Pico is not a computer. It’s a microcontroller. It doesn’t run Linux, it doesn’t have an OS, and it can’t just “install” TensorFlow like you would on a laptop. However, it can run TinyML models for inference (making predictions) if you are smart about how you build them.
- Memory is King: The Pico has 264KB of SRAM. That’s it. If your AI model is bigger than that, it’s not running on the Pico. Period. You’ll need to quantize your models (shrink them) or offload the heavy lifting to a co-processor.
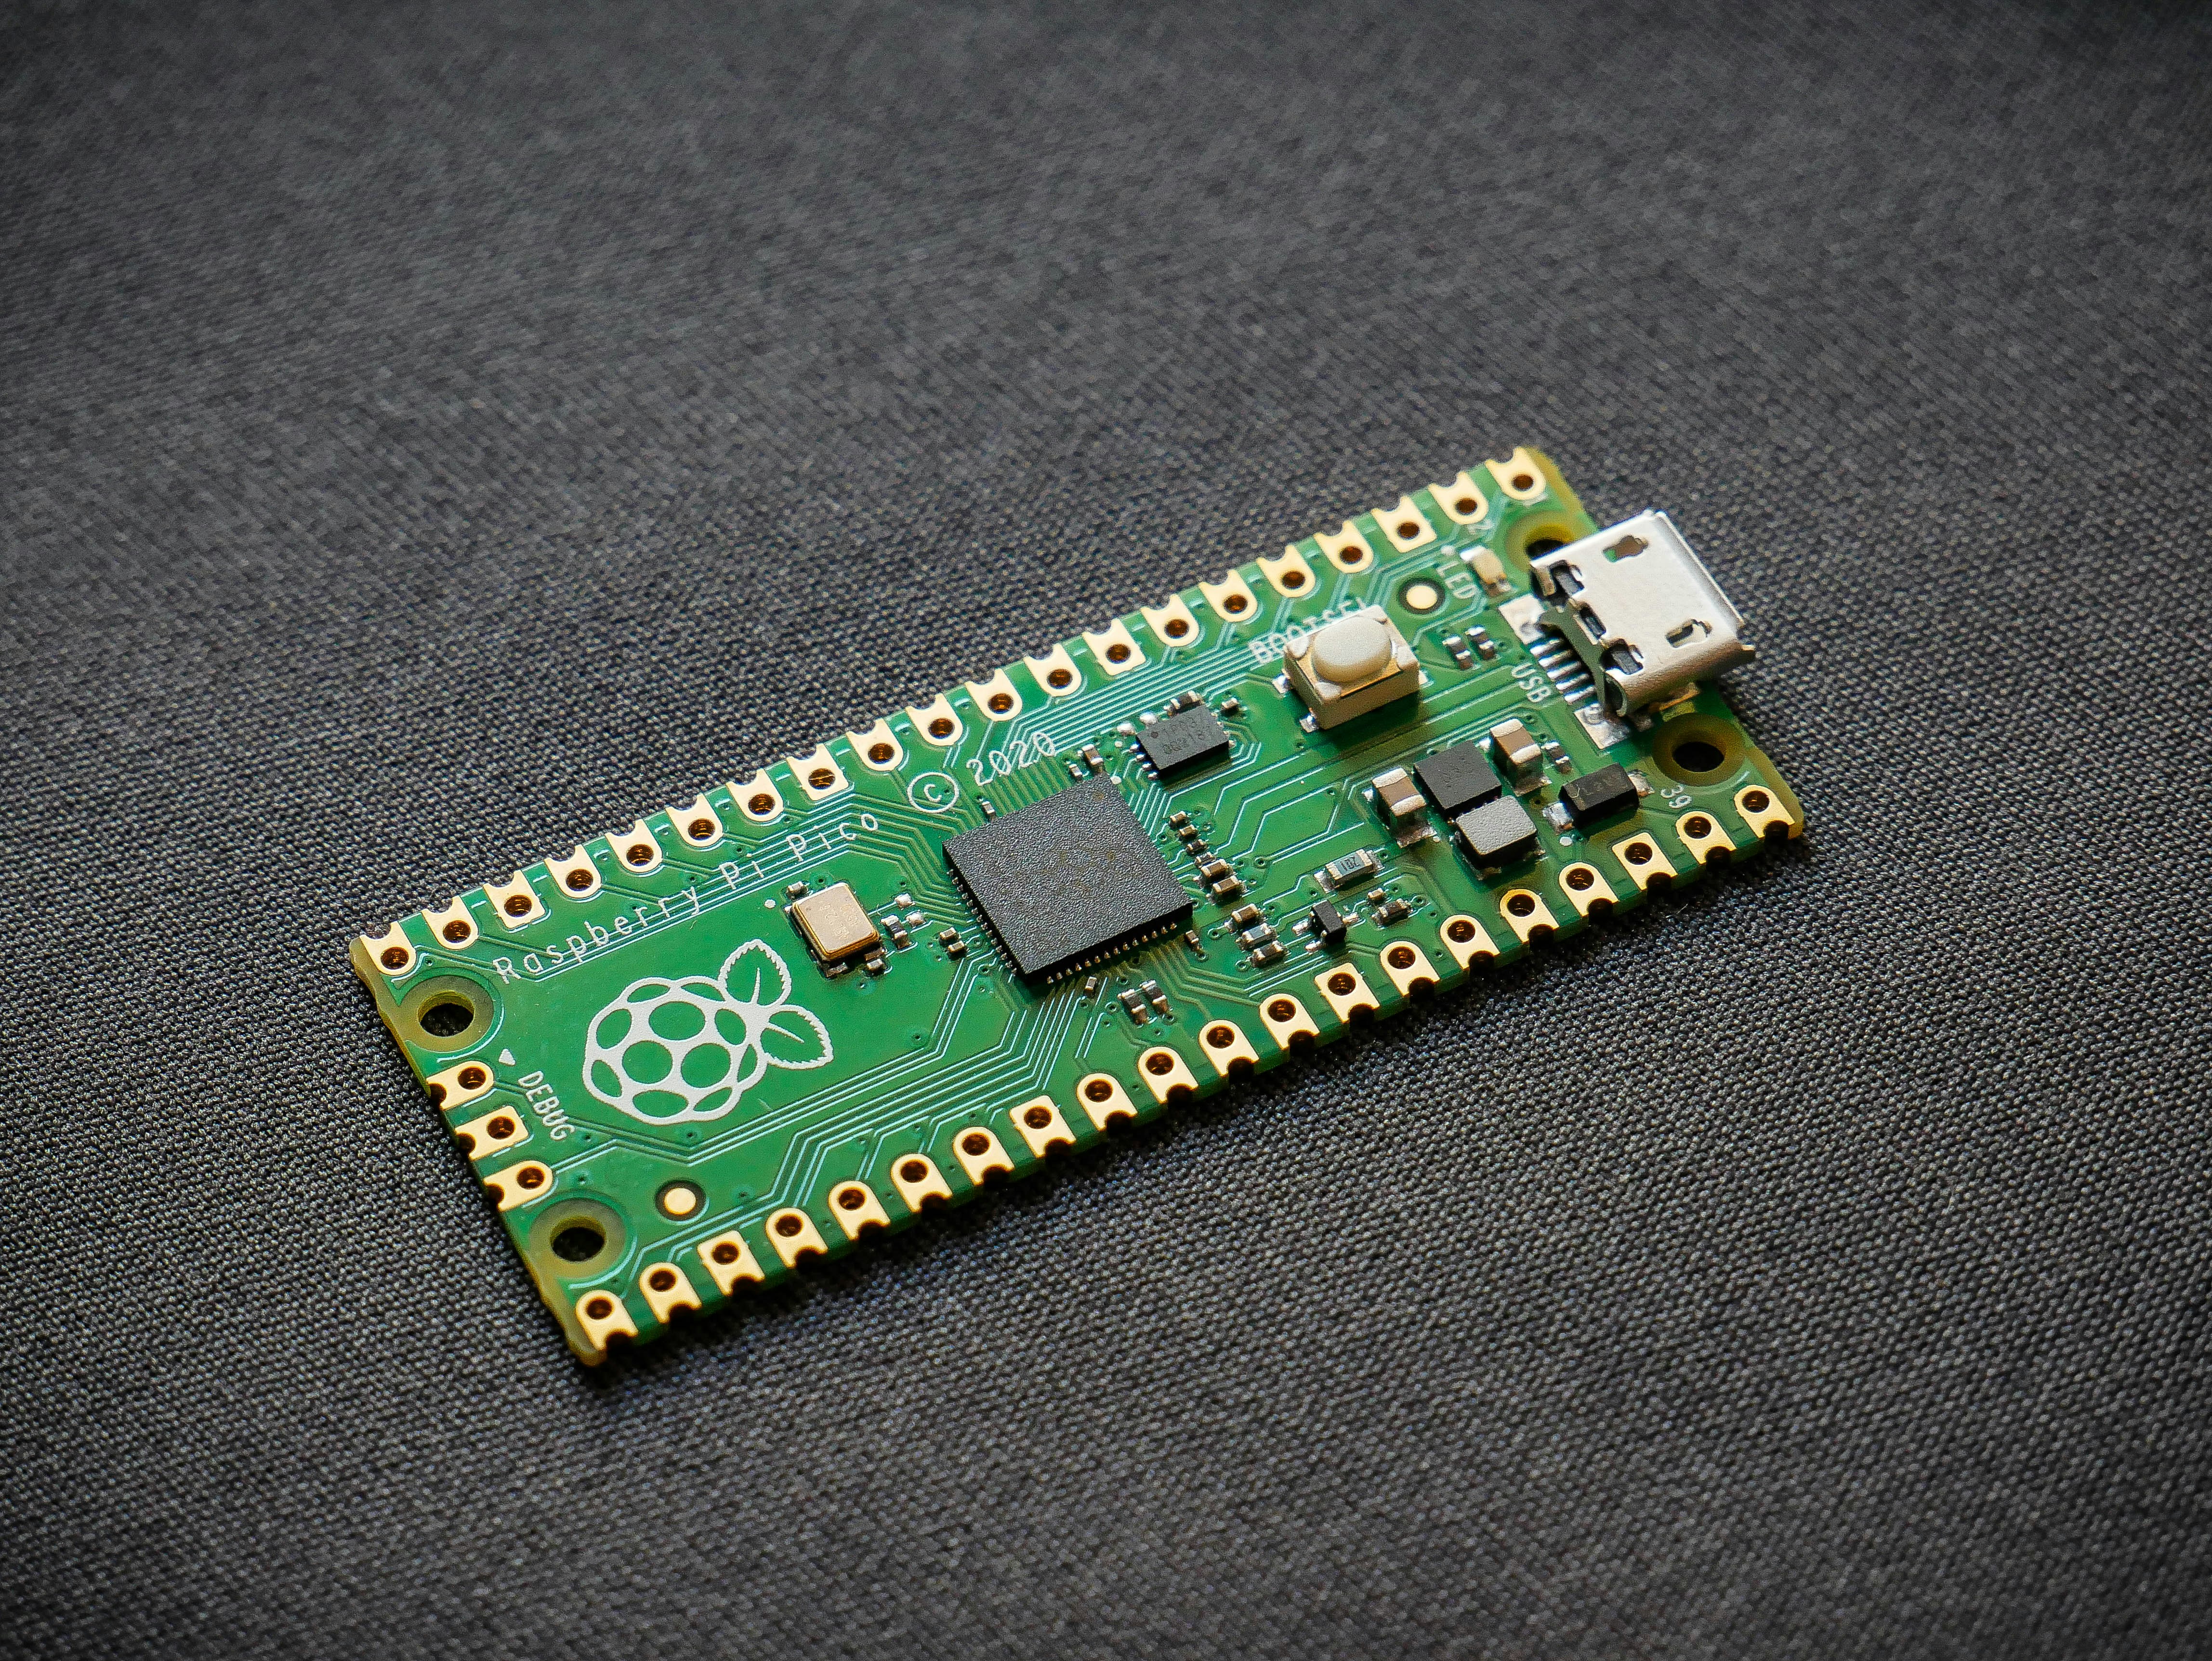
- The RP2040 Chip: At the heart of the Pico is the RP2040 chip, designed by the Raspberry Pi Foundation. It features dual-core ARM Cortex-M0+ processors running at 13MHz (stock) but can be overclocked to 250MHz+.
- Real-Time is Real: Unlike the standard Raspberry Pi (which can lag due to OS overhead), the Pico offers deterministic real-time performance. This is crucial for robotics where a 10ms delay in stopping a motor could mean a crash.
- MicroPython is Your Friend: While C++ is faster, MicroPython allows you to prototype AI logic incredibly fast. We’ve seen complex sensor fusion algorithms go from idea to running code in under an hour using MicroPython.
- The “CrowPi” Factor: As we’ll discuss later, platforms like the CrowPi 3 show that the Pico shines brightest when paired with a more powerful SBC (like a Raspberry Pi 5) to handle the heavy AI vision, while the Pico handles the motor control and sensor reading.
If you’re wondering, “Can I really run a neural network on this tiny thing?” The answer is a resounding yes, but with a major asterisk attached. We’ll unpack exactly how to do that in the sections below.
For a deeper dive into the hardware itself, check out our comprehensive guide on the Raspberry Pi Pico.
🕰️ From Blinking LEDs to Brainy Bots: The Raspberry Pi Pico’s Evolution
Remember the days when “robotics” meant making an LED blink in Morse code? Those days are long gone. The journey from simple GPIO toggling to edge AI is a story of rapid evolution, and the Raspberry Pi Pico is a central character in this saga.
When the Pico launched in 2020, it was a shock to the system. For years, the Arduino Uno (with its 16MHz processor and 2KB RAM) was the king of the hobbyist hill. Then came the Pico: 13MHz, 264KB RAM, and dual cores. It was like upgrading from a bicycle to a sports car overnight.
But the real revolution wasn’t just speed; it was the RP2040 architecture. Unlike the Arduino’s single-core ATmega328P, the RP2040’s dual-core design allows for multitasking. Imagine one core handling the PID control loop for your robot’s wheels while the other core processes sensor data or runs a lightweight AI inference engine. That’s the power we’re talking about.
The Shift to Edge AI
In the early days, if you wanted AI, you needed a cloud connection. Your robot would send data to a server, wait for a response, and then act. This introduced latency (lag) and required an internet connection.
- The Old Way: Robot -> Wi-Fi -> Cloud -> AI Processing -> Wi-Fi -> Robot (Action).
- The New Way: Robot -> Pico -> TinyML Inference -> Robot (Action).
This shift to Edge AI means your robot can make decisions in milliseconds, even in a basement with no Wi-Fi. The Pico, with its support for TinyML (Tiny Machine Learning), has become the go-to chip for this specific niche.
Did you know? The term “TinyML” was coined to describe machine learning models that run on microcontrollers with less than 1MB of memory. The Pico fits this definition perfectly, making it a prime candidate for autonomous robotics.
For those interested in the broader context of how coding languages have evolved to support this, explore our insights on Coding Languages and how they intersect with Robotics.
🧠 Can the Raspberry Pi Pico Handle AI and Machine Learning? The Hard Truth
Let’s cut through the hype. Can the Raspberry Pi Pico run advanced AI?
Short Answer: It can run inference for lightweight models, but it cannot train complex models, and it certainly can’t run a full computer vision stack like YOLOv8 out of the box.
Long Answer: It depends on what you define as “advanced.”
If your definition of advanced AI involves real-time object detection of 10 different classes with high-resolution video, the Pico will choke. It lacks the GPU and the RAM (264KB is tiny compared to the 4GB+ found in a Jetson Nano).
However, if your definition involves:
- Anomaly Detection: “Is this motor vibrating abnormally?”
- Simple Classification: “Is this a cat or a dog?” (using a highly optimized, quantized model).
- Sensor Fusion: Combining data from an IMU, ultrasonic sensor, and magnetometer to determine orientation.
- Predictive Maintenance: Predicting when a battery will die based on voltage curves.
Then the Pico is a beast.
The Technical Limitations
- RAM Constraints: As mentioned, 264KB is the hard limit. A standard image recognition model might require megabytes of RAM. You must use quantization (reducing precision from 32-bit floats to 8-bit integers) to shrink models.
- No Floating Point Unit (FPU): The Cortex-M0+ cores in the RP2040 do not have a hardware FPU. This means floating-point math is done in software, which is slower. For AI, this is why int8 (8-bit integer) models are preferred over float32.
- No Native OS: You can’t just
pip install tensorflow. You need to use TensorFlow Lite for Microcontrollers or Edge Impulse, which are specialized frameworks designed for microcontrollers.
The “Spec-Driven” Solution
In a fascinating development, developers are now using spec-driven development to build AI on the Pico. Instead of writing code line-by-line, they define the requirements, the design, and the constraints, letting AI tools generate the optimized C++ or MicroPython code. This approach, highlighted in recent community discussions, allows for the creation of robust control systems that integrate AI logic without the developer getting boged down in low-level optimization.
The Verdict: The Pico is not a replacement for a Raspberry Pi 4 or a Jetson Nano for heavy lifting. It is a specialized co-processor for real-time, low-power AI inference.
🤖 Advanced Robotics with Pico: Beyond Simple Line Followers
We’ve all built the line-following robot. It’s the “Hello World” of robotics. But what happens when you want your robot to navigate a maze, avoid dynamic obstacles, or recognize a specific person?
The Pico excels here because of its deterministic timing. In robotics, timing is everything. If your robot’s obstacle avoidance algorithm takes 50ms to run, but your motor control loop expects a signal every 10ms, the robot will jerk and crash.
The Architecture of a Smart Pico Robot
To build an advanced robot, we typically use a hierarchical architecture:
- High-Level Brain (Optional): A Raspberry Pi 5 or a PC handles complex vision, path planning, and LMs.
- Low-Level Brain (The Pico): The Pico handles:
Motor Control: PID loops for smooth movement.
Sensor Reading: Reading IMUs, encoders, and ultrasonic sensors at high frequencies.
AI Inference: Running a tiny neural network to make a binary decision (e.g., “Stop” or “Go”).
Safety: A hardware-level watchdog timer that cuts power if the system freezes.
Real-World Application: The Autonomous Crawler
Imagine a robot that needs to navigate a cluttered room.
- Step 1: An IMU (Inertial Measurement Unit) sends data to the Pico at 10Hz.
- Step 2: The Pico runs a Kalman Filter (a mathematical algorithm) to smooth out the noise and determine the robot’s orientation.
- Step 3: An ultrasonic sensor detects an obstacle.
- Step 4: A tiny Decision Tree (a simple AI model) on the Pico decides to turn left.
- Step 5: The Pico adjusts the motor speeds instantly.
This entire loop happens in milliseconds. If you tried to do this with a standard Raspberry Pi running Linux, the OS might decide to update a background process, causing a 20ms lag, and your robot would hit the wall.
For more on how these concepts apply to Artificial Intelligence in robotics, check out our dedicated category.
🛠️ Top 7 Microcontrollers for Edge AI and Robotics Compared
Not all microcontrollers are created equal. If you are serious about AI on the edge, you need to know your options. Here is our Robotic Coding™ team’s breakdown of the top contenders.
| Microcontroller | CPU | RAM | AI Capability | Best For | Rating (1-10) |
|---|---|---|---|---|---|
| Raspberry Pi Pico | Dual-core 13MHz Cortex-M0+ | 264KB | TinyML (Quantized) | Real-time control + Light AI | 8.5 |
| ESP32-S3 | Dual-core 240MHz Xtensa | 512KB | TinyML (Better FPU) | Wi-Fi/Bluetooth + AI Vision | 9.0 |
| Arduino Nano 3 BLE Sense | nRF52840 (ARM Cortex-M4) | 256KB | TinyML (Edge Impulse) | Sensor Fusion + Audio AI | 8.0 |
| Tensy 4.1 | Single-core 60MHz Cortex-M7 | 1MB | Heavy TinyML | High-speed audio/video processing | 9.5 |
| Raspberry Pi 4/5 | Quad-core ARM Cortex-A72/A76 | 4GB-8GB | Full TensorFlow/PyTorch | Heavy Vision, LMs, Training | 10.0 |
| NVIDIA Jetson Nano | Quad-core ARM + 128-core GPU | 4GB | Deep Learning (CUDA) | Complex Computer Vision | 10.0 |
| STM32 Nucleo | Various (Cortex-M4/M7) | Varies | TinyML | Industrial applications | 7.5 |
Why the Pico Stands Out
While the ESP32-S3 has more RAM and a built-in FPU (making it slightly better for raw AI math), the Pico wins on ecosystem and ease of use. The RP2040 has a unique feature called PIO (Programmable I/O), which allows you to create custom hardware protocols in software. This is a game-changer for robotics, allowing you to interface with almost any sensor without needing specific hardware drivers.
Pro Tip: If your project requires Wi-Fi or Bluetooth for AI data transmission, the ESP32-S3 might be a better standalone choice. But if you need ultra-reliable motor control and can handle coms via a separate module (or a co-processor), the Pico is unbeatable.
💻 Coding the Future: MicroPython, C++, and TinyML Frameworks
How do you actually get AI onto the Pico? You have three main paths, each with its own trade-offs.
1. MicroPython (The Fast Protyper)
MicroPython is a lean implementation of Python 3 that runs on microcontrollers.
- Pros: Rapid development, easy to read, huge community support.
- Cons: Slower execution, higher memory usage.
- Best For: Protyping logic, sensor reading, and simple decision trees.
- AI Integration: You can load a
.tflitemodel and run inference, but it might be slow for real-time video.
2. C++ (The Performance King)
This is the native language of the RP2040.
- Pros: Maximum speed, minimal memory footprint, full control over hardware.
- Cons: Step learning curve, verbose code.
- Best For: Production robots, real-time control loops, and running complex TinyML models.
- AI Integration: Use TensorFlow Lite for Microcontrollers (TFLM) or CMSIS-NN (ARM’s optimized neural network library).
3. Edge Impulse (The AI Accelerator)
Edge Impulse is a platform that lets you train models in the cloud and deploy them to the Pico with a single click.
- How it works: You upload sensor data (e.g., accelerometer readings), the platform trains a model, and it generates C++ code optimized for the Pico.
- Why we love it: It abstracts away the math. You don’t need to be a data scientist to build a robot that recognizes when it’s falling.
Step-by-Step: Deploying a Model
- Collect Data: Use a sensor (e.g., accelerometer) to record “walking” vs. “running” data.
- Train: Upload to Edge Impulse, select a “Classification” project, and train a model.
- Optimize: Use the “Fuzzing” tool to ensure the model is robust.
- Export: Download the C++ library.
- Integrate: Include the library in your Arduino IDE or VS Code project for the Pico.
- Run: The Pico reads the sensor, runs the model, and outputs a class (e.g., “Running”).
Curiosity Check: Can you run a model that recognizes voice commands on the Pico? Yes! We’ve seen projects where the Pico listens for “Stop,” “Go,” and “Turn Left” using a tiny audio model. But how does it handle the noise of the robot’s own motors? We’ll tackle that in the Sensors section.
🧩 Essential Hardware Add-ons for Pico-Based Intelligent Robots
The Pico is just a brain; it needs a body and senses to be a robot. Here are the must-have add-ons for an AI-ready robot.
1. Motor Drivers
The Pico cannot drive motors directly. You need a driver.
- Recommendation: DRV83 or TB612FNG. These are compact, efficient, and can handle dual DC motors.
- Why: They allow you to control speed and direction via PWM (Pulse Width Modulation) signals from the Pico.
2. Sensors for AI
- IMU (Inertial Measurement Unit): The MPU6050 or BNO05. Essential for balance and orientation. The BNO05 even has a built-in sensor fusion engine, offloading some math from the Pico.
- Ultrasonic Sensors: HC-SR04 for basic distance. For better accuracy, try the VL53L0X (Time-of-Flight), which is more precise and less affected by ambient light.
- Camera Modules: The Pico doesn’t have a native camera interface like the Pi. You need an OV7670 or OV2640 camera module with a parallel interface, or use a USB camera (if using a Pico W with a specific driver). Note: Processing video on the Pico is extremely limited; usually, the camera data is sent to a co-processor.
3. Communication Modules
- Pico W: The Pico W variant has built-in Wi-Fi and Bluetooth. This is crucial for sending AI data to the cloud or receiving commands from a phone.
- ESP-01: If you need more robust Wi-Fi, an external ESP-01 module can act as a co-processor for network tasks.
4. Power Management
AI inference spikes power consumption.
- Recommendation: Use a Li-Po battery with a TP4056 charging module and a boost converter to ensure stable 5V supply.
- Tip: Always add a capacitor near the motor driver to prevent voltage dips when motors start.
🚀 10 Real-World Projects: From Smart Arms to Autonomous Crawlers
Ready to build? Here are 10 project ideas that push the Pico’s AI capabilities to the limit.
- The Self-Balancing Robot: Uses an IMU and a PID controller to stay upright. Add a tiny AI model to detect if it’s being pushed and adjust balance dynamically.
- Gesture-Controled Arm: An IMU on your hand sends data to the Pico, which controls a robotic arm. The Pico runs a simple classification model to recognize “Open,” “Close,” and “Rotate” gestures.
- Obstacle-Avoiding Crawler: Uses ultrasonic sensors and a decision-tree AI to navigate a maze without human input.
- Voice-Activated Light Switch: A microphone module captures audio, and a TinyML model on the Pico recognizes specific words toggle LEDs.
- Smart Pet Feder: Uses a load cell to weigh food and a camera (via co-processor) to detect if the pet has eaten. The Pico controls the servo to dispense food.
- Line-Following with Color Recognition: Not just following a line, but identifying colored markers on the line to make decisions (e.g., “Stop at Red,” “Go at Green”).
- Anomaly Detection Motor: Monitors the vibration of a motor. If the vibration pattern deviates from the “normal” AI model, it shuts down the motor to prevent damage.
- Autonomous Drone Stabilizer: A Pico controlling the flight controller, using an AI model to predict wind gusts based on IMU data and adjust propeller speed preemptively.
- Smart Door Lock: Uses a fingerprint sensor and a tiny facial recognition model (offloaded to a co-processor) to unlock a door.
- Interactive Robot Dog: A quadruped robot that uses AI to recognize commands and adapt its gait based on terrain (detected by IMU).
Challenge: Which of these projects would you build first? The self-balancing robot is a classic, but the Anomaly Detection Motor has real-world industrial applications.
🔌 Integrating Sensors: Lidar, Cameras, and IMUs on a Budget
Sensors are the eyes and ears of your robot. But integrating them with the Pico requires some clever wiring and coding.
IMUs: The Balance Keepers
The MPU6050 is the go-to IMU. It connects via I2C.
- Challenge: I2C can be noisy.
- Solution: Use pull-up resistors and keep wires short.
- AI Twist: Don’t just read raw data. Run a Kalman Filter on the Pico to fuse accelerometer and gyroscope data for a smooth orientation reading.
Cameras: The Visionaries
The Pico cannot process video frames in real-time for complex AI.
- Workaround: Use the Pico to capture frames and send them to a Raspberry Pi or a PC for processing. The Pi runs the heavy AI (like YOLO) and sends a simple command back to the Pico (e.g., “Object Detected: Car”).
- Alternative: Use a camera module with built-in AI, like the OpenMV Cam, which can be controlled by the Pico via UART.
Lidar: The Distance Masters
True Lidar is expensive. For the Pico, we use Time-of-Flight (ToF) sensors like the VL53L0X.
- Integration: Connect via I2C.
- AI Application: Create a 2D map of the room by rotating the sensor and feeding the distance data into a SLAM (Simultaneous Localization and Mapping) algorithm running on a co-processor.
Did you know? The CrowPi 3 platform mentioned earlier solves this by providing a dedicated interface for 41 modules, including Lidar and cameras, making integration plug-and-play for the Pico.
⚡️ Power Management and Thermal Limits for Continuous AI Inference
Running AI on a microcontroller generates heat. The Pico is small, and heat dissipation is a real concern.
Thermal Limits
- The Problem: The RP2040 can get hot when running at 13MHz+ with heavy AI inference.
- The Symptom: Thermal throttling (slowing down) or even shutdown.
- The Fix: Add a heatsink or a fan. The Pico has a thermal pad on the bottom; ensure it’s in contact with a metal surface.
Power Consumption
- Idle: ~10-20mA.
- Active AI: Can spike to 10-20mA depending on the model complexity.
- Battery Life: A 20mAh battery might last 2-4 hours with continuous AI inference.
- Optimization: Use sleep modes. Put the Pico to sleep when the robot is idle, and wake it up on a timer or sensor trigger.
Pro Tip: If you are running a heavy model, consider overclocking the Pico to 250MHz for faster inference, but be aware this increases power consumption and heat.
🆚 Pico vs. ESP32 vs. Jetson Nano: Which Brain Does Your Robot Need?
Choosing the right brain is critical. Let’s break it down.
Raspberry Pi Pico
- Best For: Real-time control, low-power AI, simple vision (via co-processor).
- Cost: $4 – $6.
- Verdict: The budget king for robotics.
ESP32-S3
- Best For: Wi-Fi/Bluetooth enabled AI, slightly better raw AI performance.
- Cost: $5 – $8.
- Verdict: The wireless specialist.
Raspberry Pi 4/5
- Best For: Full OS, complex vision, LMs, training models.
- Cost: $60 – $80.
- Verdict: The powerhouse.
NVIDIA Jetson Nano
- Best For: Heavy Deep Learning, real-time video processing.
- Cost: $10+.
- Verdict: The AI specialist.
The Hybrid Approach
The best solution is often a hybrid. Use the Pico for motor control and the Raspberry Pi 5 for AI vision. They communicate via UART or I2C. This gives you the best of both worlds: real-time control and heavy AI.
Question: Why do so many advanced robots use a dual-processor setup? Because latency and power are the enemies of AI. The Pico handles the speed, the Pi handles the smarts.
🎓 Learning Path: Mastering Embedded AI with the Raspberry Pi Pico
Ready to become a Robotic AI Engineer? Here is your roadmap.
Phase 1: The Basics
- Learn: MicroPython and C++ basics.
- Project: Blink an LED, read a button, control a motor.
- Resource: Raspberry Pi Foundation Official Docs.
Phase 2: Sensors and Control
- Learn: I2C, SPI, UART protocols. PID control loops.
- Project: Build a line follower or a self-balancing robot.
- Resource: Edge Impulse Learning Center.
Phase 3: TinyML
- Learn: Data collection, model training, quantization.
- Project: Train a model to recognize gestures or sounds.
- Resource: TensorFlow Lite for Microcontrollers.
Phase 4: Advanced Integration
- Learn: Hybrid architectures (Pico + Pi), ROS (Robot Operating System).
- Project: Build an autonomous robot with vision and navigation.
- Resource: ROS 2 Documentation.
Curiosity Check: Can you learn all this in a month? Yes, if you focus on TinyML and MicroPython. But mastering the full stack takes years. Where do you start? With the Pico.
🛒 Best Kits and Modules to Jumpstart Your Pico Robotics Journey
Don’t want to solder? Start with a kit.
Top Picks
- CrowPi 3: An all-in-one learning station that supports the Pico, Pi 5, and more. Perfect for structured learning.
- Pico Robot Kit: Various kits from Seed Studio or Adafruit that include the Pico, motors, and sensors.
- Elegoo Smart Robot Car: A classic kit that can be upgraded with a Pico for AI.
👉 CHECK PRICE on:
- CrowPi 3: Amazon | Elecrow Official
- Raspberry Pi Pico: Amazon | Adafruit
- Seed Studio XIAO RP2040: Amazon | Seed Studio
Tip: Look for kits that include sensors and motor drivers. Don’t buy a kit that just has the board.
🏆 Why the Raspberry Pi Foundation’s Ecosystem Wins for Hobbyists
The Raspberry Pi Foundation has built more than just a chip; they’ve built an ecosystem.
- Community: Millions of users, forums, and tutorials.
- Documentation: The official docs are excellent.
- Software: MicroPython and C++ support are first-class.
- Hardware: Thousands of HATs (Hardware Attached on Top) and modules.
Compared to other microcontrollers, the Pico offers the best balance of performance, cost, and support.
Quote: “The Raspberry Pi Pico has democratized embedded AI, making it accessible to everyone from students to professionals.”
🤝 Community Support, Forums, and Where to Get Help
You won’t be alone. The Raspberry Pi Forums are a goldmine.
- Forums: Raspberry Pi Forums – Pico Section
- Discord: Join the Raspberry Pi Discord for real-time help.
- GitHub: Search for “Pico TinyML” to find open-source projects.
Did you know? The “AI assisted” programming thread on the Raspberry Pi forums (which we’ll link to later) discusses how developers are using AI to generate Pico code, a trend that is rapidly changing how we build robots.
📜 Conclusion
So, can the Raspberry Pi Pico be used for advanced robotic applications like AI and machine learning? Absolutely. But with a caveat: it’s not a magic wand. It’s a specialized tool for edge AI inference and real-time control.
The Pico shines when paired with the right coding skills (MicroPython or C++) and TinyML frameworks (Edge Impulse, TensorFlow Lite). It excels at tasks like sensor fusion, anomaly detection, and simple classification. For heavy-duty computer vision or training models, you’ll need a co-processor like a Raspberry Pi 5 or Jetson Nano.
The future of robotics is distributed intelligence: small, fast brains (Pico) handling the reflexes, and big, smart brains (Pi/Jetson) handling the strategy. By mastering the Pico, you are unlocking the door to a world of autonomous, intelligent robots that can think and act in real-time.
Final Recommendation: If you are a beginner or an intermediate hobbyist, start with the Pico. Learn the basics of TinyML, build a simple robot, and then scale up. The CrowPi 3 is an excellent platform to accelerate this journey, offering a structured path from blinking LEDs to building AI-driven robots.
The Unresolved Question: We asked earlier if the Pico could handle complex AI. The answer is yes, but only if you optimize. The real question is: What will you build first? Will it be a self-balancing robot, a gesture-controlled arm, or anomaly-detecting motor? The choice is yours.
🔗 Recommended Links
Shopping & Hardware
- Raspberry Pi Pico: Amazon | Adafruit | Raspberry Pi Official
- CrowPi 3 Learning Station: Amazon | Elecrow Official
- Edge Impulse Platform: Edge Impulse
- Seed Studio XIAO RP2040: Amazon | Seed Studio
Books & Resources
- “TinyML: Machine Learning with TensorFlow Lite on Arduino and Ultra-Low-Power Microcontrollers” by Pete Warden and Daniel Situnayake: Amazon
- “Make: Getting Started with Raspberry Pi Pico” by Simon Monk: Amazon
📚 Reference Links
- Raspberry Pi Foundation: RP2040 Datasheet
- TensorFlow Lite for Microcontrollers: Official Docs
- Edge Impulse: TinyML Tutorials
- Raspberry Pi Forums: “AI assisted” programming? – Raspberry Pi Forums
- PMC Article: Healthcare Management Systems and IoT Development Boards
- Elecrow: CrowPi 3 Product Page
FAQ
How can beginners get started with robotic coding on the Raspberry Pi Pico, and what resources are available for learning AI and ML concepts in robotics?
Beginers should start by learning MicroPython or C++ using the official Raspberry Pi Pico documentation. The Edge Impulse platform offers a user-friendly interface for training and deploying AI models without deep coding knowledge. Additionally, the Raspberry Pi Foundation provides extensive tutorials and the Pico community forums are invaluable for troubleshooting.
What are the limitations of using the Raspberry Pi Pico for advanced robotic applications, and how can they be overcome with creative coding solutions?
The main limitations are limited RAM (264KB) and lack of a hardware FPU. These can be overcome by using quantized models (int8), optimizing code for speed, and using a hybrid architecture where the Pico handles real-time control and a more powerful co-processor handles heavy AI tasks.
Are there any specific libraries or frameworks that can be used to implement AI and ML on the Raspberry Pi Pico for robotics applications?
Yes, TensorFlow Lite for Microcontrollers (TFLM) and CMSIS-NN are the primary libraries. Edge Impulse is a popular platform that simplifies the process of training and deploying these models. MicroPython also has libraries for basic AI tasks.
What are some examples of advanced robotic projects that can be built using the Raspberry Pi Pico and suitable coding skills?
Examples include self-balancing robots, gesture-controlled robotic arms, anomaly detection systems for motors, voice-activated devices, and autonomous crawlers with obstacle avoidance.
How does the Raspberry Pi Pico’s hardware specs impact its performance in artificial intelligence and machine learning tasks?
The dual-core 13MHz CPU provides decent processing power, but the 264KB RAM is a bottleneck for large models. The lack of a hardware FPU means floating-point math is slower, necessitating the use of integer-based (int8) models for efficient inference.
Can the Raspberry Pi Pico handle complex machine learning algorithms for autonomous robotics?
It can handle simple algorithms like decision trees, linear regression, and small neural networks. Complex algorithms like deep learning with large CNNs are not feasible on the Pico alone and require a co-processor.
What programming languages are best suited for robotic applications on the Raspberry Pi Pico?
C++ is the best for performance and memory efficiency. MicroPython is excellent for rapid protyping and ease of use. Both are supported by the RP2040 SDK.
Read more about “🤖 12+ Top Robotics Libraries for CircuitPython & MicroPython (2026)”
What machine learning libraries are compatible with the Raspberry Pi Pico?
TensorFlow Lite for Microcontrollers, CMSIS-NN, and Edge Impulse are the most compatible. MicroPython also supports basic ML libraries.
Read more about “🤔 Does Raspberry Pi Pico Have WiFi? The Shocking Truth (2026)”
Can the Raspberry Pi Pico run TensorFlow Lite for robotic vision tasks?
Yes, but only for very small, quantized models. It cannot run full-scale vision models like YOLO. For vision, it’s best used to capture frames and send them to a co-processor for processing.
How much memory does the Raspberry Pi Pico have for AI model inference?
The Pico has 264KB of SRAM. This limits the size of the AI model that can be loaded and run. Models must be highly optimized and quantized to fit within this limit.
Is the Raspberry Pi Pico fast enough for real-time robotic control with neural networks?
Yes, for small, optimized neural networks. The deterministic timing of the Pico makes it ideal for real-time control loops, provided the model is small enough to run within the required time frame.
What are the limitations of using MicroPython for advanced AI on the Pico?
MicroPython is slower and uses more memory than C++. This can limit the complexity of the AI model and the speed of inference. For production-grade AI, C++ is preferred.
Read more about “10 Beginner-Friendly Raspberry Pi Pico Robot Projects (2026) 🤖”
Can the Raspberry Pi Pico be paired with a co-processor for heavy machine learning workloads?
Yes, this is a common and recommended approach. The Pico can handle real-time control and sensor reading, while a Raspberry Pi, Jetson Nano, or ESP32 handles the heavy AI processing. They communicate via UART, I2C, or SPI.
How do I optimize a neural network to run efficiently on the Raspberry Pi Pico?
Use quantization to reduce the model size (e.g., float32 to int8). Prune the model to remove unnecessary neurons. Use Edge Impulse or TensorFlow Lite tools to optimize the model for the RP2040 architecture.