
The absolute best Arduino sensors for robots combine the plug-and-play ease of the Grove system with the raw power of AI vision modules like the HUSKYLENS to transform a static board into a thinking machine. You don’t need a PhD in electrical engineering to build a robot that sees, hears, and balances; you just need the right mix of digital and analog inputs.
We once watched a student’s robot crash into a wall because it relied solely on a cheap ultrasonic sensor that couldn’t detect a glass pane. That single failure taught us that sensor fusion—combining multiple data sources—is the only way to build truly reliable autonomous bots.
Did you know that the first industrial robot, Unimate, had zero sensors and relied entirely on pre-programed movements? Today, a simple $5 infrared sensor can give your creation more situational awareness than that million-dollar machine.
Key Takeaways
- Start with the right ecosystem: The Grove system eliminates wiring headaches, allowing you to focus on code rather than soldering.
- Vision is the future: Modules like the HUSKYLENS offer AI-powered object recognition without complex coding, making them the top pick for advanced navigation.
- Balance requires math: A 6-axis IMU (MPU6050) is essential for self-balancing robots, but requires sensor fusion algorithms to work correctly.
- Power matters: Always use a dedicated battery pack with a voltage regulator; the Arduino USB port cannot power multiple sensors and motors simultaneously.
👉 Shop Top Sensor Categories:
- AI Vision: HUSKYLENS on Amazon
- Environmental: BME280 Sensors on Amazon
- Complete Kits: Gravity 27 Pcs Sensor Set on Amazon
- Motion & Balance: MPU6050 Gyro on Amazon
Table of Contents
- ⚡️ Quick Tips and Facts
- 🕰️ From Blinking LEDs to Smart Machines: A Brief History of Arduino Robotics
- 🧠 The Brain and the Senses: How Robot Perception Actually Works
- 👀 Seeing the World: Essential Vision and Light Sensors for Arduino Robots
- 1. 📸 HUSKYLENS: The AI-Powered Vision Module That Actually Understands Faces
- 2. 🌞 Digital Light Sensors: Teaching Your Bot to Love the Sun (or Avoid It)
- 3. 🔦 Infrared Reflective Sensors: The Classic Line-Following Secret Weapon
- 4. 📷 Ultrasonic and Infrared Proximity Sensors: Avoiding the “Oops, I Hit a Wall” Moment
- 🦶 Feeling the Ground: Tactile, Motion, and Balance Sensors
- 1. 🤸 6-Axis Accelerometers and Gyroscopes: Keeping Your Robot Upright (Mostly)
- 2. 🚶 PIR Motion Sensors: Detecting Intruders Without Breaking a Sweat
- 3. 📡 Microwave Motion Radar: The Next-Gen Alternative to PIR for Smooth Detection
- 4. 🖐️ Touch Sensors: Giving Your Robot a Gentle Nudge Back to Reality
- 🌬️ Sniffing Out Danger: Environmental and Gas Detection Modules
- 1. 🌡️ Temperature, Humidity, and Pressure Sensors (SHT31, BME280, BMP280, DPS310)
- 2. 💨 Dust and Air Quality Sensors (PPD42NS): When Your Robot Needs to Breathe Easy
- 3. 🧪 CO2 and pH Sensors: Monitoring the Invisible Threats in Your Lab
- 🔊 Listening to the Silence: Sound and Audio Detection
- 1. 🎤 Sound Sensors: Making Your Robot React to Claps, Whistles, and Chaos
- 🧩 The Ultimate Sensor Showdown: Comparing Grove vs. Analog vs. Digital
- 🛠️ Wiring Woes and Code Confusion: Troubleshooting Common Arduino Sensor Pitfalls
- 📦 Top Picks: The Best Sensor Kits for Beginners and Pros Alike
- 1. 📦 Gravity: 27 Pcs Sensor Set: The Swiss Army Knife of Robotics
- 2. 🧱 Modular Grove Systems: Why We Love the Plug-and-Play Life
- 🚀 Conclusion
- 🔗 Recommended Links
- 📚 Reference Links
⚡️ Quick Tips and Facts
Before we dive into the nitty-gritty of wiring and coding, let’s hit the pause button on your excitement for a second. We’ve seen too many brilliant robotics projects die on the vine because someone skipped the basics. Here are the non-negotiable truths about Arduino sensors that we’ve learned the hard way (often after burning a few boards):
- Voltage is King: Most Arduino sensors are 5V tolerant, but the newer 3.3V boards (like the Arduino Due or ESP32) can fry a 5V sensor instantly. Always check the datasheet! 🔥
- The “Floating” Pin Nightmare: If you connect a sensor and get random, crazy data, you likely have a floating pin. A simple pull-up or pull-down resistor usually fixes this.
- Library Overload: Don’t write code from scratch if you don’t have to. The Arduino Library Manager is your best friend. If a library exists, use it. If it’s buggy, fork it.
- Power Supply Matters: A single Arduino USB port can’t power a robot with 5 sensors and two motors. You’ll need a dedicated battery pack with a voltage regulator.
- Calibration is Not Optional: A sensor that works perfectly on your desk might fail miserably on a dusty garage floor. Calibrate in the field.
Did you know? The first robotic arm, Unimate, didn’t have a single sensor. It just moved because it was told to. Today, a robot without sensors is just a very expensive paperweight. 🤖
If you’re new to the ecosystem, check out our deep dive on Arduino fundamentals to get your hardware setup right before adding the brain.
🕰️ From Blinking LEDs to Smart Machines: A Brief History of Arduino Robotics
Let’s take a trip down memory lane. It wasn’t long ago that “robotics” meant a guy in a lab coat wrestling with vacuum tubes. Then came the microcontrollers, and suddenly, we could make things move with code. But the real revolution happened when Arduino hit the scene in 205.
Before Arduino, building a robot required a PhD in electrical engineering and a soldering iron that could melt steel. You had to write assembly code for obscure chips and debug hardware with an oscilloscope. It was brutal.
Then, Massimo Banzi and his team in Italy said, “No more.” They created a platform that was open-source, cheap, and incredibly easy to program. Suddenly, students, artists, and hobbyists could build robots that could see, hear, and feel.
The evolution of sensors followed closely:
- The Analog Era: Early robots relied on simple potentiometers and photransistors. If the light hit the sensor, the robot turned. Simple, but dumb.
- The Digital Leap: As microcontrollers got faster, we got digital sensors. No more guessing with voltage dividers; just clean 0s and 1s.
- The I2C/SPI Revolution: This was the game-changer. Instead of using 10 pins for 10 sensors, we could daisy-chain them on just two wires. This allowed for complex sensor arrays on small robots.
- The AI Era: Today, we have sensors that don’t just send data; they process it. Modules like the HUSKYLENS can recognize faces and objects without your Arduino writing a single line of image processing code.
We’ve come a long way from the days of a robot that just bumped into walls and spun around. Now, your bot can map a room, avoid a cat, and tell you the humidity in the garden. But how does it actually work? Let’s peel back the layers.
🧠 The Brain and the Senses: How Robot Perception Actually Works
You’ve got the brain (the Arduino), but without senses, it’s like trying to drive a car with your eyes taped shut. Robot perception is the magic sauce that turns code into action.
Here’s the secret sauce: Sensors don’t “think.” They just report raw data. It’s your code that turns “5 volts” into “There is a wall 30cm away.”
The Data Pipeline
- Transduction: The sensor converts a physical phenomenon (light, heat, sound) into an electrical signal.
- Analog-to-Digital Conversion (ADC): If the signal is analog (continuous voltage), the Arduino’s ADC chip converts it to a digital number (0-1023).
- Processing: Your code reads that number, applies math (like
distance = time * speed / 2), and decides what to do. - Actuation: The robot moves a motor, flashes an LED, or sends a Wi-Fi alert.
Wait, why do some sensors need libraries while others don’t?
It comes down to communication protocols. Simple analog sensors (like a light-dependent resistor) just need a voltage reading. Complex digital sensors (like a BME280) speak a specific language (I2C or SPI) that requires a library to translate.
If you want to see this in action, check out our guide on Robotic Simulations where we test these concepts in a virtual environment before burning real components.
👀 Seeing the World: Essential Vision and Light Sensors for Arduino Robots
Light is the most abundant data source in our world. For a robot, “seeing” isn’t just about taking a picture; it’s about understanding the environment. From following a black line to recognizing your face, vision sensors are the eyes of your creation.
1. 📸 HUSKYLENS: The AI-Powered Vision Module That Actually Understands Faces
Let’s be honest: building a computer vision system from scratch on an Arduino is like trying to bake a soufflé with a hammer. It’s possible, but why would you? Enter the DFRobot HUSKYLENS.
This isn’t just a camera; it’s a smart sensor with a built-in AI chip. It can recognize faces, track objects, follow lines, and even identify colors—all without your Arduino doing the heavy lifting.
| Feature | Rating (1-10) | Notes |
|---|---|---|
| Ease of Use | 10 | Plug and play via I2C/UART. No complex coding. |
| Accuracy | 9 | Excellent for object tracking and face recognition. |
| Speed | 8 | Fast enough for real-time robotics, but not for high-speed video. |
| Price/Value | 9 | Expensive compared to a raw camera, but saves hours of coding. |
| Versatility | 10 | Handles multiple tasks (face, object, line, color) in one unit. |
Why we love it:
We once built a robot that had to find a specific red ball in a cluttered room. Using a standard camera and OpenCV on a Raspberry Pi was overkill and slow. With the HUSKYLENS, we just taught it the red ball once, and it tracked it perfectly. The learning button on the side makes it incredibly intuitive.
The Catch:
It’s a bit pricey, and the resolution isn’t HD. If you need to stream video to a phone, this isn’t the sensor for you. But for autonomous navigation, it’s a beast.
👉 Shop HUSKYLENS on:
- Amazon: DFRobot HUSKYLENS AI Machine Vision Sensor
- DFRobot Official: HUSKYLENS Product Page
2. 🌞 Digital Light Sensors: Teaching Your Bot to Love the Sun (or Avoid It)
Sometimes you don’t need AI; you just need to know if it’s bright or dark. The Grove – Digital Light Sensor (based on the BH1750) is a classic for a reason.
Unlike old-school LDRs (Light Dependent Resistors) that give you a vague voltage, the BH1750 gives you lux values directly. This means you can program your robot to “go to sleep” when the room gets dark or “charge up” when the sun hits the panel.
- Pros: High precision, I2C interface (easy wiring), wide range (1-6535 lux).
- Cons: Can be confused by direct sunlight if not shielded properly.
Pro Tip: Don’t just use if (light > 50). Use a hysteresis function in your code to prevent the robot from jittering between two states when the light level is borderline.
3. 🔦 Infrared Reflective Sensors: The Classic Line-Following Secret Weapon
If you’ve ever built a line-following robot, you know the Infrared Reflective Sensor (like the TCRT50 or the Grove version). It’s the workhorse of the robotics world.
How it works: It shines an IR LED and measures how much light bounces back. Black absorbs IR (low reading), white reflects it (high reading).
| Sensor Type | Range | Best For |
|---|---|---|
| TCRT50 | 2-15mm | Line following, edge detection. |
| Grove IR Reflective | 2-15mm | Modular setups, easy protyping. |
| QTR Array | 2-10mm | High-precision line following (Polu). |
The “Why” behind the “How”:
Why not use a camera for line following? Because cameras are slow and require complex image processing. An IR sensor gives you a binary output (on/off) instantly. It’s fast, cheap, and reliable.
Real-world anecdote:
We once entered a line-following competition. The track had a weird curve that confused everyone’s cameras. Our robot, running on a simple array of 6 IR sensors, crushed it because it reacted in microseconds, not milliseconds.
4. 📷 Ultrasonic and Infrared Proximity Sensors: Avoiding the “Oops, I Hit a Wall” Moment
Nothing kills the vibe like a robot crashing into a coffee table. You need obstacle avoidance.
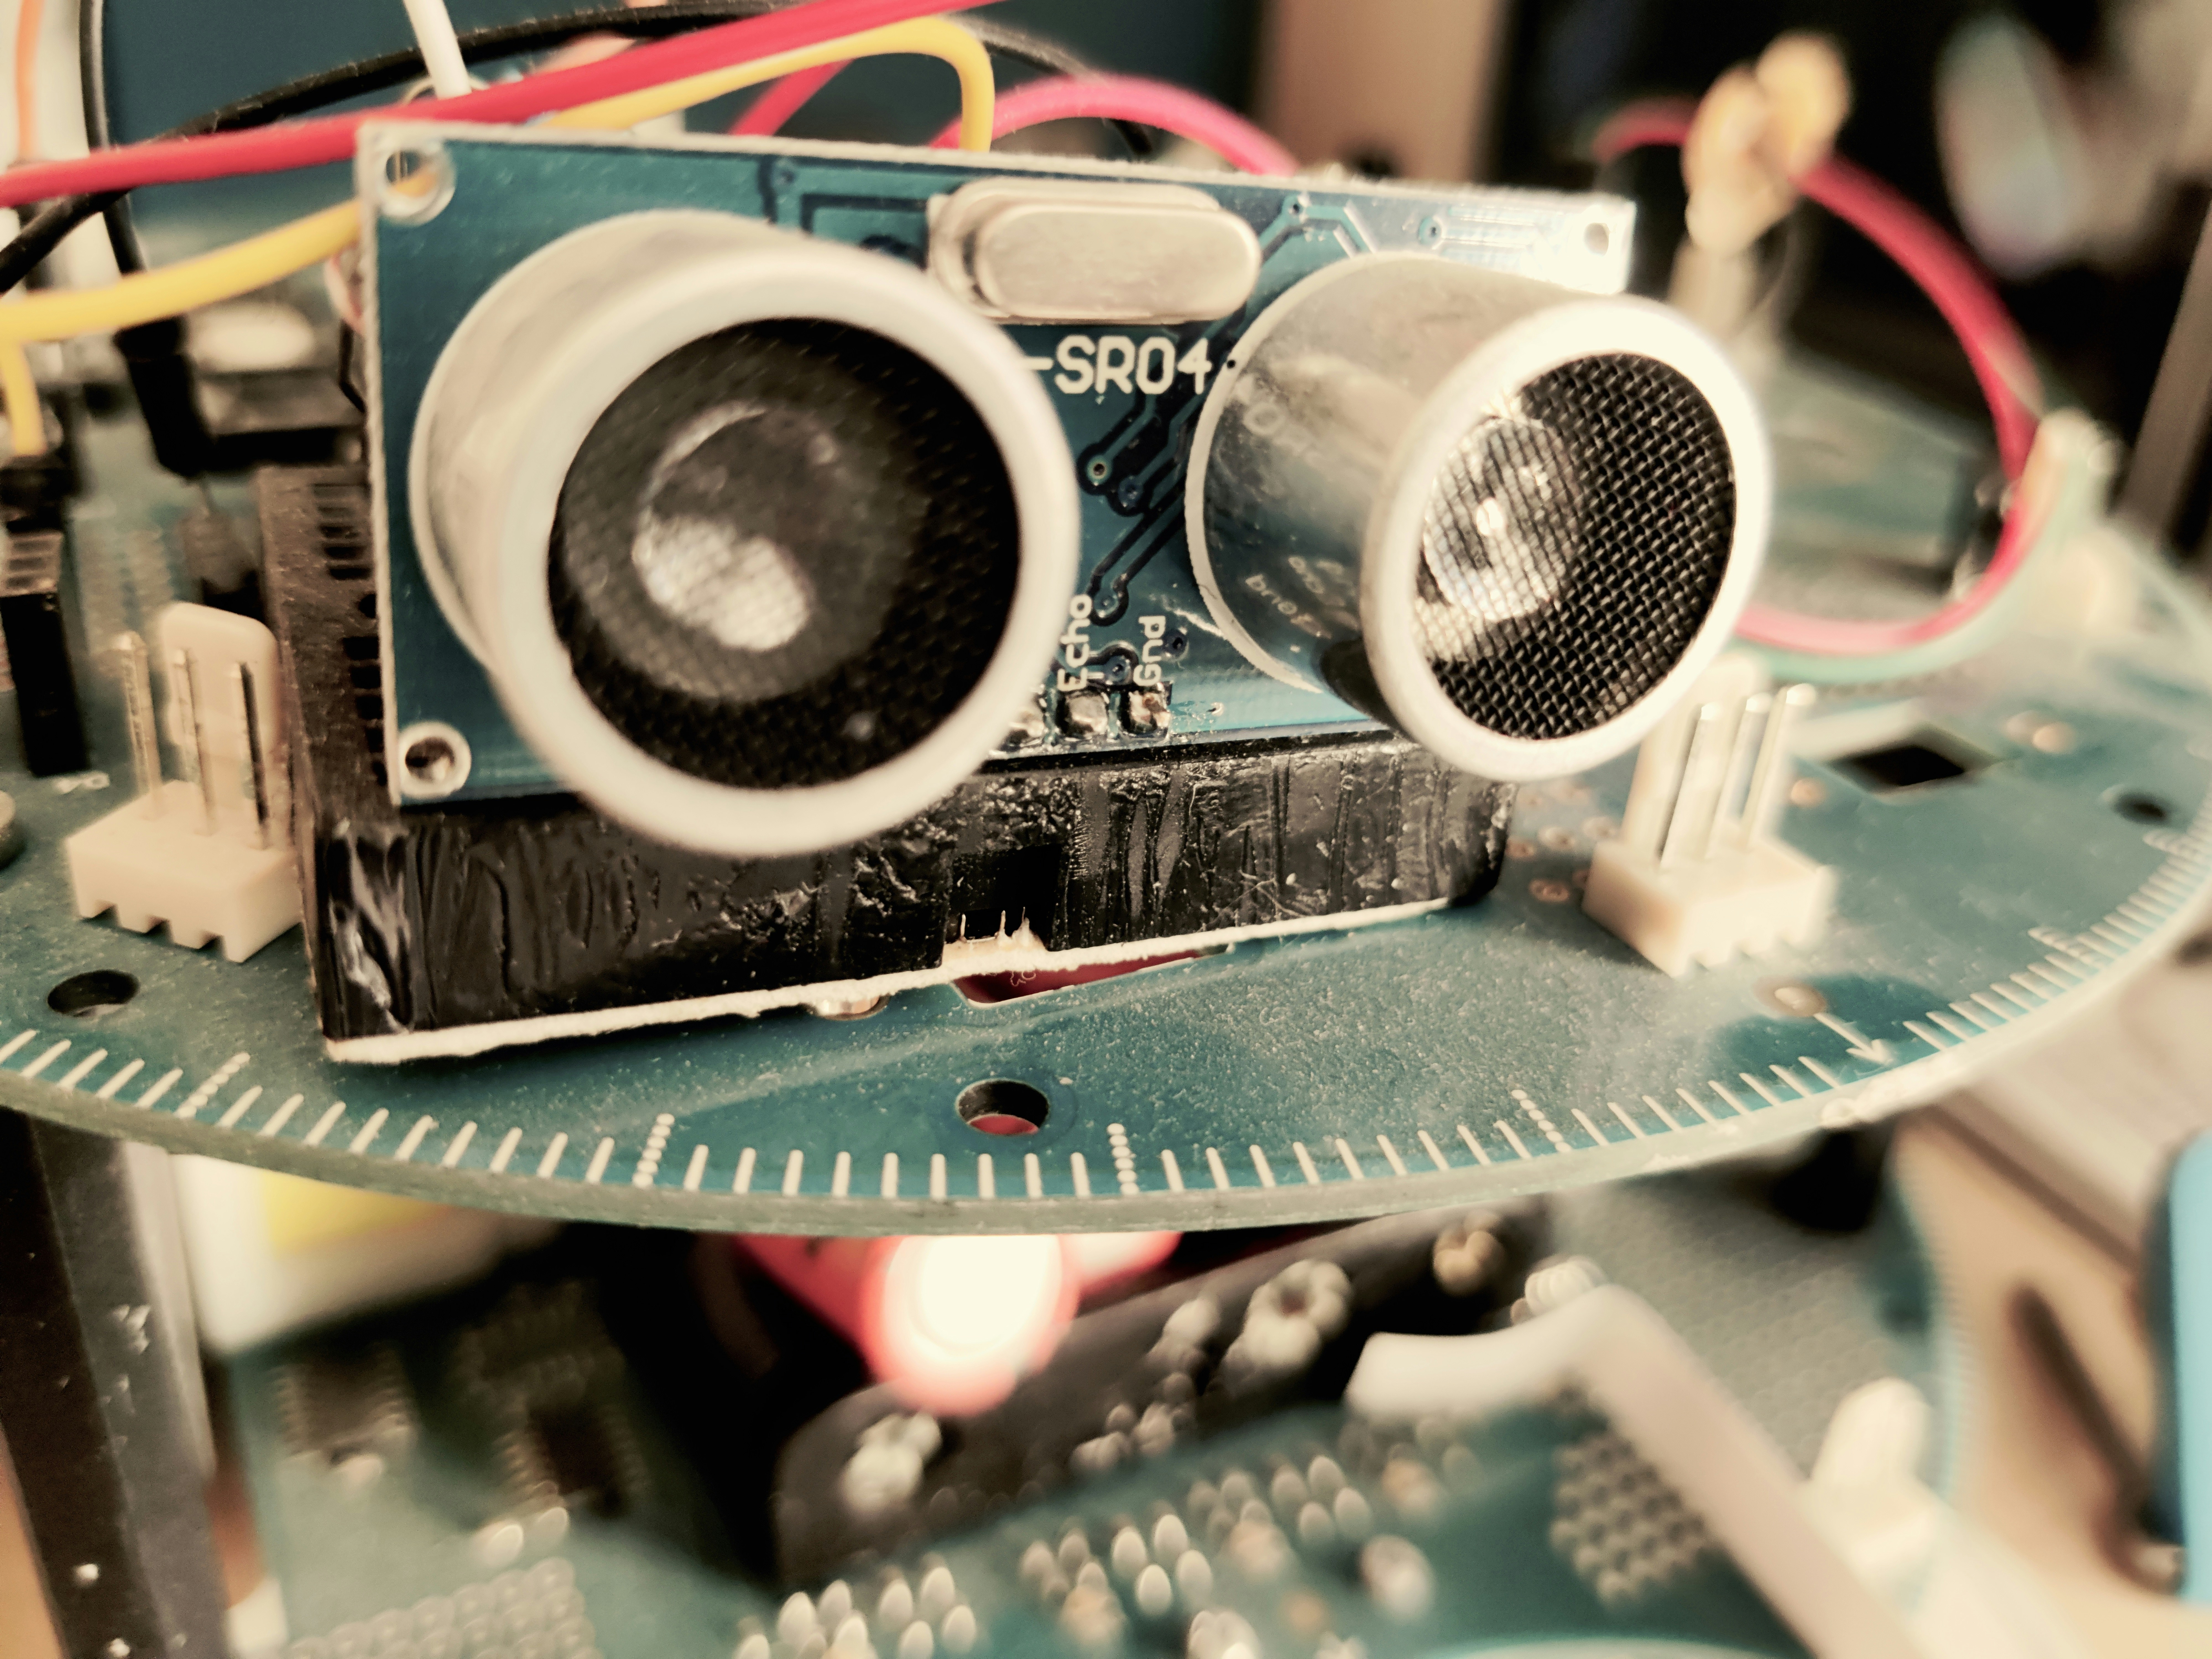
Ultrasonic Sensors (HC-SR04):
These are the most popular. They send a sound wave and time the echo.
- Range: 2cm to 40cm.
- Accuracy: ±3mm.
- Limitation: They struggle with soft materials (curtains, foam) and have a “blind spot” right in front of them.
Infrared Proximity Sensors:
These use light instead of sound. They are faster but have a shorter range and are affected by ambient light.
Wait, what about that video we mentioned earlier?
In the featured video, you’ll see exactly how to wire an HC-SR04 to a servo motor. The video demonstrates the sonar scanner technique, where the sensor rotates to map the room. It’s a brilliant way to visualize how distance calculation works:Distance = Speed × Time / 2. The video highlights that while the sensor is accurate, it only works with 5V and has a blind spot.
Comparison: Ultrasonic vs. IR Proximity
| Feature | Ultrasonic (HC-SR04) | IR Proximity (Sharp GP2Y0A) |
|---|---|---|
| Max Range | 40cm | ~80cm (varies by model) |
| Min Range | 2cm | 2cm |
| Material Sensitivity | Poor on soft/absorbent surfaces | Good on most solid surfaces |
| Ambient Light | Unaffected | Affected by bright sunlight |
| Speed | Slow (sound speed) | Fast (light speed) |
| Cost | Very Low | Moderate |
👉 Shop Ultrasonic Sensors on:
- Amazon: HC-SR04 Ultrasonic Sensor
- Adafruit: Ultrasonic Rangefinder
🦶 Feeling the Ground: Tactile, Motion, and Balance Sensors
A robot that can see but can’t balance is just a falling statue. To move gracefully, your robot needs to feel the ground and know which way is up.
1. 🤸 6-Axis Accelerometers and Gyroscopes: Keeping Your Robot Upright (Mostly)
If you’re building a self-balancing robot (like a Segway clone), you absolutely need an IMU (Inertial Measurement Unit). The Grove – 6-Axis Accelerometer & Gyroscope (often based on the MPU6050) is the gold standard for hobbyists.
- Accelerometer: Measures linear acceleration (gravity + movement). Tells you which way is “down.”
- Gyroscope: Measures angular velocity (how fast you are rotating). Tells you if you are tilting.
The Magic of Sensor Fusion:
Neither sensor is perfect on its own. The accelerometer is noisy when moving; the gyroscope drifts over time. By combining them using a Kalman Filter or Complementary Filter, you get a rock-solid orientation reading.
Why it’s tricky:
The math is hard. You can’t just read the values and go. You need to implement a filter. We recommend starting with the MPU6050 library and the Madgwick or Mahony filter implementations.
👉 Shop MPU6050 on:
- Amazon: MPU6050 6-Axis Gyro Accelerometer
- SparkFun: MPU6050 Breakout
2. 🚶 PIR Motion Sensors: Detecting Intruders Without Breaking a Sweat
The Grove – PIR Motion Sensor is the classic “is someone there?” detector. It detects changes infrared radiation emitted by warm bodies.
- Best For: Security bots, automatic lights, or triggering an action when a human enters the room.
- Limitation: It only detects motion, not presence. If you stand perfectly still, the sensor thinks you’re gone.
Pro Tip: Adjust the sensitivity and time delay potentiometers on the back of the sensor. If your robot is moving, the sensor might trigger constantly because it is moving. You need to filter out your own motion in the code!
3. 📡 Microwave Motion Radar: The Next-Gen Alternative to PIR for Smooth Detection
PIR sensors are great, but they have a blind spot for slow movement. Enter the Microwave Motion Radar (like the RCWL-0516 or the newer LD2410).
These sensors emit microwave signals and detect the Dopler shift caused by moving objects.
- Advantage: Can detect micro-movements (like breathing) and works through plastic or thin wood.
- Disadvantage: More expensive than PIR and can be triggered by moving curtains or fans.
Comparison: PIR vs. Microwave
| Feature | PIR Sensor | Microwave Radar |
|---|---|---|
| Detection Type | Heat + Motion | Movement (Dopler) |
| Range | ~7-12 meters | ~5-8 meters (configurable) |
| Through-Wall | No | Yes (thin walls) |
| False Positives | Low (heat only) | Higher (moving objects) |
| Cost | $ | $$ |
4. 🖐️ Touch Sensors: Giving Your Robot a Gentle Nudge Back to Reality
Sometimes, you just need a bumper. The Grove – Touch Sensor or a simple mechanical limit switch is perfect for this.
- Use Case: When a robot hits a wall, it stops, reverses, and turns.
- Implementation: Connect a mechanical switch to a digital pin. When the robot bumps into something, the switch closes, pulling the pin to GND (or VCC), triggering an interrupt.
Why we still use them:
In a world of fancy AI, there’s something satisfying about a robot that just bumps and bounces. It’s the simplest, most reliable form of obstacle avoidance.
🌬️ Sniffing Out Danger: Environmental and Gas Detection Modules
Your robot isn’t just for moving around; it can be a mobile environmental monitor. From checking air quality to measuring humidity, these sensors add a layer of “smart home” functionality to your bot.
1. 🌡️ Temperature, Humidity, and Pressure Sensors (SHT31, BME280, BMP280, DPS310)
These are the workhorses of environmental sensing.
- SHT31: High precision for Temp and Humidity. Great for weather stations.
- BME280: The “Swiss Army Knife.” Measures Temp, Humidity, and Pressure.
- BMP280: Similar to BME280 but no humidity. Cheaper, good for altitude tracking.
- DPS310: High-precision pressure sensor, excellent for altitude changes.
Why Pressure Matters:
Pressure sensors can help a robot determine its altitude (great for drones) or detect changes in weather patterns. The BME280 is our go-to because it’s accurate and easy to use via I2C.
👉 Shop BME280 on:
- Amazon: BME280 Temperature Humidity Pressure Sensor
- Adafruit: BME280 Breakout
2. 💨 Dust and Air Quality Sensors (PPD42NS): When Your Robot Needs to Breathe Easy
The Grove – Dust Sensor (PPD42NS) is a classic for detecting particulate matter (PM2.5, PM10).
- How it works: It uses a laser to detect dust particles in the air.
- Use Case: Building a robot that cleans the house or monitors air quality in a factory.
- Warning: These sensors have a long warm-up time (up to 30 seconds) and can be sensitive to humidity.
Real-world application:
We built a “Air Quality Rover” that mapped the dust levels in a workshop. It found that the dust was highest near the sanding station, helping the user optimize their ventilation.
3. 🧪 CO2 and pH Sensors: Monitoring the Invisible Threats in Your Lab
- CO2 Sensors (MG-81): Detect carbon dioxide levels. Crucial for indoor air quality monitoring. Note: These often require a heater and a stable power supply.
- pH Sensors (Gravity Analog pH Sensor): Measure acidity. Great for aquaponics robots or soil monitoring.
The Challenge:
Gas sensors like the MG-81 are analog and drift over time. They need frequent calibration in fresh air. Don’t expect them to be as plug-and-play as a temperature sensor.
🔊 Listening to the Silence: Sound and Audio Detection
Robots don’t just need to see; they need to hear.
1. 🎤 Sound Sensors: Making Your Robot React to Claps, Whistles, and Chaos
The Grove – Sound Sensor is a simple microphone module that detects sound intensity.
- Function: It outputs analog voltage proportional to the sound level.
- Use Case: Clap-to-turn-on lights, noise-level monitoring, or a robot that runs away from loud noises.
- Limitation: It doesn’t “understand” sound (like speech recognition). It just measures volume.
Pro Tip: To detect a specific sound (like a clap), you need to look for a peak in the sound wave followed by silence. This requires some signal processing in your code.
🧩 The Ultimate Sensor Showdown: Comparing Grove vs. Analog vs. Digital
You might be wondering: “Should I buy the Grove version or the raw component?”
Grove System (Seed Studio):
- Pros: Plug-and-play, color-coded cables, no soldering, huge ecosystem.
- Cons: Slightly more expensive, bulky connectors.
- Best For: Protyping, education, and rapid development.
Raw Analog/Digital Components:
- Pros: Cheaper, smaller, more flexible for custom PCBs.
- Cons: Requires soldering, breadboarding, and careful wiring.
- Best For: Final products, space-constrained robots, and budget builds.
Our Verdict:
Start with Grove to learn. Once you know what you need, switch to raw components for the final build.
🛠️ Wiring Woes and Code Confusion: Troubleshooting Common Arduino Sensor Pitfalls
Even the best sensors fail if you wire them wrong. Here are the top 5 mistakes we see at Robotic Coding™:
- Power Starvation: Connecting too many sensors to the 5V pin of the Arduino. Fix: Use an external power supply with a common ground.
- I2C Address Conflicts: Two sensors on the same bus with the same address. Fix: Check the datasheet for address jumpers or use an I2C scanner.
- Missing Pull-up Resistors: I2C lines need pull-up resistors (usually 4.7kΩ). Fix: Most Grove modules have them built-in; raw modules might not.
- Floating Analog Pins: Not connecting the sensor properly. Fix: Ensure the sensor is connected to VCC, GND, and the correct signal pin.
- Ignoring Library Dependencies: Forgetting to install required libraries. Fix: Always check the “Dependencies” tab in the library manager.
Still stuck?
If your sensor is giving random values, try the Serial Monitor. Print the raw values to see if they make sense. If they are all 0 or 1023, you have a wiring issue. If they are jumping around, you might have noise or a power issue.
📦 Top Picks: The Best Sensor Kits for Beginners and Pros Alike
Don’t want to buy 20 individual sensors? Get a kit.
1. 📦 Gravity: 27 Pcs Sensor Set: The Swiss Army Knife of Robotics
The DFRobot Gravity 27 Pcs Sensor Set is a massive collection of sensors. It includes everything from light and sound to gas and motion.
- Rating: 9/10
- Why we love it: It covers 90% of what you need for a beginner to intermediate robot. The Grove connectors make it easy to swap sensors.
- The Catch: It’s a bit bulky, and some sensors are duplicates of others.
👉 Shop Gravity 27 Pcs Set on:
- Amazon: DFRobot Gravity 27 Pcs Sensor Set
- DFRobot Official: Gravity Sensor Set
2. 🧱 Modular Grove Systems: Why We Love the Plug-and-Play Life
If you prefer to pick and choose, the Grove Starter Kit is the way to go. You can buy individual modules and build your own custom set.
- Flexibility: Buy only what you need.
- Scalability: Add more sensors as your project grows.
- Community: Thousands of tutorials available for Grove sensors.
👉 Shop Grove Kits on:
- Amazon: Seed Studio Grove Starter Kit
- Seed Studio: Grove Products
🚀 Conclusion
We’ve covered a lot of ground, from the humble beginnings of blinking LEDs to the AI-powered vision of the HUSKYLENS. The world of Arduino sensors for robots is vast, but it doesn’t have to be overwhelming.
The Golden Rule: Start simple. Get a light sensor, a distance sensor, and a motor. Make your robot move. Then, add complexity. Don’t try to build a self-driving car on day one.
Our Top Recommendation:
If you’re just starting, grab the Gravity 27 Pcs Sensor Set. It gives you the breadth to experiment without the headache of wiring. If you need vision, the HUSKYLENS is the best investment you can make for AI capabilities. For balance, the MPU6050 is non-negotiable.
Remember, the best robot isn’t the one with the most sensors; it’s the one that works reliably.
Did we answer your question?
You asked, “How do I make my robot see?” We showed you the path from simple IR sensors to AI vision. You asked, “How do I keep it balanced?” We explained the magic of IMUs. Now, it’s your turn to build.
🔗 Recommended Links
Ready to start building? Here are the best places to grab the gear we discussed:
-
👉 Shop Sensors on Amazon:
-
Books to Deepen Your Knowledge:
-
Official Brand Stores:
📚 Reference Links
- Arduino Official Robotics Collection
- Seed Studio Grove Documentation
- DFRobot Sensor Datasheets
- Arduino Library Manager
- Instructables: Robot Bump Sensors (Note: Content may vary, check for latest tutorials)
- SparkFun Sensor Tutorials
FAQ
What are the best Arduino sensors for beginner robot projects?
For beginners, we recommend starting with the HC-SR04 Ultrasonic Sensor for obstacle avoidance and the TCRT50 or Grove IR Reflective Sensor for line following. These are cheap, easy to wire, and have thousands of tutorials available. If you want to add “smart” features without complex coding, the HUSKYLENS is an excellent choice for vision.
Read more about “Is Arduino Similar to Raspberry Pi? The 2026 Showdown 🤖”
How do I connect ultrasonic sensors to Arduino for obstacle avoidance?
Connect the VCC to 5V, GND to GND, TRIG to a digital pin (e.g., 10), and ECHO to another digital pin (e.g., 1). Use the NewPing or Ultrasonic library to read the distance. If the distance is less than a set threshold (e.g., 20cm), stop the motors and turn.
Read more about “🤖 10+ Ways to Connect Sensors to Arduino for Robotics (2026)”
Which infrared sensors work best with Arduino for line-following robots?
The TCRT50 is the classic choice due to its low cost and reliability. For higher precision, consider the Polu QTR-8RC array, which provides multiple sensors in a single unit for smoother line tracking. The Grove IR Reflective Sensor is also great for modular setups.
Read more about “🤖 15+ Ways Arduino Powers Robots (2026 Guide)”
Can Arduino read data from multiple sensors simultaneously for a robot?
Yes, but you need to manage the I2C bus carefully. Most digital sensors use I2C, which allows multiple devices on the same two wires (SDA and SCL), provided they have unique addresses. Analog sensors can be read in rapid succession using the analogRead() function. However, be mindful of power consumption and processing time; reading too many sensors too fast can slow down your robot’s reaction time.
Read more about “🤖 Can Arduino Control Complex Robots? The 2026 Reality Check”
What is the difference between LIDAR and ultrasonic sensors for Arduino robots?
Ultrasonic sensors use sound waves, are cheaper, and have a range of up to 4 meters, but they struggle with soft surfaces and have a wider beam angle. LIDAR uses laser light, offers much higher precision and a narrower beam, and can map environments in 360 degrees, but it is significantly more expensive and complex to integrate with standard Arduinos (often requiring a Raspberry Pi or specialized LIDAR modules like the RPLIDAR).
Read more about “🤖 Intro to C++ for Robotics: The Ultimate 2026 Guide to Real-Time Control”
How to calibrate gyro and accelerometer sensors on an Arduino robot?
Calibration involves finding the offset values when the sensor is stationary. You can write a script that reads the sensor values while the robot is still, calculates the average, and stores these as offsets. Subtract these offsets from future readings. For more advanced calibration, use a Kalman Filter to fuse the accelerometer and gyroscope data, which corrects for drift and noise.
Read more about “🤖 How to Start Programming Arduino for Your First Robot (2026)”
What power supply is needed for Arduino robots with multiple sensors?
A standard USB power source is usually insufficient for a robot with multiple sensors and motors. You should use a LiPo battery (3.7V or 7.4V) with a voltage regulator (like the AMS17-5.0) to provide a stable 5V to the Arduino and sensors. Ensure the battery has enough mAh capacity to last your desired runtime and can deliver the required current (Amps) for your motors.
Read more about “🤖 Arduino vs. Raspberry Pi: The Ultimate Robotics Showdown (2026)”